
Motorola Moto G6 Charging Port Replacement

Introduction
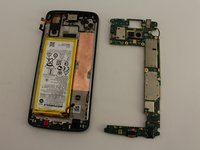
Go to step 1The Motorola Moto G6 features a USB type C charging port. The charging port allows the battery to recharge through an external power source. If the charging port is damaged, it may lead to a damaged battery, or a nonchargeable device. This will require a charging port replacement.
This guide teaches how to perform a charging port replacement. No repair experience is required. However, this replacement will require tools to pry the back shell open, unscrew plates within the device, remove interior pieces, and solder inside of the device. The specific device model in this guide is XT1925-12. Other model numbers include: XT1925-4, XT1925-5, XT1925-6, and XT1925DL.
Before you begin, download the Rescue and Smart Assistant app to backup your device and diagnose whether your problem is software or hardware related.
Before beginning the repair, make sure the device is turned off and disconnected from an external power source. Gather the suggested tools listed below and a new Motorola Moto G6 charging port.


-
-
If possible, drain the battery before disassembly. When the battery is charged, there's an increased risk of a dangerous thermal event if the battery is overheated or damaged during repairs.
-
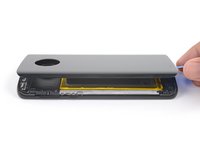
Prepare an iOpener and heat the back of the phone along its bottom edge for about two minutes, or until it's slightly too hot to touch. This will help soften the adhesive securing the rear glass.
-
-
-
Apply a suction cup to the bottom edge of the rear glass.
-
Pull up on the suction cup with firm, constant pressure to create a slight gap between the rear glass and the frame.
-
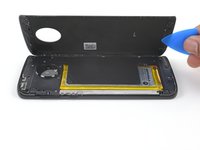
If you have trouble, apply more heat to further soften the adhesive, and try again. The adhesive cools quickly, so you may need to heat it repeatedly.
-
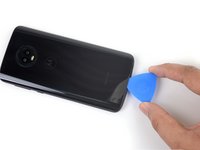
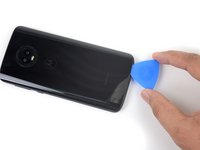
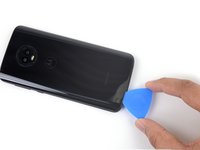
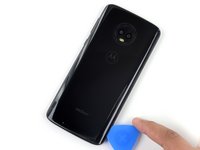
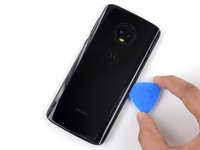
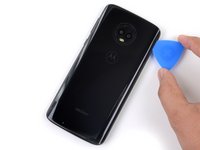
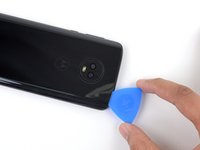
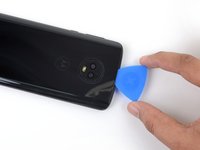
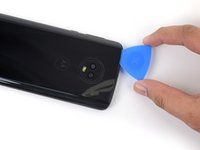
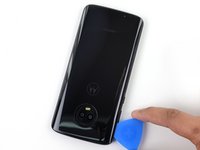
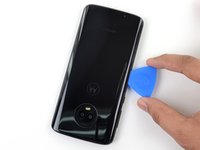
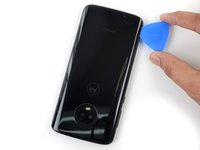
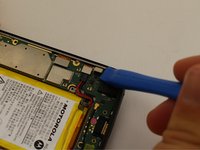
Insert an opening pick into the gap you created under the rear glass.
-
-
-
Tool used on this step:Tweezers$4.99
-
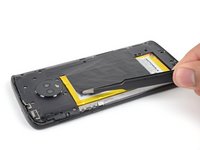
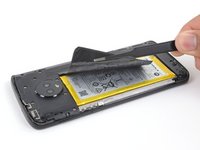
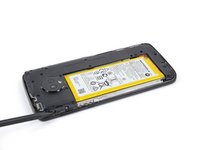
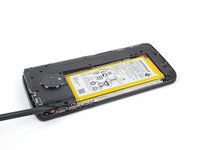
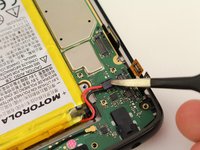
Use a pair of tweezers to carefully peel up the black tape covering the battery.
-
Remove the tape.
-
-
-
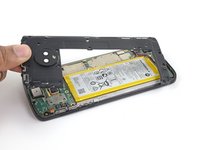
Use a Phillips driver to remove seventeen screws securing the plastic cover:
-
Eleven grey 3 mm-long screws
-
Five black 2.5 mm-long screws
-
One silver 3.5 mm-long screw
-
-
-
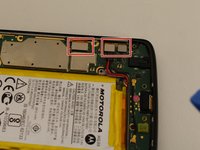
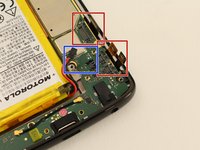
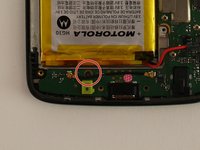
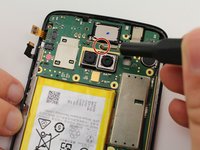
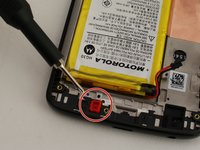
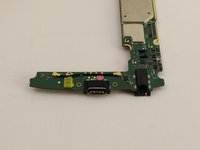
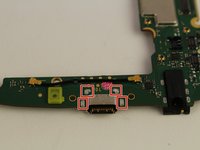
Using the iFixit opening tool, pop up the three press-fit connectors in the bottom right corner of the motherboard.
-
-
Tool used on this step:Tweezers$4.99
-
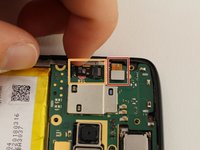
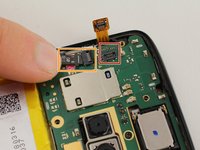
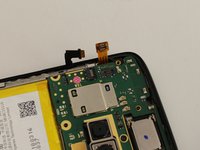
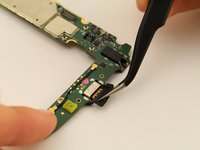
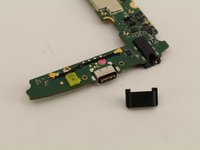
Take off the black rubber cover around the charging port with a pair of tweezers.
-


To reassemble your device, follow these instructions in reverse order.
To reassemble your device, follow these instructions in reverse order.
Cancel: I did not complete this guide.
8 other people completed this guide.

Team

Cal Poly, Team S11-G1, Regan Fall 2019 Member of Cal Poly, Team S11-G1, Regan Fall 2019
CPSU-REGAN-F19S11G1
4 Members
14 Guides authored
8 Comments
Thanks for the guide, but where can I buy a replacement charging port? I thought the Motorola replacement parts would be available here but I can‘t find it?
Hi! We are currently still in the process of adding Motorola parts into our inventory. Please check back soon!
Awesome guide! I really need to make this repair, is there anyone who knows where I can find a replacement port?
You can find them on eBay.