
Nexus 6P Daughterboard/Charging Port Replacement

Introduction
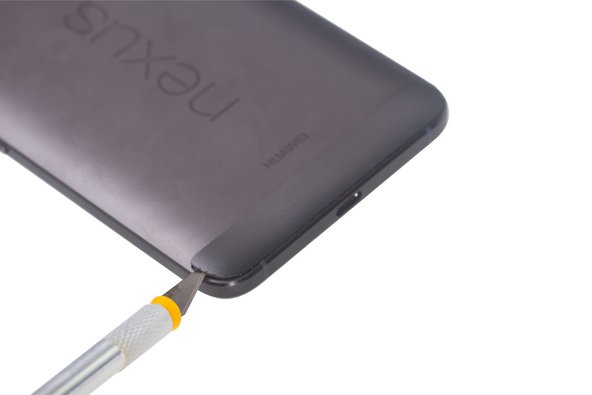
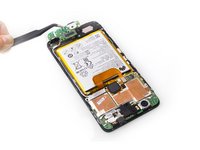
Go to step 1It is happy to see the charging port is attached on daughterboard, it is convenient for us to replace the usb part. Now follow us to replace it by yourself.


Video Overview
-
-
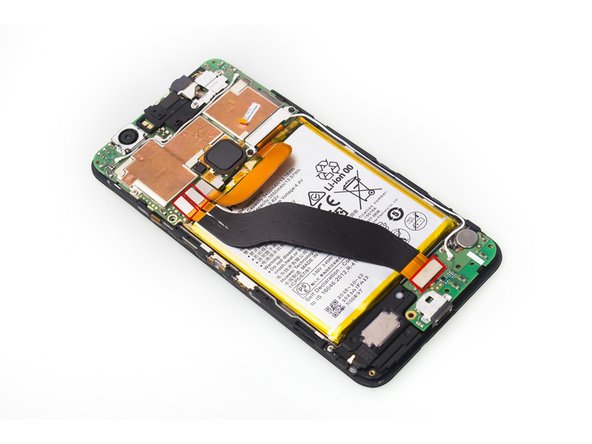
Here is the daughterboard. The charging port is attached here.
-


To reassemble your device, follow these instructions in reverse order.
To reassemble your device, follow these instructions in reverse order.
Cancel: I did not complete this guide.
23 other people completed this guide.

13 Guide Comments
Do you know the part number of the daughterboard, or where I can buy a replacement?
Global Direct Parts seems to have OEM parts. Don't go with eBay and stuff. The ones I saw are cheap knockoffs that don't work right (even when they say OEM).
Sunny Wu -
Do we need more adhesive or everything will stick back with heat?
I have replaced my battery. You most likely will need more adhesive. I just plan on using some double sided tape as the original glue was too tough in case I have to open it again. You can just buy a case for it after. It will keep everything nice and tight on there.
Sunny Wu -
To replace the daugherboard, step #5 can largely be skipped - just remove the cable from the daugherboard and move on to step #6. This phone is a true PITA to take apart.
I would recommend you unplug the battery first and then try to power it on a couple times before proceeding. Don't want to short anything out or even worse, a battery on fire.
Sunny Wu -
i replaced this part now my mic isnt working but it work in speeker mode or my headset could i have a defective part or did i miss something in the teardown
I'm having exact same trouble now. Did anyone find a fix?
Lbuk -
More than likely you got an aftermarket board (this is quite a few advertised as OEM but are cheap knockoffs).
Sunny Wu -
I was able to do this a few weeks ago without any major problems. I took the chance to replace the entire back plate with a new one since mine was pretty scratched up and the volume button was bent, turns out this was a great idea. A few notes: there are a couple screws under the plastic bit at the bottom that are covered with little paper stickers, I missed one of these and spent 20 minutes trying to get the phone apart before I realized it. When you go to pry the phone apart, be gentle, use lots of opening picks, and DO NOT pry at the charging port, the strip of metal along the top is pretty weak and will easily bend out of shape. There is also a plastic strip that runs around the edge of the display, be careful as you take the back off as this is easy to break. It is only a cosmetic thing but I notice the few areas that mine broke at now and then, not a huge deal overall.
David Fisher, When you put a new back plate in, did you have to take the black plastic 'sticker' off old back and replace it on new one? My new one did not come with that and it looks like the old case had 2 contacts on it that were not present in the replacement case. up by the camera inside.
Thanks.
For anyone wondering, you literally can not get an OEM daughterboard anywhere. I talked to Global Parts Direct (they buy parts from manufacturers), and they informed me that as far as they know, buying that part is not possible in any way, because Huawei, for this specific part, maintains a one to one ratio on parts per phone. The best solution if you need to replace your daughterboard is to buy a broken 6P off of Ebay. I wanted to share that with anyone with questions about an OEM daughterboard.
What if you solder a replacement port on the daughterboard? Will that function properly?