Introduction
This guide will show you how to replace the side buttons on your Nexus 9. If your buttons are not depressing fully or are jammed, you may need to replace them.
What you need
-
-
With your fingers, carefully pry off the back plastic casing. Starting at the corners is usually the easiest.
-
-
-
Carefully peel up the copper shielding with your fingers.
-
Before fully removing the copper shielding, make sure that the blue antenna cable is out of the way of the copper tab.
-
-
-
Using the spudger tool, carefully remove the bottom of the battery from it's location below the logic boards.
-
The battery is attached to the motherboard with some adhesive, so you may need an iOpener to loosen up the adhesive. Check out the iOpener guide for info on how to do it.
-
Do not pull the battery from the tablet yet, as it is still connected to the motherboard.
-
-
-
-
Carefully peel up the copper shielding with your fingers.
-
Before fully removing the copper shielding, make sure that the blue antenna cable is out of the way of the copper tab.
-
-
-
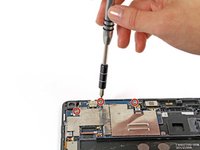
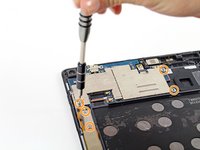
Remove the three 3 mm T5 Torx screws.
-
Remove the five 2 mm Phillips #000 screws.
-
-
-
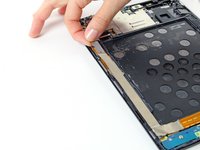
Refer to the rear-facing camera replacement guide to remove the rear-facing camera from the motherboard and transfer it to the new one.
-
The motherboard remains.
-
-
Tool used on this step:Tweezers$4.99
-
Using your tweezers, gently grasp the clear rubber backing and pull outward. The buttons should come free.
-


To reassemble your device, follow these instructions in reverse order.
To reassemble your device, follow these instructions in reverse order.
Cancel: I did not complete this guide.
2 other people completed this guide.
Team

Cal Poly, Team 19-11, Maness Winter 2015 Member of Cal Poly, Team 19-11, Maness Winter 2015
CPSU-MANESS-W15S19G11
5 Members
7 Guides authored