
You're viewing a previously published version of this guide.  View latest version

Older Newer
Nikon Coolpix B700 Back Frame Assembly Replacement

Nikon Coolpix B700 Back Frame Assembly Replacement

Carlos Salgado

Carlos Salgado and 5 other contributors

Last updated on January 5, 2021

10 minutes
Moderate

Introduction

Go to step 1

This guide shows how to remove the back frame assembly of the Nikon Coolpix B700 digital camera. This provides access to the internals of the device.

What you need

Tools

Show more…

  1. Nikon Coolpix B700 Back Frame Assembly Replacement, Back Frame Assembly: step 1, image 1 of 1
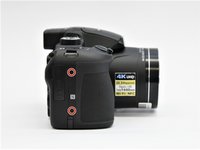
    • Use the Phillips screwdriver to remove the two 5.5 mm screws on the left side of the camera.

  2. Nikon Coolpix B700 Back Frame Assembly Replacement: step 2, image 1 of 1
    • Use the Phillips screwdriver to remove seven 5.5 mm screws from the bottom of the camera.

  3. Nikon Coolpix B700 Back Frame Assembly Replacement: step 3, image 1 of 2 Nikon Coolpix B700 Back Frame Assembly Replacement: step 3, image 2 of 2
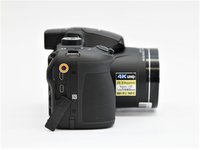
    • Use the Phillips screwdriver to remove the two 5.5mm screws on the right side of the camera.

    • Open the HDMI flap to remove a 5.5mm screw.

    • Don't forget to replace the hidden screw under the HDMI flap during reassembly.

  4. Nikon Coolpix B700 Back Frame Assembly Replacement: step 4, image 1 of 1
    • Use the Phillips screwdriver to remove the two 5.5mm screws under the LCD panel.

  5. Nikon Coolpix B700 Back Frame Assembly Replacement: step 5, image 1 of 3 Nikon Coolpix B700 Back Frame Assembly Replacement: step 5, image 2 of 3 Nikon Coolpix B700 Back Frame Assembly Replacement: step 5, image 3 of 3
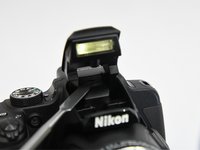
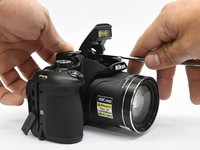
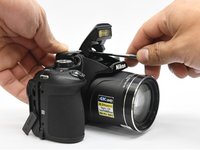
    • Open the flash assembly and insert the spudger into the slot under the flash unit and twist.

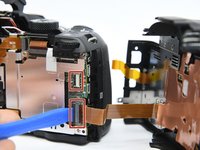
    • While twisting, pry apart the shell to split the camera in half.

  6. Nikon Coolpix B700 Back Frame Assembly Replacement: step 6, image 1 of 1
    • Be careful not to damage the ribbons that connect the halves together.

  7. Nikon Coolpix B700 Back Frame Assembly Replacement: step 7, image 1 of 2 Nikon Coolpix B700 Back Frame Assembly Replacement: step 7, image 2 of 2
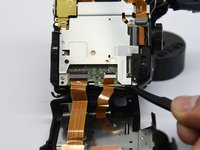
    • Place the pry tool under the black latch. Lift gently until the latch flips up.

    • Gently pull the ribbon away from the latch.

    • Be gentle when taking ribbons out and apart because they are fragile.

View Statistics:

Past 24 Hours: 0

Past 7 Days: 3

Past 30 Days: 9

All Time: 777