Nikon Coolpix S4000 Casing  Replacement

Nikon Coolpix S4000 Casing Replacement

Matina Newsom

Matina Newsom and 3 other contributors

Last updated on July 27, 2020

4 minutes
Easy

Introduction

Go to step 1

In order to replace anything in the camera, besides the battery or SD card, the camera’s casing must be removed. When removing the casing there are a few important factors to keep in mind.

The screws used to hold the casing together are very small, and easy to lose. Keep them in a safe place where you will be able to find them again.

Be gentle when removing the front and back casing from the body of the camera. It is tight around the body and can crack easily if you try to force it apart. Use the spudger if working it apart with your fingers is proving difficult.

What you need

Tools

  • Spudger
    Spudger
  • Phillips #000 Screwdriver
    Phillips #000 Screwdriver
  1. Nikon Coolpix S4000 Casing  Replacement, Battery: step 1, image 1 of 1
    • Slide the battery door open with a finger or thumb and release it so the door opens.

  2. Nikon Coolpix S4000 Casing  Replacement: step 2, image 1 of 1
    • Push the orange tab back and the battery will pop out.

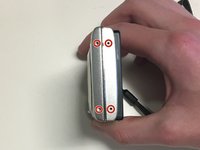
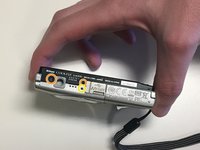
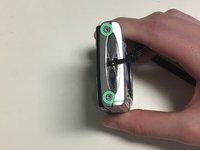
  3. Nikon Coolpix S4000 Casing  Replacement, Casing: step 3, image 1 of 3 Nikon Coolpix S4000 Casing  Replacement, Casing: step 3, image 2 of 3 Nikon Coolpix S4000 Casing  Replacement, Casing: step 3, image 3 of 3
    • Remove four 2mm Phillips #000 screws.

    • Remove two black 3mm Phillips #000 screws.

    • Remove one 4mm Phillips #000 screws.

    • Remove two silver 3mm Phillips #000 screws.

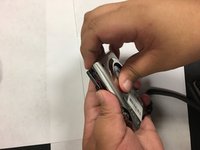
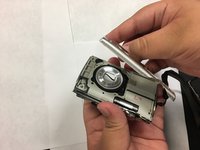
  4. Nikon Coolpix S4000 Casing  Replacement: step 4, image 1 of 2 Nikon Coolpix S4000 Casing  Replacement: step 4, image 2 of 2
    • Use your fingers, or a spudger, to lift up one end of the casing and then pry the two pieces apart.

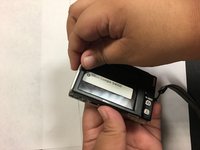
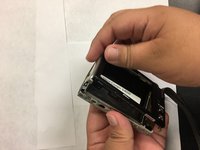
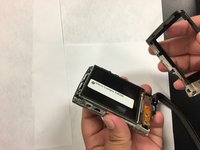
  5. Nikon Coolpix S4000 Casing  Replacement: step 5, image 1 of 3 Nikon Coolpix S4000 Casing  Replacement: step 5, image 2 of 3 Nikon Coolpix S4000 Casing  Replacement: step 5, image 3 of 3
    • Turn the camera over.

    • Use your fingers, or spudger, to lift one end of the back casing and pry it apart from back of the camera.

Conclusion

To reassemble your device, follow these instructions in reverse order.

0 Comments

Add Comment

View Statistics:

Past 24 Hours: 1

Past 7 Days: 1

Past 30 Days: 2

All Time: 234