Nikon Coolpix S4000 Lens Replacement

Nikon Coolpix S4000 Lens Replacement

Matina Newsom

Matina Newsom and one other contributor

Last updated on July 28, 2020

6 minutes
Difficult

Introduction

Go to step 1

If the lense on your camera is malfunctioning we suggest first checking out our troubleshooting guide. If you have determined that the lense itself needs replacing please follow this guide to replace it.

Please note that this guide will require the use of a soldering tool to replace the lens completely.

What you need

Tools

Show more…

  1. Nikon Coolpix S4000 Lens Replacement, Battery: step 1, image 1 of 1
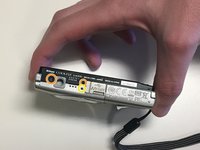
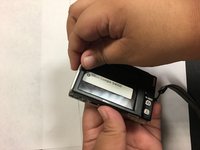
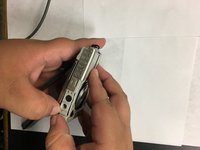
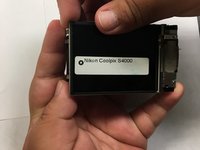
    • Slide the battery door open with a finger or thumb and release it so the door opens.

  2. Nikon Coolpix S4000 Lens Replacement: step 2, image 1 of 1
    • Push the orange tab back and the battery will pop out.

  3. Nikon Coolpix S4000 Lens Replacement, Casing: step 3, image 1 of 3 Nikon Coolpix S4000 Lens Replacement, Casing: step 3, image 2 of 3 Nikon Coolpix S4000 Lens Replacement, Casing: step 3, image 3 of 3
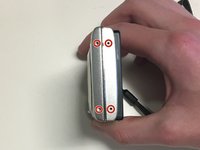
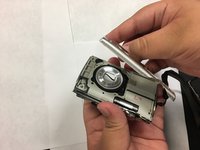
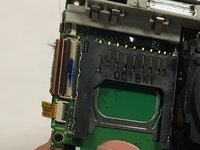
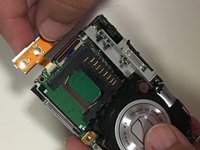
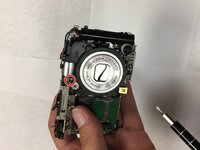
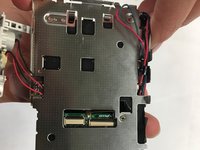
    • Remove four 2mm Phillips #000 screws.

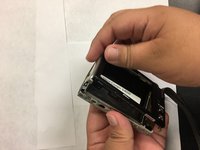
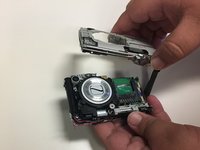
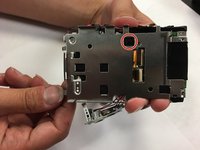
    • Remove two black 3mm Phillips #000 screws.

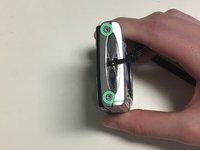
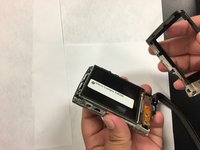
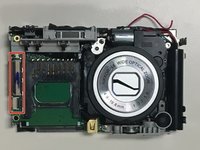
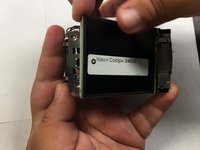
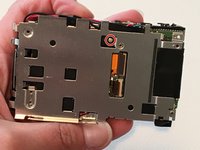
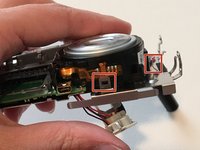
    • Remove one 4mm Phillips #000 screws.

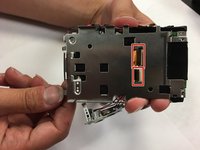
    • Remove two silver 3mm Phillips #000 screws.

  4. Nikon Coolpix S4000 Lens Replacement: step 4, image 1 of 2 Nikon Coolpix S4000 Lens Replacement: step 4, image 2 of 2
    • Use your fingers, or a spudger, to lift up one end of the casing and then pry the two pieces apart.

  5. Nikon Coolpix S4000 Lens Replacement: step 5, image 1 of 3 Nikon Coolpix S4000 Lens Replacement: step 5, image 2 of 3 Nikon Coolpix S4000 Lens Replacement: step 5, image 3 of 3
    • Turn the camera over.

    • Use your fingers, or spudger, to lift one end of the back casing and pry it apart from back of the camera.

  6. Nikon Coolpix S4000 Lens Replacement, Lens Casing: step 6, image 1 of 1
    • Remove the single 3mm Phillips #000 screw from the back of the camera.

  7. Nikon Coolpix S4000 Lens Replacement: step 7, image 1 of 2 Nikon Coolpix S4000 Lens Replacement: step 7, image 2 of 2
    • Turn the camera over and pry the lens casing off by slipping your fingers, or spudger, under the lip of the casing.

    • Desolder the two wires connecting the casing to the motherboard.

    • Work carefully so that you do not break the soldered wires.

  8. Nikon Coolpix S4000 Lens Replacement, Screen: step 8, image 1 of 1
    • Remove the single 2mm Phillips #000 screw.

  9. Nikon Coolpix S4000 Lens Replacement: step 9, image 1 of 3 Nikon Coolpix S4000 Lens Replacement: step 9, image 2 of 3 Nikon Coolpix S4000 Lens Replacement: step 9, image 3 of 3
    • Use the flat end of a spudger to lift up the black tabs on the ZIF connectors.

    • Pull the ribbon cables out of the ZIF connectors.

  10. Nikon Coolpix S4000 Lens Replacement: step 10, image 1 of 2 Nikon Coolpix S4000 Lens Replacement: step 10, image 2 of 2
    • Grabbing the top left corner of the screen, pull it up until the screen comes completely off.

  11. Nikon Coolpix S4000 Lens Replacement, Lens: step 11, image 1 of 2 Nikon Coolpix S4000 Lens Replacement, Lens: step 11, image 2 of 2
    • Remove the two 3mm Phillips #000 screws.

  12. Nikon Coolpix S4000 Lens Replacement: step 12, image 1 of 2 Nikon Coolpix S4000 Lens Replacement: step 12, image 2 of 2
    • Turn the camera over and remove a single 4mm Phillips #000 screw.

    • There may be black tape covering the screw.

  13. Nikon Coolpix S4000 Lens Replacement: step 13, image 1 of 2 Nikon Coolpix S4000 Lens Replacement: step 13, image 2 of 2
    • Use the flat end of a spudger to flip up the black tabs on the ZIF connectors.

    • Pull the ribbon cables out of the ZIF connectors.

  14. Nikon Coolpix S4000 Lens Replacement: step 14, image 1 of 2 Nikon Coolpix S4000 Lens Replacement: step 14, image 2 of 2
    • Use the flat end of a spudger to pry the lens locking tabs open while pulling the lens away from the camera body.

    • The tabs are brittle so use gently force.

  15. Nikon Coolpix S4000 Lens Replacement: step 15, image 1 of 1
    • Use the flat end of a spudger to lift up the black tab on the ZIF connector.

    • Pull the orange ribbon cable out of the ZIF connector.

    • Separate the lens from the motherboard.

Conclusion

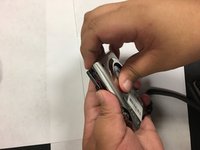
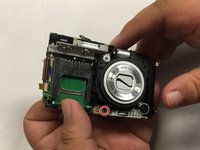
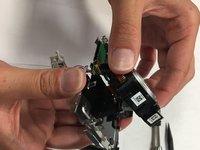
To reassemble your device, follow these instructions in reverse order.

One other person completed this guide.

0 Comments

Add Comment

View Statistics:

Past 24 Hours: 1

Past 7 Days: 11

Past 30 Days: 32

All Time: 1,301