Nikon Coolpix S6300 Display Replacement

Nikon Coolpix S6300 Display Replacement

Hung

Hung and one other contributor

Last updated on August 7, 2020

15 minutes
Moderate
Needs Better Images
Action Shots
Missing Steps

Introduction

Go to step 1

This guide shows how to replace a broken display

What you need

Tools

  1. Nikon Coolpix S6300 Display Replacement, Battery: step 1, image 1 of 1
    • Place the camera facing upwards.

    • Press down on the battery cover and slide towards the front face of the camera.

  2. Nikon Coolpix S6300 Display Replacement: step 2, image 1 of 1
    • Rotate the orange battery clip in the camera to release the battery.

    long press it

    Tech Vishwak - Reply

    then it works

    Tech Vishwak - Reply

  3. Nikon Coolpix S6300 Display Replacement, Buttons: step 3, image 1 of 3 Nikon Coolpix S6300 Display Replacement, Buttons: step 3, image 2 of 3 Nikon Coolpix S6300 Display Replacement, Buttons: step 3, image 3 of 3
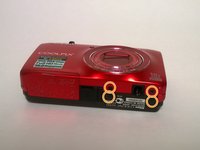
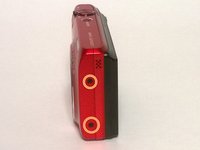
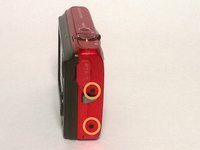
    • Locate the eight outer PH 2mm screws on the device.

    • Using the PH00 screwdriver remove all of the screws from the camera.

  4. Nikon Coolpix S6300 Display Replacement: step 4, image 1 of 3 Nikon Coolpix S6300 Display Replacement: step 4, image 2 of 3 Nikon Coolpix S6300 Display Replacement: step 4, image 3 of 3
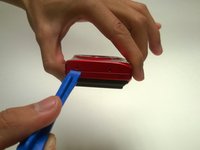
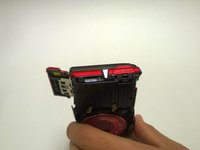
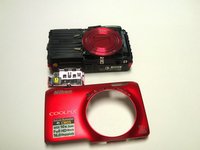
    • Using a plastic opening tool, gently pry off the front and rear plates.

    • Be patient with this step, do not force the clips holding the plates together.

  5. Nikon Coolpix S6300 Display Replacement: step 5, image 1 of 1
    • Using a Phillips #00 screwdriver, remove the PH 2 mm screw located to the right of the screen, above the OK dial.

  6. Nikon Coolpix S6300 Display Replacement: step 6, image 1 of 1
    • Disconnect the connectors using a plastic spudger.

    • Be careful when removing the cables to prevent damaging the connectors.

  7. Nikon Coolpix S6300 Display Replacement: step 7, image 1 of 1
    • You may now remove the internal panel of the buttons.

  8. Nikon Coolpix S6300 Display Replacement, Display: step 8, image 1 of 1
    • Remove the clasp from the ribbon cable using the plastic spudger.

    • Make sure to be gentle when removing the clasp to prevent it from ripping.

    • You may now remove the display.

Conclusion

To reassemble your device, follow these instructions in reverse order.

Hung

Member since: 09/01/15

383 Reputation

2 Guides authored

Team

USF Tampa, Team 1-2, Remmell Fall 2015 Member of USF Tampa, Team 1-2, Remmell Fall 2015

USFT-REMMELL-F15S1G2

5 Members

10 Guides authored

2 Comments

Step 8 could have better pictures and explanation of the clasp...or picture of the clasp. I think it was some white tape looking stuff that I did break. Looking for better instructions elsewhere. I think I just made the situation worse

Lisa F - Reply

I have this problem with my coolpix (see images and video):

https://i.postimg.cc/pXk2L4QB/20190201-1...

https://i.postimg.cc/d3wYqjLX/20190201-1...

https://i.postimg.cc/RCLmgyYz/20190201-1...

https://drive.google.com/file/d/1sDr8fPD...

Screen has a posterized effect.

I already replaced the screen with a new one, but the problem remains..

Any idea what is faulty, and how can I fix it?

Geo Nik - Reply

Add Comment

View Statistics:

Past 24 Hours: 0

Past 7 Days: 5

Past 30 Days: 25

All Time: 1,637