
Nikon D3000 Motherboard Replacement
Introduction
Go to step 1The motherboard is located behind the LCD and rear panel of the camera. It is relatively accessible but does require the use of a soldering iron to completely disconnect it from the rest of the camera.


-
-
Remove six 3 mm x 2.5 mm Phillips head screws from the bottom right of the camera bottom.
-
Remove three 3 mm x 5.5 mm Phillips head screws from the bottom left of the camera bottom
-
Lift the battery cover and remove two 3 mm x 5 mm Phillips head screws.
-
-
-
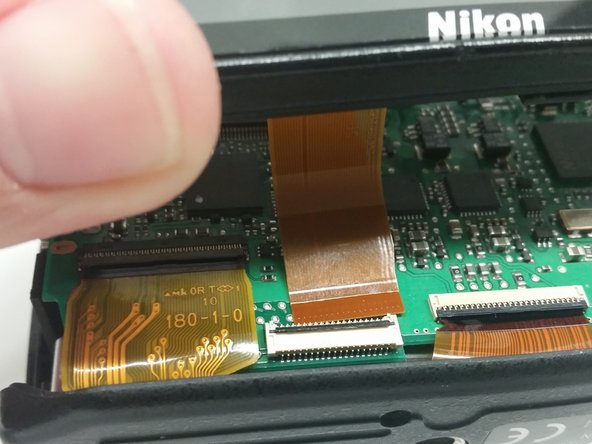
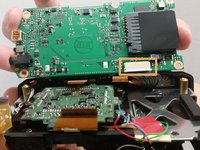
Lift the tab on the ribbon connector and pull away the ribbon to expose a 4 mm x 4 mm Phillips head screw.
-
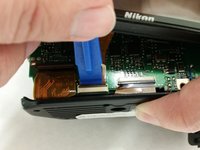
De-solder the red (upper), two grey (lower), red (lower), and blue (lower) wires from the motherboard.
-
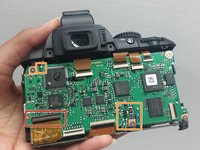
Remove five 4 mm x 4 mm Phillips head screws holding the motherboard to the camera frame.
-


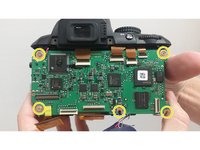


To reassemble your device, follow these instructions in reverse order.
To reassemble your device, follow these instructions in reverse order.
Cancel: I did not complete this guide.
3 other people completed this guide.
Team

USF Tampa, Team 14-7, Meier Fall 2015 Member of USF Tampa, Team 14-7, Meier Fall 2015
USFT-MEIER-F15S14G7
4 Members
6 Guides authored