Introduction
The motherboard should only be replaced as a last resort. Be careful removing it!
What you need
-
-
-
Fully power off the console and flip it upside down.
-
Remove the game card, headphones, charging cable, stylus, and anything else connected.
 Ask FixBot
-
-
-
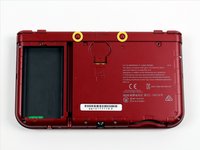
Use a JIS 0 screwdriver to loosen the two black captive screws on the back cover.
-
-
-
Insert an opening tool or the flat end of a spudger into the small notch above the battery and pry the battery out.
-
-
-
-
-
Remove the MicroSD card by pressing it in with your thumbnail until it clicks and partially ejects, then pull it out.
-
Using a JIS #00 screwdriver, remove the six 6mm screws around the edges of the secondary cover.
-
-
-
Tool used on this step:Tweezers$4.99
-
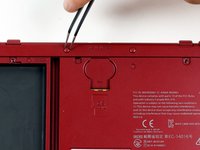
Using tweezers, carefully pop out the rubber bumpers located at the top side of the 3DS. Removing them will reveal another two 6mm screws. Remove these screws using a JIS #000 as well.
-
-
-
To separate the cover, carefully lift it up and away from the hinges (in order to clear the headphone port), then pivot it towards the hinges to expose the circuit boards.
-
-
-
Use the flat end of a spudger to disconnect the shoulder button cable press connectors.
-
Remove the back cover.
-
-
-
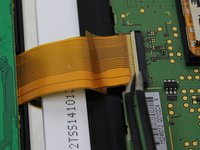
Use tweezers to flip up the small, hinged locking flap in order to unlock the ZIF connector securing the Circle Pad ribbon.
-
Slide the ribbon out of the ZIF connector.
-
-
-
Using a JIS #000 screwdriver, remove the two 8 mm screws securing the circle pad.
-
-
-
Lift the circle pad casing upward to remove it. There will be some friction, but it should not require excessive force.
-
-
-
Locate the gold terminal plug with a red cable at the top left of the motherboard. Using your fingers, carefully pull the plug straight upward to remove.
-
Use a pair of tweezers to disconnect the single ribbon connector.
-
-
-
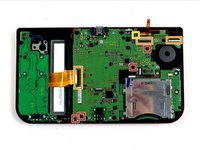
Using tweezers, gently pull the four marked ribbons out of the ZIF connectors along the sides of the motherboard.
-
Three of the ribbon connectors have plastic clamping flaps that cover the ribbon to prevent slippage. Use the tweezers to flip them up before ribbon removal.
-
This one ribbon connector may also have a plastic clamping flap, but it's not like the others, rather it's similar to the one used for the Circle Pad. Gently flip up the flap on the side opposite the ribbon cable to remove the cable.
-
-
-
Using a JIS #000 screwdriver, remove six 4mm screws along the edges of the motherboard.
-
-
-
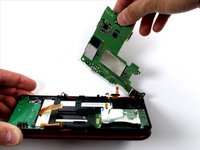
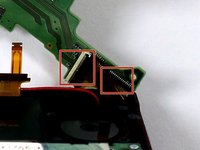
Carefully pivot the motherboard 90 degrees toward the hinges to reveal two more ZIF connectors on the underside of the motherboard.
-
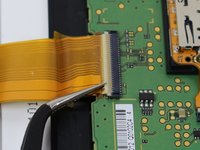
Both have latches that must be flipped up. The left, longer latch is black; the right, shorter one is white. Flip up the flaps, slide the ribbons out and remove the motherboard.
-
-






To reassemble your device, follow these instructions in reverse order.
Cancel: I did not complete this guide.
55 other people completed this guide.

Team

Cal Poly, Team 24-4, Lancaster Spring 2015 Member of Cal Poly, Team 24-4, Lancaster Spring 2015
CPSU-LANCASTER-S15S24G4
4 Members
60 Guides authored
13 Guide Comments
With some digging, I managed to find this on the GBAtemp forums , which host a community of 3DS modders:
https://gbatemp.net/threads/screwed-up-p...
Seems like no one's quite sure, but it could be a start. Unfortunately, the N3DS components are largely small black boxes with no labeling.
If you have a multimeter, it might help to test some of these mystery boxes.
Question: Seeing as how you pulled the red cable in the photos, how was that fixed? Asking for a friend.
We...never fixed that actually, as we didn't have the tools for it and the device had been loaned to us specifically for tearing down.
I don't know if iFixit themselves ever did anything with it, but I would imagine soldering the frayed end of the cable back onto the plug would work. (Here's a guide on that: http://www.instructables.com/id/Solderin... )
