
You're viewing a previously published version of this guide.  View latest version

Older Newer
Nokia 6133 Logic Board Replacement

Nokia 6133 Logic Board Replacement

Vincent Benvin

Vincent Benvin and 3 other contributors

Last updated on October 10, 2017

5 minutes
Moderate
  1. Nokia 6133 Logic Board Replacement, Battery: step 1, image 1 of 2 Nokia 6133 Logic Board Replacement, Battery: step 1, image 2 of 2
    • Remove the back cover of your cell phone by applying slight pressure with your thumb and pushing up towards the top of the phone.

    • Lift off back cover.

  2. Nokia 6133 Logic Board Replacement: step 2, image 1 of 3 Nokia 6133 Logic Board Replacement: step 2, image 2 of 3 Nokia 6133 Logic Board Replacement: step 2, image 3 of 3
    • Use your index finger to first push down and then lift up the battery as shown.

    • Remove battery from cell phone.

  3. Nokia 6133 Logic Board Replacement, Keypad: step 3, image 1 of 2 Nokia 6133 Logic Board Replacement, Keypad: step 3, image 2 of 2
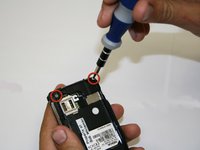
    • Unscrew two T5 torx screws easily visible on the back side of the cell phone

    • Screws: 7.8mm

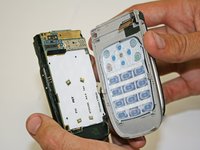
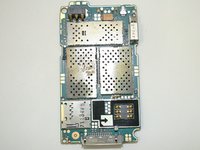
    • Once screw are removed, the phone will separate easily into two pieces connected by a flexible wire strip.

    • Be sure to not lose or disconnect the indicated piece that the screw mounts to. It is spring loaded and is very dificult to reattach.

  4. Nokia 6133 Logic Board Replacement: step 4, image 1 of 3 Nokia 6133 Logic Board Replacement: step 4, image 2 of 3 Nokia 6133 Logic Board Replacement: step 4, image 3 of 3
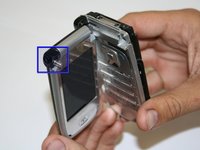
    • Use an iPod opening tool to gently pry open the back case as indicated in the picture.

    • Work your way down the side of the phone starting from the top down to the bottom. (Use multiple prying tools if necessary)

    • REPEAT on both sides, and be careful not to stab the circuitry with the tools.

  5. Nokia 6133 Logic Board Replacement: step 5, image 1 of 3 Nokia 6133 Logic Board Replacement: step 5, image 2 of 3 Nokia 6133 Logic Board Replacement: step 5, image 3 of 3
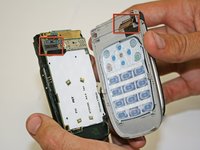
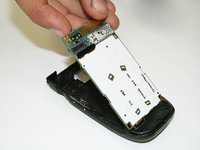
    • Gently pull the phone apart and the flexible wire should detach from its connection as shown.

    • If not, lift up on the black tab within the left box in the picture.

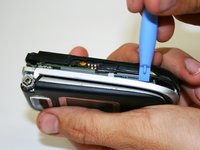
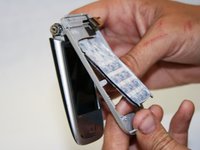
    • With the front half of the phone, push the keypad towards the removed portion of the phone.

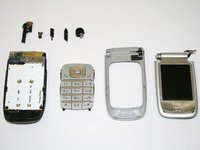
    • To clean, use a damp cloth with water.

  6. Nokia 6133 Logic Board Replacement, Logic Board: step 6, image 1 of 1
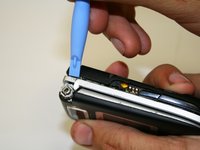
    • Use a T6 Torx Screwdriver to remove the screw located in the bottom right corner of the back panel.

    • Screw: 6.4 mm

  7. Nokia 6133 Logic Board Replacement: step 7, image 1 of 2 Nokia 6133 Logic Board Replacement: step 7, image 2 of 2
    • Lift up from the top of the logic board as shown to remove.

Vincent Benvin

Member since: 04/19/10

121 Reputation

4 Guides authored

Team

Cal Poly, Team 23-82, Johann Spring 2010 Member of Cal Poly, Team 23-82, Johann Spring 2010

CPSU-JOHANN-S10S23G82

4 Members

5 Guides authored

View Statistics:

Past 24 Hours: 0

Past 7 Days: 0

Past 30 Days: 0

All Time: 1,808