
Oral-B Vitality Power Button Replacement
Introduction
Go to step 1Electric toothbrushes are powered on by a small on/off switch located on the outer case of the toothbrush handle. The on/off switch signals the circuit board to power the motor. If you press the power button and the toothbrush doesn't power on, most likely the power button needs to be replaced.
What you need
Parts
Tools


Show more…
-
-
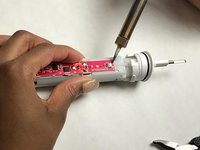
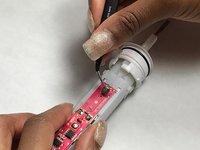
Using the pliers, rotate the head base 90 degrees counterclockwise and remove core from the handle.
-


To reassemble your device, follow these instructions in reverse order.
To reassemble your device, follow these instructions in reverse order.
Cancel: I did not complete this guide.
8 other people completed this guide.
Team

IUPUI, Team S2-G1, Harley Fall 2017 Member of IUPUI, Team S2-G1, Harley Fall 2017
IUPUI-HARLEY-F17S2G1
3 Members
9 Guides authored
5 Comments
Before unsoldering the button, you can understand if it is good or not just bypassing it with a wire: with a copper wire you can touch two pins of the button (one on the right side, on on the left side); if the toothbrush starts and stop on each touch of the wire, the problem is the button. I recognize the problem in this way.
True except if the switch is permanently “on”. I think that was my case. Replacing the switch fixed the issue.
In my case the inside of the case of the toothbrush where the cover for the start button is, was worn. I cut 3 - 3/16" squares of electrical tape and placed it on top of the start switch. This filled the gap where the worn material was and enabled the switch to be activated easier. I also noticed that some moisture was inside the case of the toothbrush, so I coated the metal shaft protruding from the toothbrush, and the o ring of the cap with some water proof grease, Vaseline.