
PSP 2000 Logic Board Replacement

Introduction
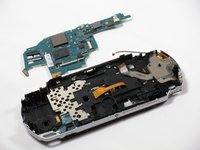
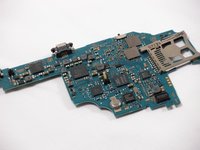
Go to step 1Is your logic board acting illogical? Fix it!
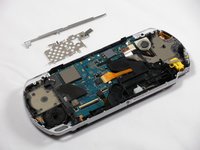
What you need


-
-
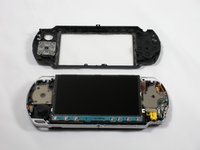
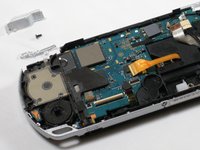
Place PSP face down, so that the UMD Drive is facing upwards.
-
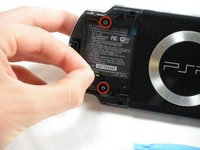
Locate the battery door and open.
-
Remove the battery from inside.
-
-
-
Locate the sticker in the battery compartment labeled: "En: Warranty Void if Seal Damaged."
-
Remove the sticker using the PSP Opening Tools.
-
-
-
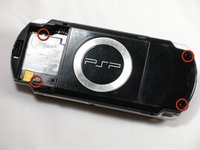
Remove the following screws from around the bezel:
-
Two 4 mm Phillips
-
One 5 mm Phillips
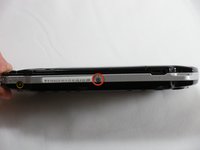
Beware that some models of PSP 2000 (mine is a limited edition Crisis Core FF7 silver version, so I suppose it is related to it being a japanese PSP) have 2 minute TORX screws (T1? T2?) instead of the 2x 4mm Phillips pointed in orange around the USB port.
-
-
-
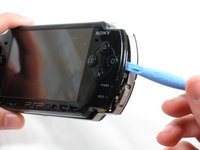
Remove the home bar by gently prying on the left and right sides of it with the opening tools. Lift the bar out of the device.
Theres a latch you have to pry on the other side of the console through the small hole in order to remove home menu bar
-
-
-
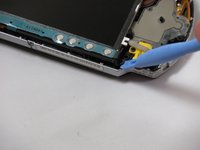
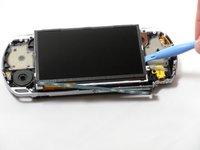
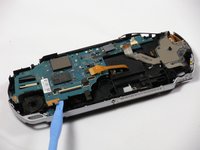
With the home bar out of the way, gently pry up the display using the opening tools.
-
Lift the black tabs of the ribbon cable connectors using a opening tool. Pull the ribbons out towards the bottom of the PSP to disconnect.
-
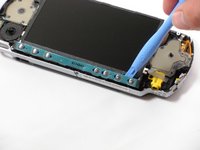
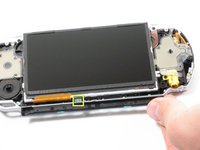
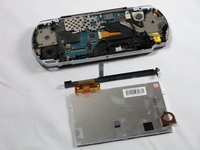
Gently lift out the display.
There are 2 ribbons connected to the screen. Both of them have to be disconnected in order to remove the screen.
Do not lift the black tab on the thin cable. That's attached to the logic board.
-
-
-
Remove two 4.5 mm Phillips screws from the left-hand side of the PSP.
-
Slide off the left trigger along with the plastic bracket underneath.
-
Carefully pry off left trigger button using opening tools.
-
-
-
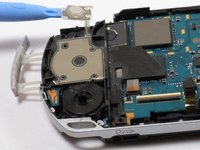
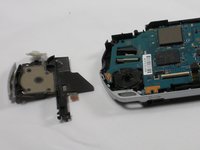
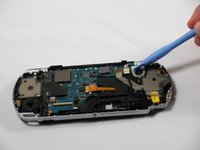
Use the opening tools to press the tab on the left-hand side of the speaker to release it.
-
Remove the speaker by twisting it counter-clockwise (to the left, like a screw).
-
-
Tool used on this step:Tweezers$4.99
-
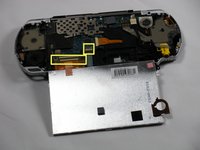
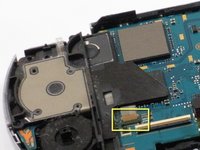
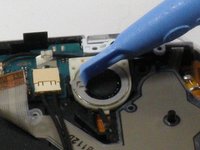
Remove the following four connections:
-
Two ribbon cables -- flip up latch and remove horizontally.
-
One wire clamp -- use an opening tool to pry it up vertically.
-
One wiring harness -- use your fingers, a PSP opening tool, or tweezers to disconnect the connector horizontally.
-


To reassemble your device, follow these instructions in reverse order.
To reassemble your device, follow these instructions in reverse order.
Cancel: I did not complete this guide.
31 other people completed this guide.

Team

Cal Poly, Team 6-3, Maness Fall 2009 Member of Cal Poly, Team 6-3, Maness Fall 2009
CPSU-MANESS-F09S6G3
5 Members
37 Guides authored
5 Comments
How do I know whether my Logic Board is functioning properly or not?
how can I change that little refill on the motherboard
My psp is not turning on when battery is inserted even when plugged to electricity...and again if the battery is inserted to it the charging light turns on..Pls help m