Introduction
Use this guide if you cracked your PSP Go's display!
What you need
-
-
Unscrew the four Phillips screws on the back of the PSP Go.
-
Rotate the PSP so you can see the top of the device.
-
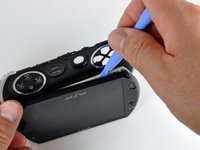
Unscrew the two Phillips screws next to the volume buttons.
-
-
-
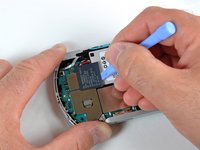
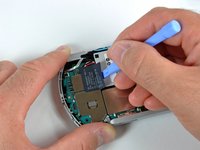
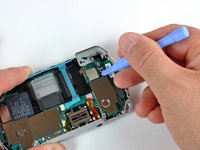
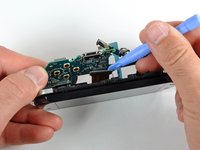
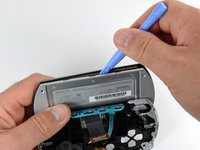
Use the plastic opening tool to gently peel away at the "Warranty Void" sticker. Start on one edge, as shown, and slide the tool from side to side until the sticker is removed from just the battery.
-
-
-
-
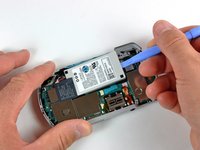
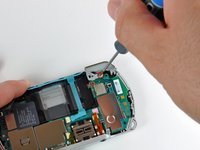
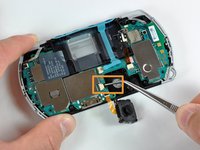
Remove the single Phillips screw securing the logic board to the inner case.
-
-
-
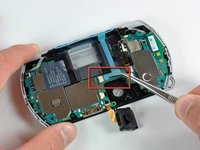
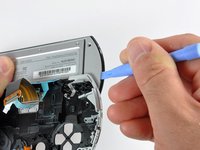
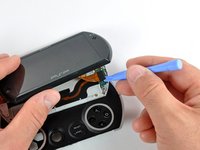
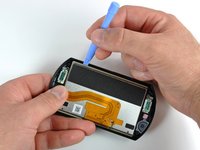
Wedge a plastic opening tool between the plastic front panel and display. Be very careful that you wedge it in the same location shown in the first picture.
-
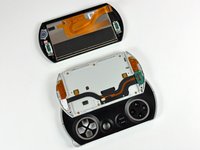
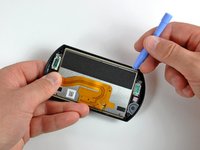
Slide the plastic opening tool across the length of the display. This should loosen the glue binding the display to the plastic front panel.
-
Rotate the display 180 degrees and free the bottom side of the display in the same manner.
-


To reassemble your device, follow these instructions in reverse order.
Cancel: I did not complete this guide.
29 other people completed this guide.

5 Guide Comments
Omg seriously!,,, Took this Dental Hygienist exactly one hour to do this! Awesome ! Thank you!
My psp won't turn back on please help I followed the directions exactly.
I use this guides to perform a flexible replacement because the original one is just too old and it's snapped some how, I've done it and my PSP Go work normal as before but I did make a mistake. I cracked the display. Yes it is really, really, really fragile! When he said “be very gentle/careful” he really mean it.
Learn from my mistakes, but I will fix it. Again.