Panasonic Lumix DMC-G5 Back Panel Replacement

What you need

  1. Panasonic Lumix DMC-G5 Back Panel Replacement, Back Panel: step 1, image 1 of 1
    • Remove four JIS #000 screws from the bottom part of the camera.

  2. Panasonic Lumix DMC-G5 Back Panel Replacement: step 2, image 1 of 2 Panasonic Lumix DMC-G5 Back Panel Replacement: step 2, image 2 of 2
    • Remove two JIS #000 screws from both sides of the camera.

  3. Panasonic Lumix DMC-G5 Back Panel Replacement: step 3, image 1 of 1
    • Remove two JIS #000 screws under the viewfinder.

  4. Panasonic Lumix DMC-G5 Back Panel Replacement: step 4, image 1 of 2 Panasonic Lumix DMC-G5 Back Panel Replacement: step 4, image 2 of 2
    • Remove the viewfinder lid.

    • Then, remove the two JIS #000 screws on the viewfinder.

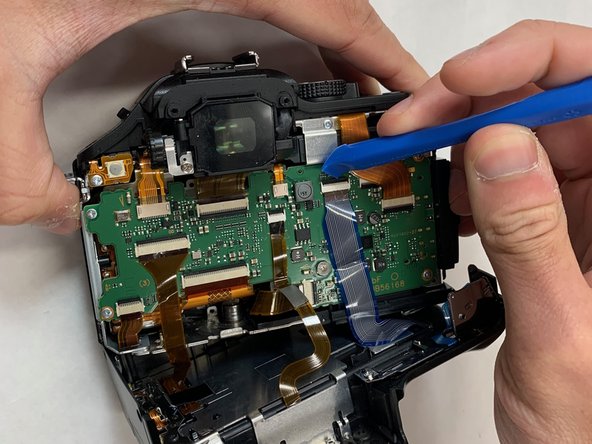
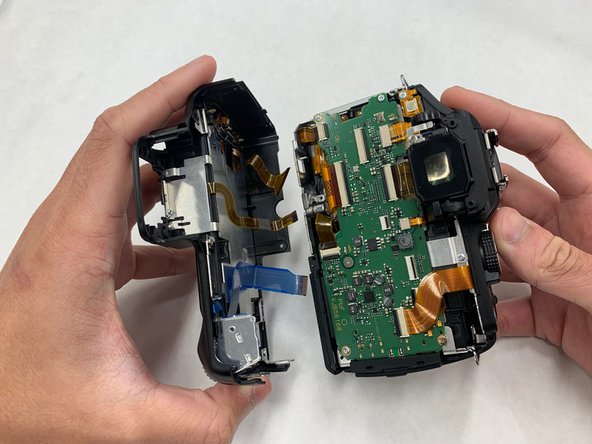
  5. Panasonic Lumix DMC-G5 Back Panel Replacement: step 5, image 1 of 3 Panasonic Lumix DMC-G5 Back Panel Replacement: step 5, image 2 of 3 Panasonic Lumix DMC-G5 Back Panel Replacement: step 5, image 3 of 3
    • Gently remove the back panel from the camera.

    • Unclip the ribbon cable from the motherboard using Wide Plastic Opening Tools and pull the cable gently.

Conclusion

To reassemble your device, follow these instructions in reverse order.

One other person completed this guide.

Khairul Samsudin

Member since: 05/22/19

412 Reputation

4 Guides authored

Team

IUPUI, Team S1-G4, Harley Summer 2019 Member of IUPUI, Team S1-G4, Harley Summer 2019

IUPUI-HARLEY-SU19S1G4

3 Members

8 Guides authored

0 Comments

Add Comment

View Statistics:

Past 24 Hours: 1

Past 7 Days: 3

Past 30 Days: 12

All Time: 692