Introduction
It is good for a sewing machine to be serviced from time to time. This means taking off the top cover, removing dust fluff and thread remnants; remove the stitch plate and clean the mechanics around the hook. Then oil it and you're done - without the need for an expensive sewing machine service.
What you need
-
Tool used on this step:Mahi Driver Kit - 48 Bit Driver Kit$39.95
-
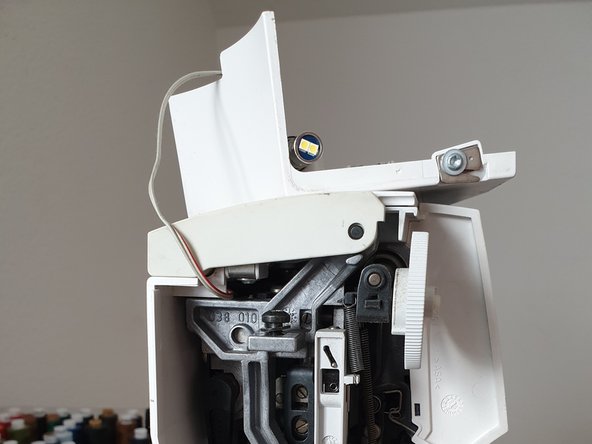
The top cover is only held in place by a screw (Torx T25H) with washer. The screw is not screwed into the cover, but only clamps it in place (with the washer).
-
To see the screw, fold up the handle of the sewing machine. The screw is located approximately in the middle of the back half of the gap between the sewing machine arm and the cover on the left.
-
Use a Torx T25H screwdriver to loosen the screw.
-
-
-
Open the cover as if you were opening a book.
-
At the back runs the cable for the sewing light; be careful not to accidentally tear it off.
-
Release the cable for the sewing light from its 4 retaining clips on the inside of the cover with your fingers.
-
Place the cover on the sewing machine arm so that the cable is not strained.
-
-
-
To be able to reattach the cover later, align it with the housing and reinsert the cable for the sewing light into the four retaining clips.
-
Loosen the screw that clamps the cover a little more.
-
Slide the washer up to the screw head so that you can slide the plastic part of the cover underneath it. You may have to hold the washer up while doing this. This is a bit tricky; it works quite well with the pointed tweezers.
-
Replace the cover and push it as close as possible to the right side of the sewing machine arm.
-
Use a Torx T25H screwdriver (or the blunt tweezers) to retighten the screw.
-
-
-
Tool used on this step:Anti-Static Brush$2.99
-
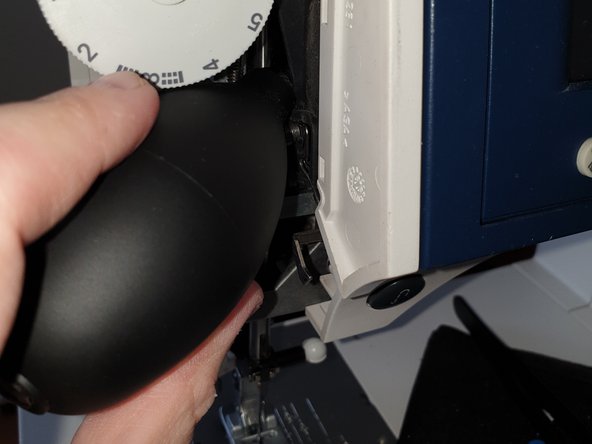
Use a (hand) hoover with the narrowest possible brush attachment to remove the coarsest dust.
-
If you don't have this attachment, brushing the dust into a lower placed hoover can be a viable alternative.
-
Then take a narrow cleaning brush with long bristles to clean the mechanism thoroughly from all sides.
-
Coarse or stuck dust particles can be fished out easily with long, narrow, pointed tweezers.
-
-
Tool used on this step:Spudger$3.99
-
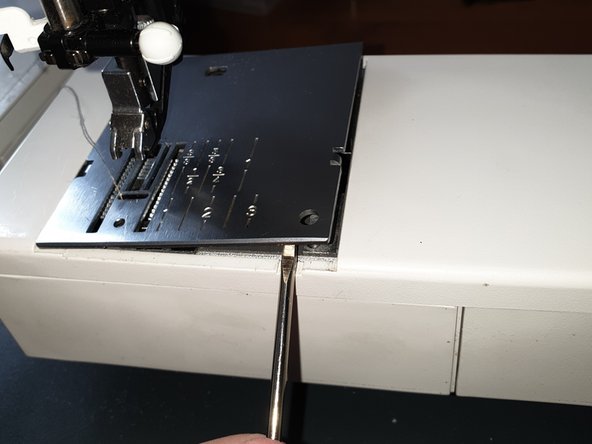
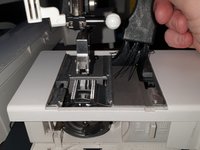
If you have not already done so, remove the needle, presser foot and bobbin case with the bobbin thread. Remove the sewing table.
-
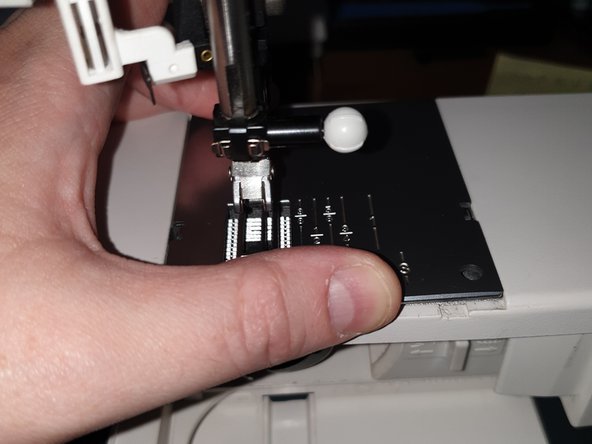
The needle plate is only held by two clips. Using a flat-blade screwdriver or iFixit spudger, lift up first the right and then the left side of the needle plate to remove it.
-
Lower the feed dog by sliding the switch next to the thread cap towards the right.
-
-
-
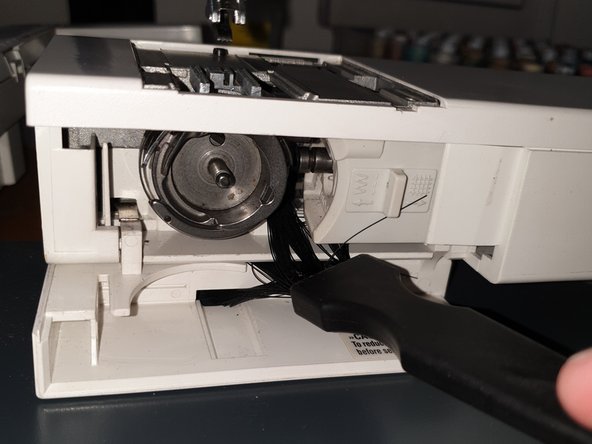
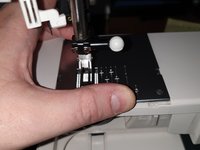
Put the needle plate back in place. Press it down centrally at the back and front and the clips will snap back into place.
-
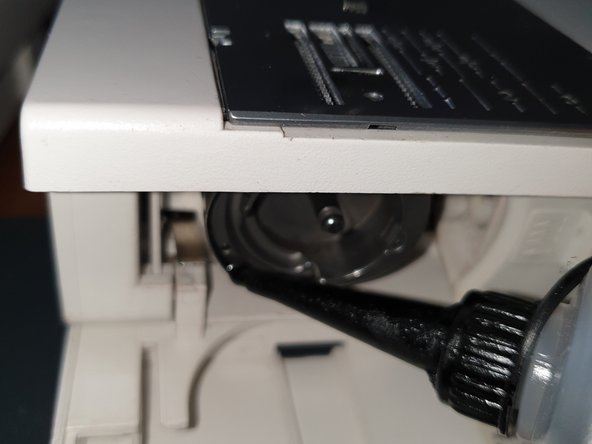
Now add a drop of sewing machine oil in the hook at the place marked in picture 3 and the machine will be happy again!
-
Replace needle, presser foot and bobbin case.
-
Don't forget to set the upper thread tension correctly again.
-
You are done! Have fun sewing!
-


Follow the steps in reverse order to reassemble your device. Have fun sewing!
Follow the steps in reverse order to reassemble your device. Have fun sewing!
Cancel: I did not complete this guide.
One other person completed this guide.
Special thanks to these translators:
100%

carlotremolada is helping us fix the world! Want to contribute?
Start translating ›

Team
