PlayStation 3 Smart Plate Replacement

10 minutes
Moderate
Introduction
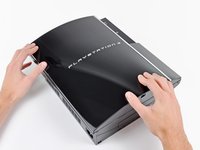
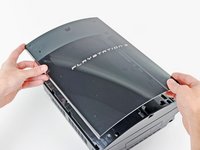
Go to step 1Use this guide to replace your PlayStation 3's smart plate.
What you need


-
-
Use the tip of a spudger to remove the black rubber screw cover from the side of the PS3.
-