Introduction
This guide shows how to remove everything from the display assembly.
What you need
-
-
Insert a fingernail or plastic opening tool in the gap between the rear case and the base of the phone.
-
-
-
Slide your fingernail or plastic opening tool along the edge of the rear case.
-
Lift the case gently from the base.
-
-
-
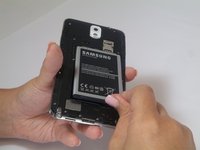
Insert a fingernail or plastic opening tool into the small gap between the battery and the phone base.
-
Lift the battery out of its recess.
-
-
-
Place your fingernail in the groove of the stylus pen.
-
Pull the stylus pen away from the phone.
-
-
-
-
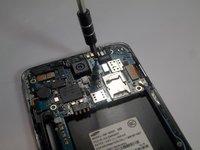
Insert the plastic opening tool into the Stylus Pen placement holder.
-
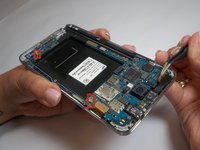
Lift the plastic opening tool so that the midframe separates from the base.
-
-
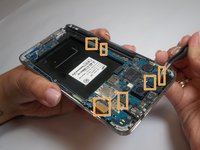
Tool used on this step:Tweezers$4.99
-
Use tweezers to remove both antenna clips.
-
Use a spudger to disconnect six cable connectors.
-
-
-
Lift the spudger to separate the jack assembly from the motherboard.
-
Pull to remove.
-
-
Tool used on this step:Tweezers$4.99
-
Remove the vibrating motor by pulling up on it carefully with the tweezers.
-


To reassemble your device, follow these instructions in reverse order.
Cancel: I did not complete this guide.
146 other people completed this guide.
Team

USF Tampa, Team 2-2, Blackwell Fall 2014 Member of USF Tampa, Team 2-2, Blackwell Fall 2014
USFT-BLACKWELL-F14S2G2
4 Members
25 Guides authored