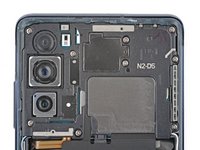
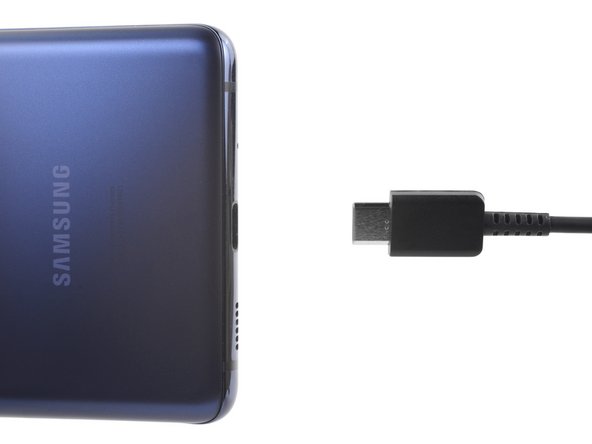
Samsung Galaxy S20 FE 5G Screen Replacement

What you need

  1. Samsung Galaxy S20 FE 5G Screen Replacement, Before you begin: step 1, image 1 of 2 Samsung Galaxy S20 FE 5G Screen Replacement, Before you begin: step 1, image 2 of 2
    • Before you begin, let your battery drain below 25%—a charged lithium-ion battery can be dangerous if accidentally punctured.

    • Power off your phone and unplug any cables.

  2. Samsung Galaxy S20 FE 5G Screen Replacement, Heat the bottom edge: step 2, image 1 of 1
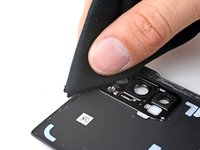
    • Heat an iOpener and apply it to the bottom edge of the back cover for two minutes.

    • You can also use a hair dryer—but be careful, as extreme heat will warp the back cover.

  3. Samsung Galaxy S20 FE 5G Screen Replacement, Insert an opening pick: step 3, image 1 of 3 Samsung Galaxy S20 FE 5G Screen Replacement, Insert an opening pick: step 3, image 2 of 3 Samsung Galaxy S20 FE 5G Screen Replacement, Insert an opening pick: step 3, image 3 of 3
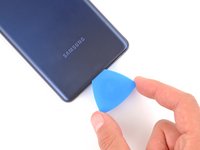
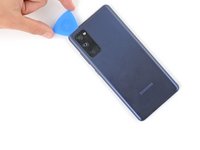
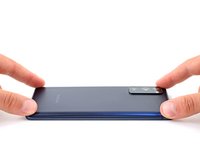
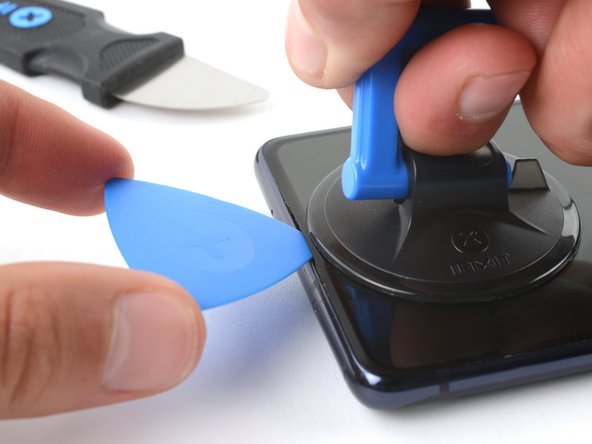
    • Apply a suction cup to the center of the back cover's bottom edge, as close to the edge as possible.

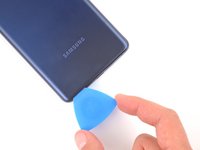
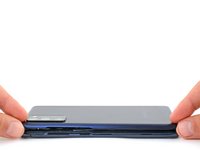
    • Pull up on the suction handle with strong, steady force to create a gap between the cover and frame.

    • This will require significant force. If you're having trouble, apply more heat and try again.

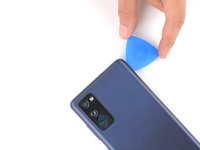
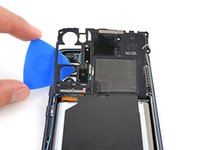
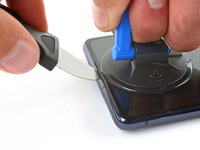
    • Insert an opening pick in the gap.

  4. Samsung Galaxy S20 FE 5G Screen Replacement, Slice the bottom adhesive: step 4, image 1 of 3 Samsung Galaxy S20 FE 5G Screen Replacement, Slice the bottom adhesive: step 4, image 2 of 3 Samsung Galaxy S20 FE 5G Screen Replacement, Slice the bottom adhesive: step 4, image 3 of 3
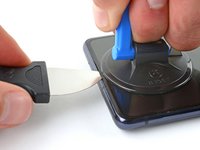
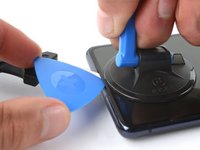
    • Slide the opening pick along the bottom edge to slice the adhesive securing the back cover.

    • Leave the opening pick inserted in the bottom right corner to prevent the adhesive from resealing.

  5. Samsung Galaxy S20 FE 5G Screen Replacement, Heat the right edge: step 5, image 1 of 1
    • Apply a heated iOpener to the right edge of the back cover for two minutes.

    • You can also use a hair dryer—but be careful, as extreme heat will warp the back cover.

  6. Samsung Galaxy S20 FE 5G Screen Replacement, Slice the right adhesive: step 6, image 1 of 3 Samsung Galaxy S20 FE 5G Screen Replacement, Slice the right adhesive: step 6, image 2 of 3 Samsung Galaxy S20 FE 5G Screen Replacement, Slice the right adhesive: step 6, image 3 of 3
    • Slide the opening pick around the bottom right corner and all the way up the right edge to slice the adhesive.

    • Leave the opening pick inserted in the top right corner.

  7. Samsung Galaxy S20 FE 5G Screen Replacement, Heat the top edge: step 7, image 1 of 1
    • Apply a heated iOpener to the top edge of the back cover for two minutes.

    • You can also use a hair dryer—but be careful, as extreme heat will warp the back cover.

  8. Samsung Galaxy S20 FE 5G Screen Replacement, Slice the top adhesive: step 8, image 1 of 2 Samsung Galaxy S20 FE 5G Screen Replacement, Slice the top adhesive: step 8, image 2 of 2
    • Slide the opening pick around the top right corner and along the top edge to slice the adhesive.

    • Leave the pick inserted in the top left corner.

  9. Samsung Galaxy S20 FE 5G Screen Replacement, Heat the left edge: step 9, image 1 of 1
    • Apply a heated iOpener to the left edge of the back cover for two minutes.

    • You can also use a hair dryer—but be careful, as extreme heat will warp the back cover.

  10. Samsung Galaxy S20 FE 5G Screen Replacement, Slice the left adhesive: step 10, image 1 of 3 Samsung Galaxy S20 FE 5G Screen Replacement, Slice the left adhesive: step 10, image 2 of 3 Samsung Galaxy S20 FE 5G Screen Replacement, Slice the left adhesive: step 10, image 3 of 3
    • Slide the opening pick around the top left corner and all the way down the left edge to slice the remaining adhesive.

  11. Samsung Galaxy S20 FE 5G Screen Replacement, Remove the back cover: step 11, image 1 of 2 Samsung Galaxy S20 FE 5G Screen Replacement, Remove the back cover: step 11, image 2 of 2
    • Remove the back cover.

    • If the back cover is still stuck to the frame, slide an opening pick around the perimeter to separate any remaining adhesive.

  12. Samsung Galaxy S20 FE 5G Screen Replacement, Reassembly information: step 12, image 1 of 3 Samsung Galaxy S20 FE 5G Screen Replacement, Reassembly information: step 12, image 2 of 3 Samsung Galaxy S20 FE 5G Screen Replacement, Reassembly information: step 12, image 3 of 3
    • During reassembly, this is a good point to power on your device and test all functions before sealing it up. Be sure to power it back down completely before you continue working.

    • If you're reinstalling your old back cover:

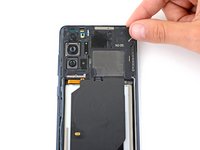
    • Use tweezers or your fingers to peel off the old adhesive from the back cover and frame.

    • Use highly-concentrated isopropyl alcohol (over 90%) and a microfiber cloth to remove any remaining adhesive residue.

    • Follow this guide to apply new custom-cut adhesive.

    • If you're installing a new back cover, peel off the liners and press firmly around the perimeter to secure the back cover to the frame.

  13. Samsung Galaxy S20 FE 5G Screen Replacement, Unfasten the motherboard cover: step 13, image 1 of 2 Samsung Galaxy S20 FE 5G Screen Replacement, Unfasten the motherboard cover: step 13, image 2 of 2
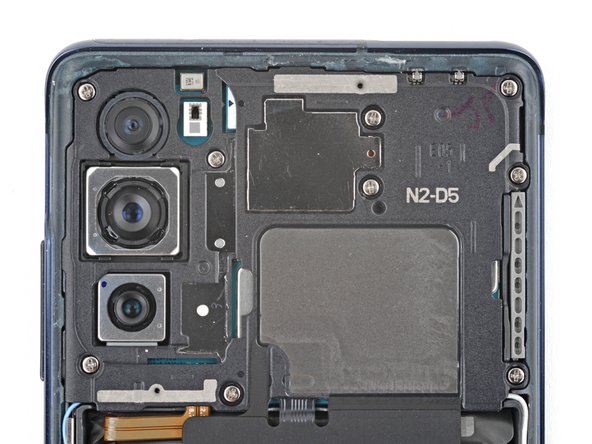
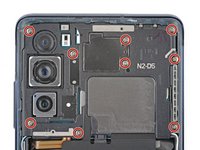
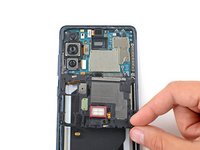
    • Use a Phillips screwdriver to remove the nine 4 mm-long screws securing the motherboard cover.

  14. Samsung Galaxy S20 FE 5G Screen Replacement, Unclip the motherboard cover: step 14, image 1 of 3 Samsung Galaxy S20 FE 5G Screen Replacement, Unclip the motherboard cover: step 14, image 2 of 3 Samsung Galaxy S20 FE 5G Screen Replacement, Unclip the motherboard cover: step 14, image 3 of 3
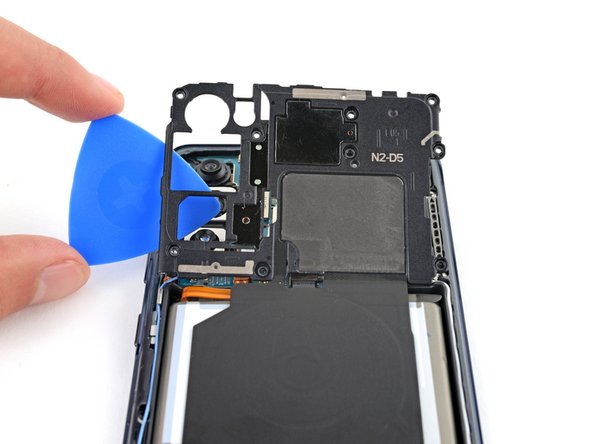
    • Insert a pick under the bottom right edge of the motherboard cover.

    • Twist the pick to release the clips securing the cover.

    • Insert and twist the opening pick on the bottom left edge of the cover to release the remaining clips.

    • During reassembly, press down firmly around the perimeter of the motherboard cover to engage the clips.

  15. Samsung Galaxy S20 FE 5G Screen Replacement, Reposition the motherboard cover: step 15, image 1 of 2 Samsung Galaxy S20 FE 5G Screen Replacement, Reposition the motherboard cover: step 15, image 2 of 2
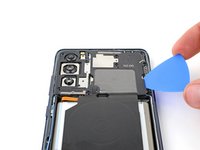
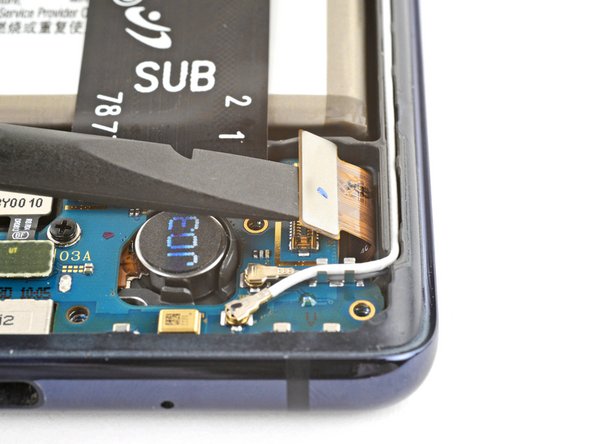
    • Reposition the motherboard cover so you can access the battery press connector on the bottom edge of the motherboard.

  16. Samsung Galaxy S20 FE 5G Screen Replacement, Disconnect the battery: step 16, image 1 of 2 Samsung Galaxy S20 FE 5G Screen Replacement, Disconnect the battery: step 16, image 2 of 2
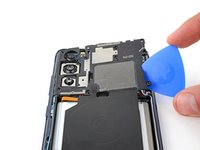
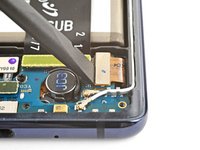
    • Use the flat end of a spudger to pry up and disconnect the battery press connector from the motherboard.

    • To re-attach press connectors like this one, carefully align and press down on one side until it clicks into place, then repeat on the other side. Don't press down in the middle. If the connector is misaligned, the pins can bend and cause permanent damage.

  17. Samsung Galaxy S20 FE 5G Screen Replacement, Disconnect the display cable: step 17, image 1 of 2 Samsung Galaxy S20 FE 5G Screen Replacement, Disconnect the display cable: step 17, image 2 of 2
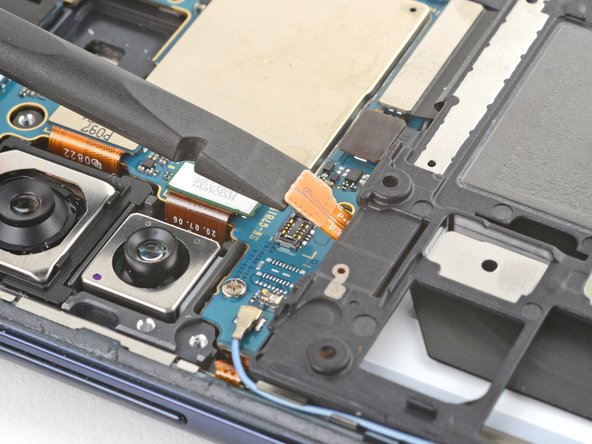
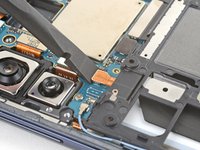
    • Use the flat end of a spudger to pry up and disconnect the display cable press connector from the charging board.

  18. Samsung Galaxy S20 FE 5G Screen Replacement, Put the back cover on: step 18, image 1 of 2 Samsung Galaxy S20 FE 5G Screen Replacement, Put the back cover on: step 18, image 2 of 2
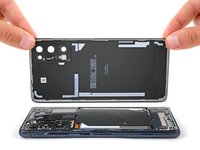
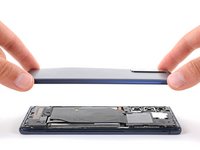
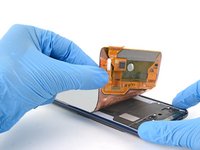
    • Place the back cover on the frame to protect your phone's internal components during the rest of the screen removal process.

  19. Samsung Galaxy S20 FE 5G Screen Replacement, Heat the top edge: step 19, image 1 of 2 Samsung Galaxy S20 FE 5G Screen Replacement, Heat the top edge: step 19, image 2 of 2
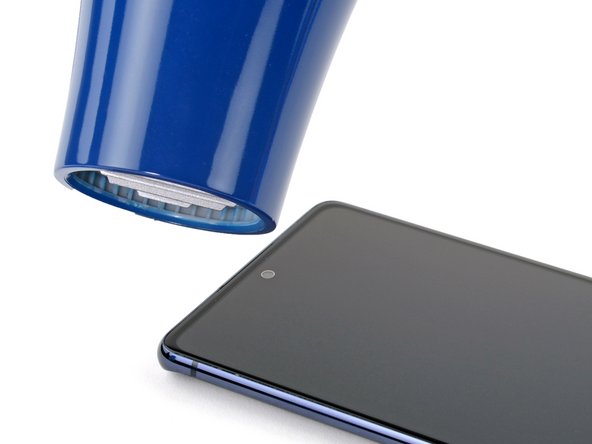
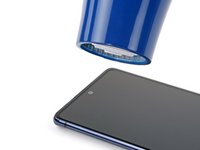
    • Flip your phone over and use a hair dryer to heat the top edge of the screen.

    • You can also use a heat gun, or hot plate—but be careful, as extreme heat will warp the back cover and can damage the battery.

  20. Samsung Galaxy S20 FE 5G Screen Replacement, Insert a Jimmy: step 20, image 1 of 3 Samsung Galaxy S20 FE 5G Screen Replacement, Insert a Jimmy: step 20, image 2 of 3 Samsung Galaxy S20 FE 5G Screen Replacement, Insert a Jimmy: step 20, image 3 of 3
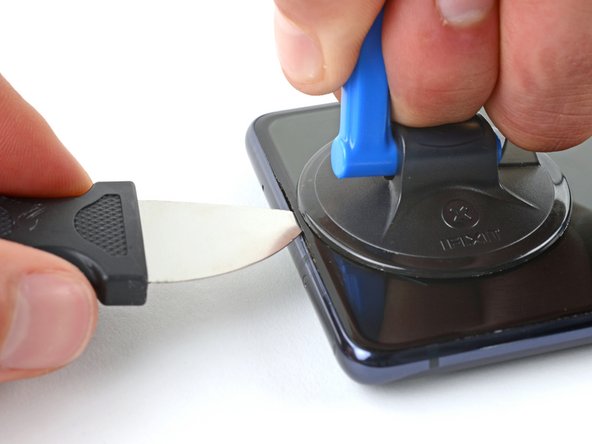
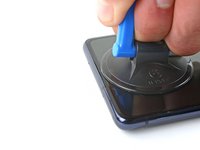
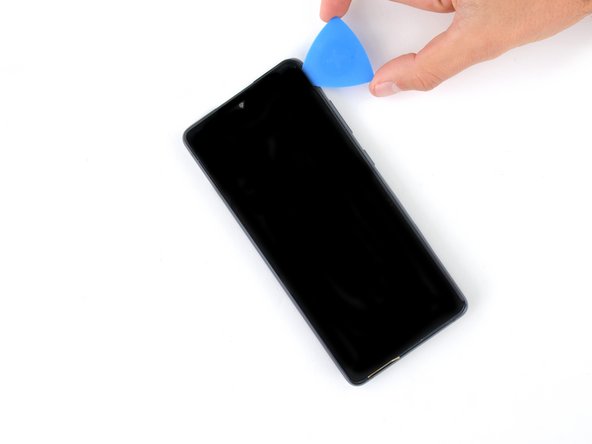
    • Apply a suction cup to the center of the screen's top edge, as close to the edge as possible.

    • If your screen is badly cracked, cover it with a layer of clear packing tape to help the suction cup adhere. Alternatively, you can pull using very strong tape instead of a suction cup. If all else fails, try supergluing the suction cup to the broken screen.

    • Insert a Jimmy in the earpiece speaker cutout at a downward angle.

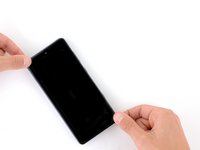
    • Pull up on the suction cup with strong, steady force while simultaneously prying up with the Jimmy until the Jimmy slides under the digitizer.

    • Significant force is required on the suction handle—you don't need to pry hard with the Jimmy. If you're having trouble, apply more heat and try again.

  21. Samsung Galaxy S20 FE 5G Screen Replacement, Insert an opening pick: step 21, image 1 of 2 Samsung Galaxy S20 FE 5G Screen Replacement, Insert an opening pick: step 21, image 2 of 2
    • Insert an opening pick in the gap created by the Jimmy.

    • Remove the Jimmy.

  22. Samsung Galaxy S20 FE 5G Screen Replacement, Slice the digitizer adhesive: step 22, image 1 of 3 Samsung Galaxy S20 FE 5G Screen Replacement, Slice the digitizer adhesive: step 22, image 2 of 3 Samsung Galaxy S20 FE 5G Screen Replacement, Slice the digitizer adhesive: step 22, image 3 of 3
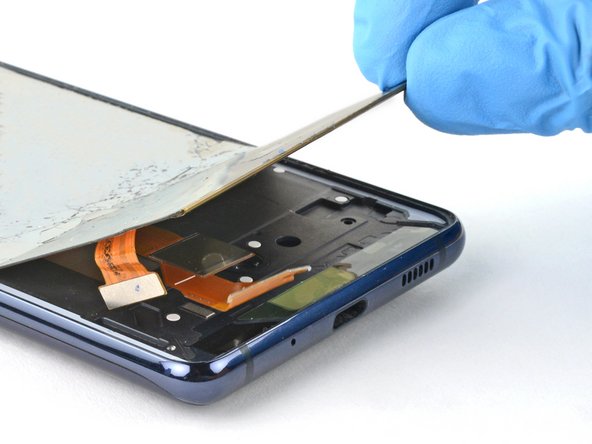
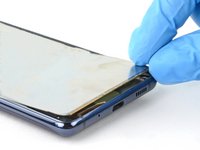
    • Slide the opening pick around the perimeter of the phone to slice the adhesive securing the digitizer.

  23. Samsung Galaxy S20 FE 5G Screen Replacement, Remove the digitizer: step 23, image 1 of 2 Samsung Galaxy S20 FE 5G Screen Replacement, Remove the digitizer: step 23, image 2 of 2
    • Remove the digitizer.

  24. Samsung Galaxy S20 FE 5G Screen Replacement, Heat the LCD panel: step 24, image 1 of 1
    • Apply a heated iOpener to the middle of the LCD panel for two minutes to heat the adhesive securing it to the frame.

    • You can also use a hair dryer—but be careful, as extreme heat will warp the back cover and can damage the battery.

  25. Samsung Galaxy S20 FE 5G Screen Replacement, Safety precautions: step 25, image 1 of 2 Samsung Galaxy S20 FE 5G Screen Replacement, Safety precautions: step 25, image 2 of 2
    • Removing the LCD panel will cause glass shards to fly onto your workspace. To protect yourself:

    • Tape over the LCD panel to keep glass shards contained.

    • Wear safety glasses and protective gloves.

    • Have a clean workspace ready and be prepared to dispose of glass.

  26. Samsung Galaxy S20 FE 5G Screen Replacement, Remove the LCD panel: step 26, image 1 of 2 Samsung Galaxy S20 FE 5G Screen Replacement, Remove the LCD panel: step 26, image 2 of 2
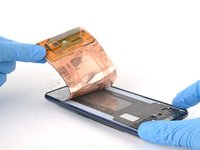
    • Lift the bottom edge of the LCD panel and guide the screen cable out of the bottom left side of the frame.

  27. Samsung Galaxy S20 FE 5G Screen Replacement: step 27, image 1 of 3 Samsung Galaxy S20 FE 5G Screen Replacement: step 27, image 2 of 3 Samsung Galaxy S20 FE 5G Screen Replacement: step 27, image 3 of 3
    • Glass will be dispersed over your workspace during this step.

    • Slowly peel the LCD panel from the frame.

    • Carefully remove any glass that's left on the frame.

  28. Samsung Galaxy S20 FE 5G Screen Replacement: step 28, image 1 of 1
    • During reassembly:

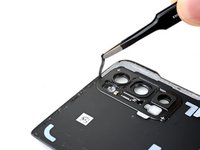
    • Use tweezers and a spudger to remove any screen adhesive from the perimeter of the frame.

    • Use high‑concentration isopropyl alcohol and a microfiber cloth to clean any remaining adhesive from the perimeter of the frame.

    • If you have custom‑cut screen adhesive, carefully apply it to the frame—before applying the adhesive, use the cutouts in the liner and the contours of the frame's perimeter to find its proper orientation.

    • If your screen comes with replacement adhesive pre‑installed, remove the liners.

    • Thoroughly check your replacement screen for any remaining liners or tape and remove them. Specifically, check around the front camera and fingerprint sensor areas.

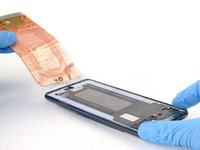
    • Carefully thread the screen cable through its cutout near the bottom left corner and lay the screen onto the frame.

    • Press firmly around the perimeter of the screen to secure it with the adhesive.

Conclusion

To reassemble your device, follow these instructions in reverse order.

Take your e-waste to an R2 or e-Stewards certified recycler.

Repair didn’t go as planned? Try some basic troubleshooting, or ask our Answers community for help.

One other person completed this guide.

Spencer Day

Member since: 09/14/22

94,500 Reputation

662 Guides authored

Team

iFixit Member of iFixit

Staff

118 Members

19,410 Guides authored

One Comment

What screen do you recommend for the replacement?

Felix Thomson - Reply

Add Comment

View Statistics:

Past 24 Hours: 28

Past 7 Days: 115

Past 30 Days: 395

All Time: 1,201