Sony BDP-S3500 Motherboard Replacement

Sony BDP-S3500 Motherboard Replacement

Michael Meissner

Michael Meissner and 2 other contributors

Last updated on June 23, 2020

15 - 20 minutes
Easy

Introduction

Go to step 1

Before following this guide refer to the troubleshooting guide to make sure this is the right guide to fix your device.

Use this guide to replace the motherboard within a Sony BDP-S3500. The motherboard controls every process within the device. The motherboard could be broken because of a power surge or physical damage. This component should be one of the last components one should replace after all other attempted fixes failed.

Before beginning this guide, make sure the device is turned off and completely unplugged from all external sources.

What you need

iFixit earns commission when you buy through these links.
  1. Sony BDP-S3500 Motherboard Replacement, Front Panel: step 1, image 1 of 2 Sony BDP-S3500 Motherboard Replacement, Front Panel: step 1, image 2 of 2
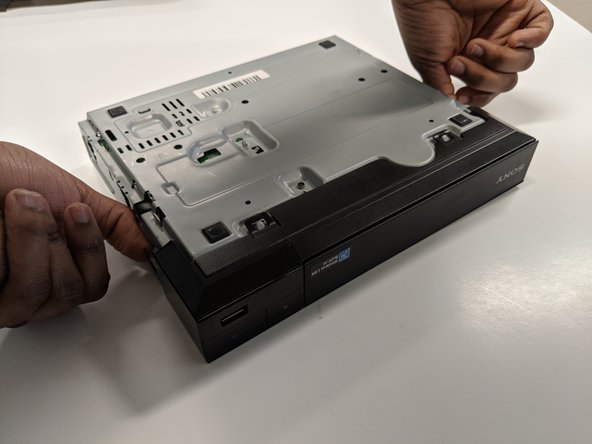
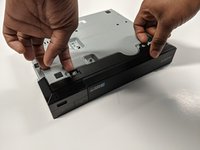
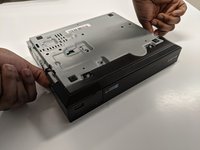
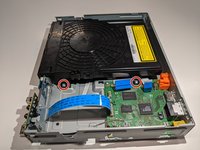
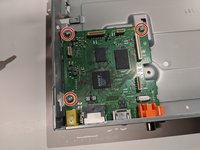
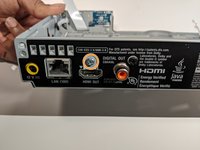
    • Use the Phillips #2 screwdriver to remove the two 9mm screws located on the back of the device.

  2. Sony BDP-S3500 Motherboard Replacement: step 2, image 1 of 1
    • Slide the top panel off towards the back of the device.

    • Remove the top panel.

  3. Sony BDP-S3500 Motherboard Replacement: step 3, image 1 of 2 Sony BDP-S3500 Motherboard Replacement: step 3, image 2 of 2
    • Unclip the plastic tags from the bottom of the device.

    • Unclip the plastic tags from the sides of the device.

    • Slide the front panel off.

  4. Sony BDP-S3500 Motherboard Replacement, Disk Drive: step 4, image 1 of 2 Sony BDP-S3500 Motherboard Replacement, Disk Drive: step 4, image 2 of 2
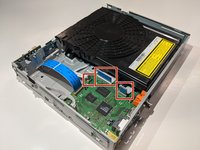
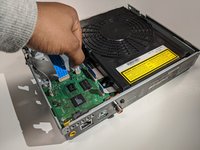
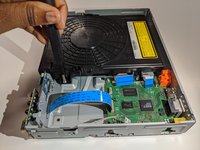
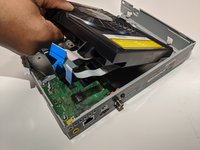
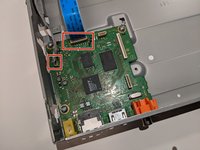
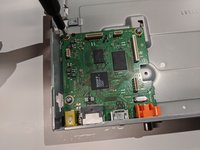
    • Remove the three ribbon cables by gently pulling the cables out of each connector.

    • Be sure to only handle the circuit board from the edges so that the PCB is not damaged.

  5. Sony BDP-S3500 Motherboard Replacement: step 5, image 1 of 2 Sony BDP-S3500 Motherboard Replacement: step 5, image 2 of 2
    • Use a Phillips #2 screwdriver to remove the two 9mm screws that are holding the disk drive in place.

  6. Sony BDP-S3500 Motherboard Replacement: step 6, image 1 of 2 Sony BDP-S3500 Motherboard Replacement: step 6, image 2 of 2
    • Carefully lift and slide the disk drive out of the casing.

  7. Sony BDP-S3500 Motherboard Replacement, Motherboard: step 7, image 1 of 2 Sony BDP-S3500 Motherboard Replacement, Motherboard: step 7, image 2 of 2
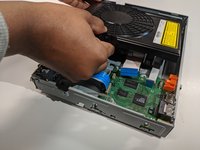
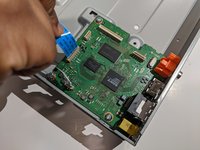
    • Remove the ribbon cables by holding onto the cable and gently pulling straight up.

  8. Sony BDP-S3500 Motherboard Replacement: step 8, image 1 of 3 Sony BDP-S3500 Motherboard Replacement: step 8, image 2 of 3 Sony BDP-S3500 Motherboard Replacement: step 8, image 3 of 3
    • Use the Phillips #2 screwdriver to remove three 9mm screws securing the motherboard to the case.

    • Remove one 5.5mm Phillips #2 from the back of the case near the ports.

  9. Sony BDP-S3500 Motherboard Replacement: step 9, image 1 of 1
    • Slide the motherboard away from the back of the case and then lift up to remove.

Conclusion

To reassemble your device, follow these instructions in reverse order.

One other person completed this guide.

Michael Meissner

Member since: 01/22/20

220 Reputation

2 Guides authored

0 Comments

Add Comment

View Statistics:

Past 24 Hours: 1

Past 7 Days: 3

Past 30 Days: 7

All Time: 587