
Sony Cyber-shot DSC-P100 LCD Screen Replacement
Introduction
Go to step 1This guide will show you how to replace the LCD screen of the Sony Cyber-Shot DSC-P100 using a simple pry tool and a screwdriver.
Before using this guide, make sure to review the troubleshooting page. Issues with the LCD screen may be related to the battery.
A failing LCD screen will render the camera useless. It must be intact for the device to work. Without the screen, it is impossible to see what your pictures will look like before you take them or view any of the pictures that you take.
Before using this guide, make sure that your workspace is free of dust and debris, and be sure to exercise caution when handling any internal hardware. The components of the camera are easily damaged.
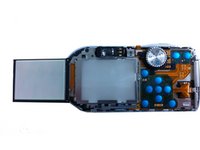
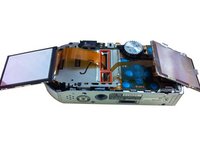
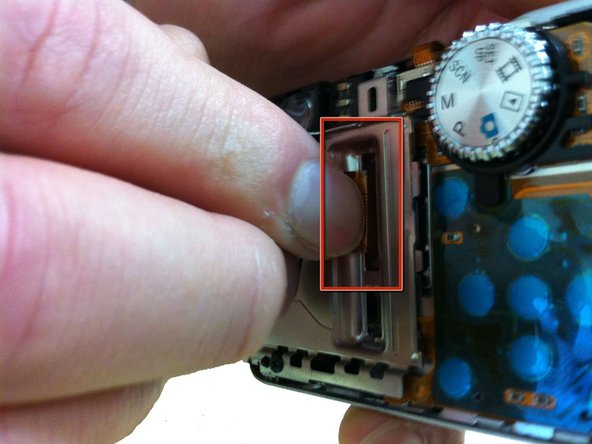
Be especially careful with the ribbon cables shown in step 4. These cables are an especially delicate part of the camera.
What you need


-
-
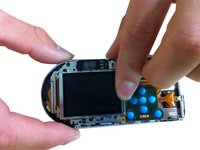
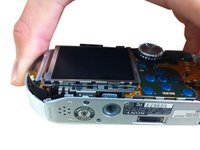
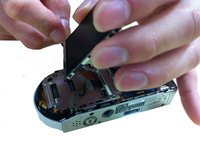
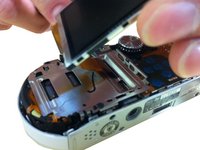
Using a pry tool, gently pry the top right corner of the LCD screen. Pry the screen until the four tabs release it from its current position.
-


To reassemble your device, follow these instructions in reverse order.
To reassemble your device, follow these instructions in reverse order.
Cancel: I did not complete this guide.
One other person completed this guide.
Team

Clemson, Team 1-5, Benson Spring 2012 Member of Clemson, Team 1-5, Benson Spring 2012
CLEM-BENSON-S12S1G5
4 Members
14 Guides authored
2 Comments
Hello!
Thank you for this tutorial.
I just disassembled a Sony DSC P1 (3Mega pixel).. And i would like to ask you if you knew if we may reuse the screen, or the sensor, or other components, in a different set up. Can we access the technical documentations of the inside components of sony's cameras? My intention would be for example to use the sensor with another lens and make another board ? Maybe im just too ambitious..
Thank you very much for your answer.
I have a question in regards to this camera. My wife has had one for years and then all of a sudden it started beeping and said something on the screen about the memory card that was inside. Does this mean the card with all the photos is bad? Maybe installing a new card would make this camera usable again? Thank you.