Sony NEX-5R Front Case Replacement

Sony NEX-5R Front Case Replacement

Emily Trujillo

Emily Trujillo and 7 other contributors

Last updated on February 10, 2021

5 minutes
Easy

Introduction

Go to step 1

We will be teaching you the proper way to disassemble your Sony NEX-5R so that you can replace your front case. This will be helpful to those that have damaged the front case and are looking to fix it by themselves.

What you need

Tools

  • Phillips #00 Screwdriver
    Phillips #00 Screwdriver
  • Spudger
    Spudger
  1. Sony NEX-5R Front Case Replacement, Front Case: step 1, image 1 of 2 Sony NEX-5R Front Case Replacement, Front Case: step 1, image 2 of 2
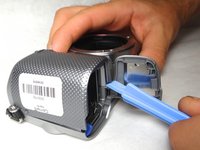
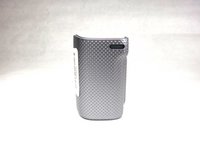
    • Open the battery pack door by moving the slider to "OPEN".

    • Remove the 3.25 mm silver screw inside the battery pack with a Phillips screwdriver.

  2. Sony NEX-5R Front Case Replacement: step 2, image 1 of 1
    • Remove the 3.25 mm exterior screw with a Phillips screwdriver.

  3. Sony NEX-5R Front Case Replacement: step 3, image 1 of 2 Sony NEX-5R Front Case Replacement: step 3, image 2 of 2
    • Use the spudger to raise the corner of the case from the camera.

    • One component of the front case should now be separate from the camera.

Conclusion

To reassemble your device, follow these instructions in reverse order.

3 other people completed this guide.

Emily Trujillo

Member since: 04/08/14

1,114 Reputation

6 Guides authored

Team

Cal Poly, Team 8-9, Regan Spring 2014 Member of Cal Poly, Team 8-9, Regan Spring 2014

CPSU-REGAN-S14S8G9

4 Members

14 Guides authored

One Comment

Can anybody tell me where I can purchase the replacement part used in this video - Regards

Chris

Chris Brookes - Reply

Add Comment

View Statistics:

Past 24 Hours: 1

Past 7 Days: 7

Past 30 Days: 23

All Time: 2,254