Sony WH-CH720N Speaker Replacement

What you need

  1. Sony WH-CH720N Speaker Replacement, Earmuff: step 1, image 1 of 1
    • Place the headphones down on a table, and orient them in this way.

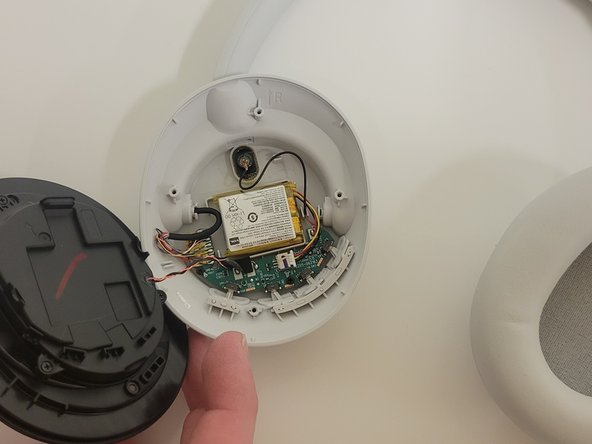
  2. Sony WH-CH720N Speaker Replacement: step 2, image 1 of 3 Sony WH-CH720N Speaker Replacement: step 2, image 2 of 3 Sony WH-CH720N Speaker Replacement: step 2, image 3 of 3
    • Remove the earmuff.

    • Check introductions to ensure you remove the correct side earmuff for each repair guide!

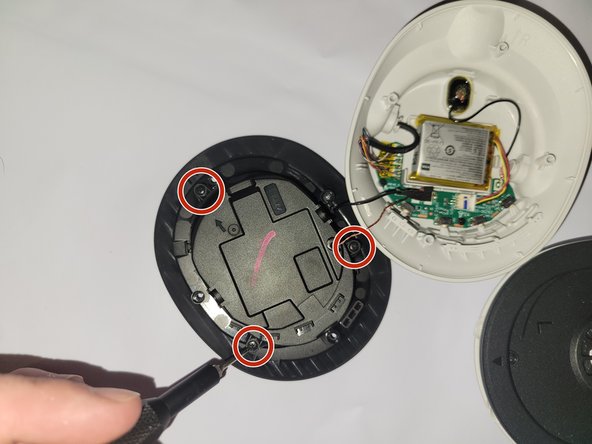
  3. Sony WH-CH720N Speaker Replacement, Speaker: step 3, image 1 of 2 Sony WH-CH720N Speaker Replacement, Speaker: step 3, image 2 of 2
    • Remove the four 5 mm screws holding the speaker housing onto the headphones.

    • Move the now detached speaker housing to the side, being careful of the wires.

  4. Sony WH-CH720N Speaker Replacement: step 4, image 1 of 2 Sony WH-CH720N Speaker Replacement: step 4, image 2 of 2
    • On the backside of the speaker housing, remove the four 3 mm screws to detach the panel.

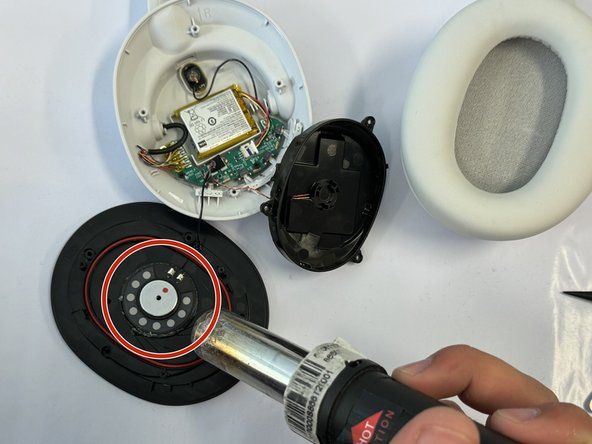
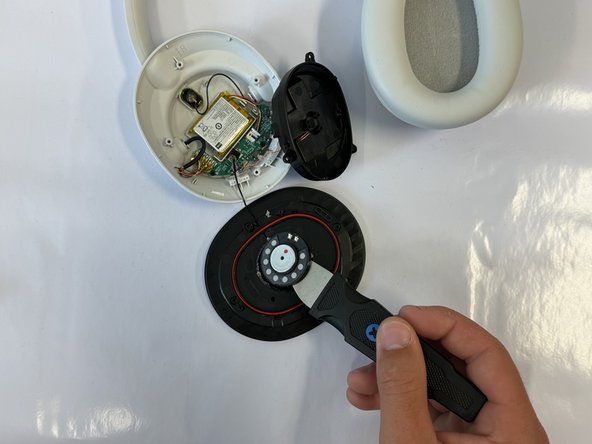
  5. Sony WH-CH720N Speaker Replacement: step 5, image 1 of 3 Sony WH-CH720N Speaker Replacement: step 5, image 2 of 3 Sony WH-CH720N Speaker Replacement: step 5, image 3 of 3
    • With the speaker panel removed, desolder the wires connecting the speaker.

    • Use a heat gun to loosen the glue around the speaker inside the housing.

    • Finally, take the metal prying tool, and carefully remove the speaker.

Conclusion

To reassemble your device, follow these instructions in reverse order.

0 Comments

Add Comment

View Statistics:

Past 24 Hours: 0

Past 7 Days: 6

Past 30 Days: 33

All Time: 80