Sony Xperia XA1 Ultra LCD Display Touchscreen Digitizer Replacement
Introduction
Go to step 1This guide will show you how to replace the LCD display touchscreen digitizer for your Sony Xperia XA1 Ultra if the display is cracked or unresponsive. A heat gun or hairdryer is needed to open the back panel, which can become hot and potentially damage the phone. In addition, a T5 screwdriver is needed to remove screws, while tweezers and a spudger are needed to remove different components of the phone.
-
-
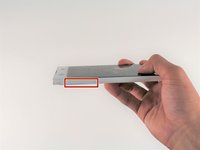
Wedge your finger under the bottom ridge of the SD card insert.
-
Pull outwards with your fingers to remove the SD card from the left side of device.
-
-
-
Use a hair dryer to heat each corner of the phone.
-
Alternate heating each corner for a minute to loosen the adhesive binding the back cover to the phone.
-
-
-
Press a suction cup on a heated corner of the device.
-
Hold the phone down and gently lift the suction cup to create a small gap.
-
-
Tool used on this step:Plastic Cards$2.99
-
Insert your iFixit Opening Tool in the small gap between your phone and the back cover.
-
Lift up on the iFixit Opening Tool and insert your plastic card in the small gap between your phone and the back cover.
-
-
-
Slide your plastic card along the side of your phone to loosen the adhesive.
-
Move the card along the sides of the phone to lift all of the corners.
-
-
-
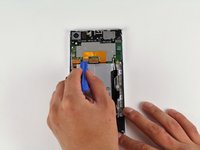
Use the iFixit Opening Tool to remove the flexible orange strip which connects the battery to the motherboard.
-
-
-
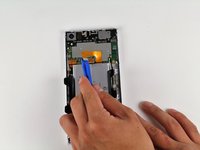
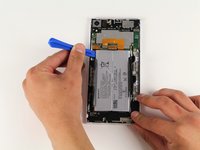
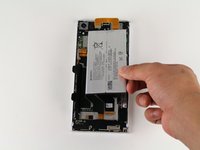
Wedge the iFixit Opening Tool underneath the battery.
-
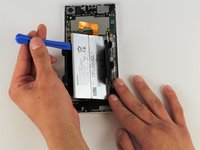
Remove the battery by pulling up on the iFixit Opening Tool.
-
-
-
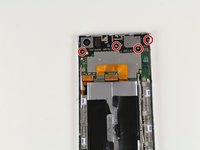
Remove the four 4mm T5 screws on the top of the black panel securing the antenna module to the device.
-
-
-
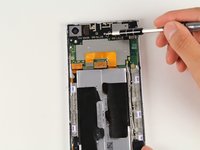
Insert your iFixit Opening Tool underneath the antenna module.
-
Lift up gently with the iFixit Opening Tool to remove the antenna module.
-
-
-
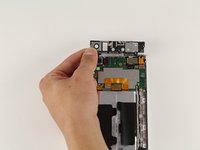
Insert your iFixit Opening Tool underneath the front camera and gently lift up.
-
Remove the front camera by lifting the front camera up with your hands.
-
-
-
-
Insert your iFixit Opening Tool between the back camera and the motherboard and gently lift up.
-
Lift up with the iFixit Opening Tool until the back camera is removed from the device.
-
-
-
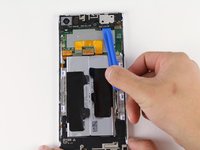
Use your iFixit Opening Tool to remove the main flex (the middle orange tab) from the motherboard.
-
Use your iFixit Opening Tool to remove the power button flex (the left orange tab) from the motherboard.
-
-
-
Wedge your iFixit opening tool under the motherboard.
-
Lift up with your iFixit Opening Tool to lift the motherboard from the device.
-
-
Tool used on this step:Tweezers$4.99
-
Wedge your flathead tweezers under the earpiece.
-
Lift up with your flat head tweezers to remove the earpiece from the device.
-
-
-
Wedge your flathead tweezers under the flashlight module.
-
Lift up with your flat head tweezers to remove the flashlight module from your device.
-
-
-
Grab the power flex from the charging port PCB board with your flathead tweezers.
-
Lift up with your flathead tweezers to remove the power flex from the charging port PCB board.
-
-
-
Grab the vibration motor connected to the charging port PCB board with your flathead tweezers.
-
Lift up with your flathead tweezers to remove the vibration motor.
-
-
-
Grab the black wire connected to the charging port PCB board with your flathead tweezers.
-
Pull up on the black wire with your flathead tweezers to disconnect the black wire from the charging port PCB board.
-
-
-
Grab the white wire connected to the charging port PCB board using your flathead tweezers.
-
Pull up on the white wire with your flathead tweezers to disconnect the white wire from the charging port PCB board.
-
-
-
Wedge your iFixit Opening Tool under the charging port PCB board.
-
Pull up with your iFixit Opening Tool to remove the charging port PCB board.
-
-
-
Use your hands to grab the side panel of the device.
-
Pull your hands away from the device to remove the side panel.
-
-
-
Remove the SD card side panel from the device by grabbing the SD card side panel with your hands and sliding the SD card side panel away from the device.
-
-
-
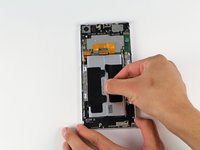
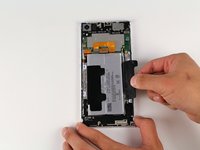
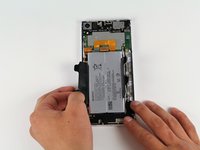
Grab the two pieces of black tape holding down the battery with your hands.
-
Lift up with your hands to remove the two black pieces of tape that hold down the battery.
-


