Introduction
This guide is prerequisite that will show you how to remove and replace your front and back camera. This guide will have you unscrew and pry at pieces.
What you need
-
-
Turn hair dryer to medium heat.
-
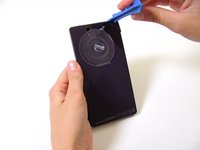
Slowly move the hair dryer along the seams on the back of the phone. Keep the dryer a few inches away from the case.
-
Circulate the dryer for a full minute to soften the adhesive binding the phone together.
-
-
-
-
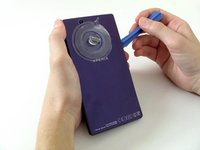
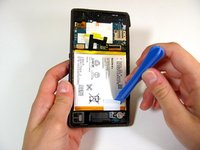
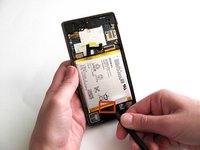
Slide the spudger firmly along the right side of the battery, loosening the adhesive between the casing and battery.
-
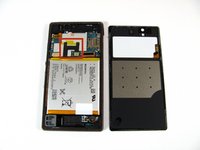
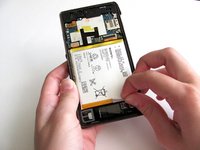
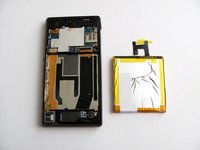
Insert the spudger in the bottom-center to further loosen the adhesive. Carefully separate the battery from the phone by sliding the spudger vertically underneath the battery and prying up. This may take some time and work as the adhesive is very strong.
-
-
-
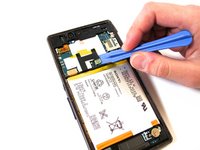
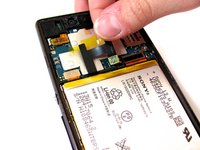
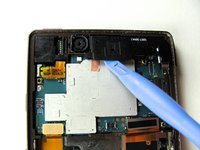
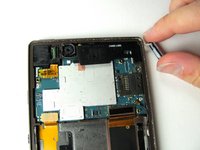
Remove the one 3 mm screw with the Phillips #000 screwdriver. The screw is located at the top right corner of the motherboard. The motherboard is the green/silver circuit board at the top of the phone.
-
-
-
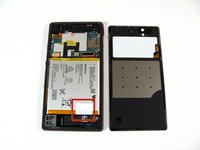
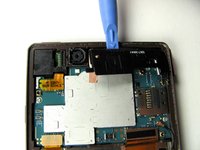
Using with the plastic opening tool, pry up firmly from the bottom and top of the plastic housing. The housing is black and located at the top right corner of the phone.
-
Release the charging cover, located on the right side of the phone at the top. This should cause the housing piece to pop out effortlessly.
-


To reassemble your device, follow these instructions in reverse order.
Cancel: I did not complete this guide.
4 other people completed this guide.
Team

Cal Poly, Team 2-7, Amido Winter 2014 Member of Cal Poly, Team 2-7, Amido Winter 2014
CPSU-AMIDO-W14S2G7
4 Members
25 Guides authored