
Steam Deck OLED Back Cover Replacement

Introduction
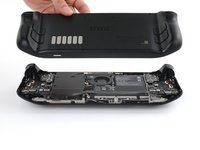
Go to step 1Use this guide to remove or replace the back cover on your Steam Deck OLED.
Remember to follow general electrostatic discharge (ESD) safety procedures while repairing your device.
Note: The back button faces (L4, R4, L5, and R5) are part of the back cover and cannot be separately removed.


-
-
Power down your Steam Deck and unplug any cables.
-
-
Tool used on this step:FixMat$36.95
-
Use a T6 Torx driver to remove the eight 5.8 mm‑long screws securing the back cover.
-
-
-
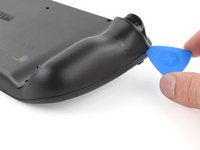
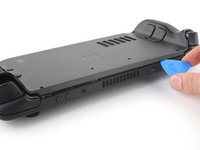
Insert an opening pick at an upward angle between the back cover and the front shell near one of the triggers.
-
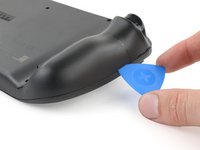
Slide your pick along the edge of the handle to release the clips securing it to the front shell.
-
-
-
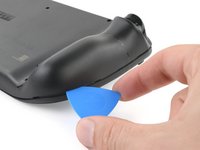
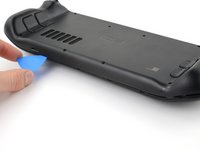
Reinsert your pick and slide it along the top and bottom edges until the back cover feels loose.
-
-
-
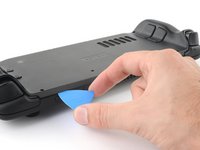
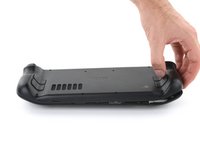
Grip the unclipped handle and pull it away from the front shell to release the remaining clips.
-
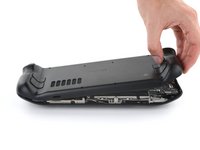
Remove the back cover.
-


To reassemble your device, follow these instructions in reverse order.
Repair didn’t go as planned? Try some basic troubleshooting, or ask our Steam Deck OLED answers community for help.
To reassemble your device, follow these instructions in reverse order.
Repair didn’t go as planned? Try some basic troubleshooting, or ask our Steam Deck OLED answers community for help.
Cancel: I did not complete this guide.
2 other people completed this guide.

Team
