
Steam Deck OLED Battery Reconnection (Alternate)

Prerequisite Only
This guide is only intended to be used as a prerequisite for other guides. It's incomplete by itself.
  1. Steam Deck OLED Battery Reconnection (Alternate), Reassembly instructions: step 1, image 1 of 2 Steam Deck OLED Battery Reconnection (Alternate), Reassembly instructions: step 1, image 2 of 2
    • During disassembly, skip the next four steps.

    • During reassembly:

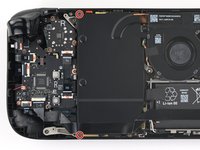
    • Reinstall the two 3.8 mm‑long screws to secure the motherboard shield.

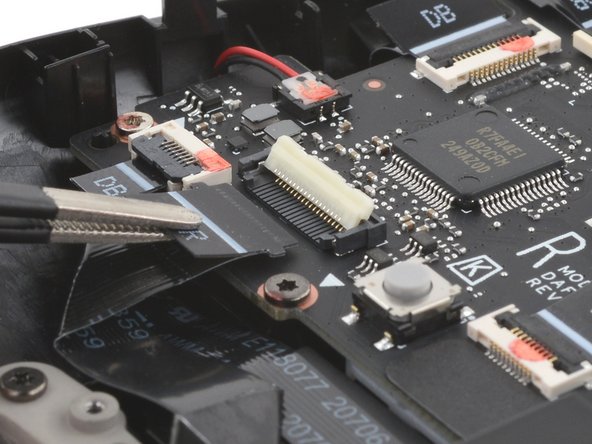
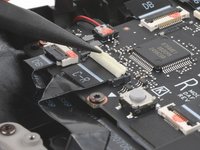
    • Reconnect the interconnect cable ZIF connector.

  2. Steam Deck OLED Battery Reconnection (Alternate), Reassembly instructions: step 2, image 1 of 3 Steam Deck OLED Battery Reconnection (Alternate), Reassembly instructions: step 2, image 2 of 3 Steam Deck OLED Battery Reconnection (Alternate), Reassembly instructions: step 2, image 3 of 3
    • During reassembly:

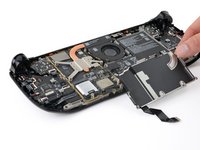
    • Use the flat end of a spudger to slide the battery connector into its socket on the motherboard.

  3. Steam Deck OLED Battery Reconnection (Alternate), Reassembly instructions: step 3, image 1 of 3 Steam Deck OLED Battery Reconnection (Alternate), Reassembly instructions: step 3, image 2 of 3 Steam Deck OLED Battery Reconnection (Alternate), Reassembly instructions: step 3, image 3 of 3
    • During reassembly:

    • Use your T6 Torx driver to remove the two 3.8 mm‑long screws securing the motherboard shield.

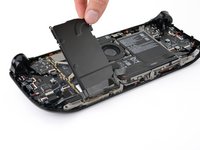
    • Lift the top edge of the motherboard shield up and flip it over the bottom edge of the frame, away from the motherboard.

    • Be careful not to crease or strain the cable.

  4. Steam Deck OLED Battery Reconnection (Alternate), Reassembly instructions: step 4, image 1 of 3 Steam Deck OLED Battery Reconnection (Alternate), Reassembly instructions: step 4, image 2 of 3 Steam Deck OLED Battery Reconnection (Alternate), Reassembly instructions: step 4, image 3 of 3
    Tool used on this step:
    Tweezers
    $4.99
    Buy
    • During reassembly, follow this step and the above four steps to reconnect the battery.

    • In this reassembly step, you'll disconnect the interconnect cable to free the motherboard shield.

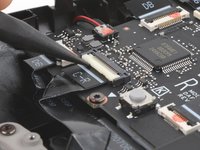
    • Use a spudger to flip up the small white locking flap on the right button board interconnect cable ZIF connector.

    • Use tweezers or your fingers to grip the cable's pull tab and slide it straight out of its socket to disconnect it.

    • The pull tab may be labelled C‑R.

Conclusion

To reassemble your device, follow these instructions in reverse order.

Clay Eickemeyer

Member since: 09/19/22

81,040 Reputation

455 Guides authored

Team

Guide Team Member of Guide Team

Staff

9 Members

11,341 Guides authored

0 Comments

Add Comment

View Statistics:

Past 24 Hours: 0

Past 7 Days: 13

Past 30 Days: 13

All Time: 27