
Introduction

Go to step 1

This is a guide to help you safely teardown your Super Mario Bros. 35th anniversary Game and Watch! (This guide is not professionally made! This means there may be a better way to do a step!)

What you need

Tools

This teardown is not a repair guide. To repair your Nintendo Handheld Console, use our service manual.

  1. Super Mario Bros. 35th anniversary Game and Watch teardown, Removing the screws: step 1, image 1 of 1
    • Remove the 4 Y00 screws on the back.

    • Don't worry! These screws are all the same size.

  2. Super Mario Bros. 35th anniversary Game and Watch teardown, Removing the back case: step 2, image 1 of 2 Super Mario Bros. 35th anniversary Game and Watch teardown, Removing the back case: step 2, image 2 of 2
    • Carefully pry off the back case from the main unit

    • Be careful to not snap the 4 clips on the top and bottom!

  3. Super Mario Bros. 35th anniversary Game and Watch teardown, Disconnecting the battery: step 3, image 1 of 2 Super Mario Bros. 35th anniversary Game and Watch teardown, Disconnecting the battery: step 3, image 2 of 2
    • Carefully disconnect the battery connector.

    • You will have to set the time again after reassembly.

    • You can use a spudger or the Y00 bit. If you use the bit, press down on the connector while pulling the bit upwards underneath the cables.

    • If it hasn't been removed before, it may be hard to disconnect. Be extremely careful to not short anything out if you use the bit method.

  4. Super Mario Bros. 35th anniversary Game and Watch teardown, Disconnecting the backlight cable: step 4, image 1 of 3 Super Mario Bros. 35th anniversary Game and Watch teardown, Disconnecting the backlight cable: step 4, image 2 of 3 Super Mario Bros. 35th anniversary Game and Watch teardown, Disconnecting the backlight cable: step 4, image 3 of 3
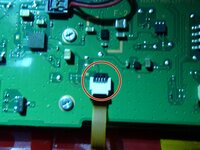
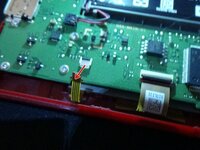
    • For the smaller ribbon cable (Backlight ribbon), Lift the small black bar upwards lightly with your nail or a small flathead bit.

    • The ribbon should be able to be pulled out after.

  5. Super Mario Bros. 35th anniversary Game and Watch teardown, Disconnecting the LCD cable: step 5, image 1 of 3 Super Mario Bros. 35th anniversary Game and Watch teardown, Disconnecting the LCD cable: step 5, image 2 of 3 Super Mario Bros. 35th anniversary Game and Watch teardown, Disconnecting the LCD cable: step 5, image 3 of 3
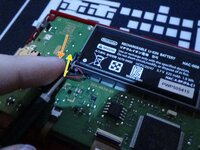
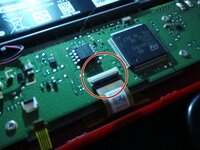
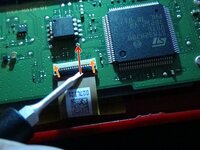
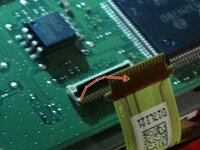
    • With either a small flathead or spudger, pry up the black bar on the wide ribbon cable.

    • Be very careful to not damage the cable. Especially when using a small flathead.

  6. Super Mario Bros. 35th anniversary Game and Watch teardown, Prying up the speaker: step 6, image 1 of 3 Super Mario Bros. 35th anniversary Game and Watch teardown, Prying up the speaker: step 6, image 2 of 3 Super Mario Bros. 35th anniversary Game and Watch teardown, Prying up the speaker: step 6, image 3 of 3
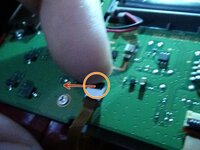
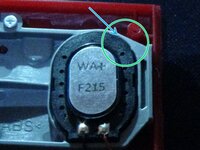
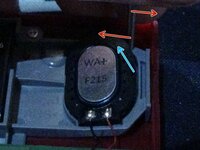
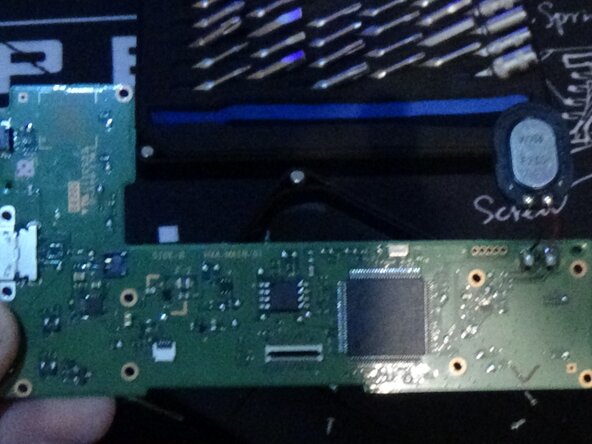
    • Using a small flathead, Pry upwards from the top right of the speaker.

    • You may hear a small pop. This is just the speaker adhesive peeling off the plastic.

  7. Super Mario Bros. 35th anniversary Game and Watch teardown, Removing the motherboard: step 7, image 1 of 3 Super Mario Bros. 35th anniversary Game and Watch teardown, Removing the motherboard: step 7, image 2 of 3 Super Mario Bros. 35th anniversary Game and Watch teardown, Removing the motherboard: step 7, image 3 of 3
    • Remove the 10 screws on the motherboard.

    • Keep these screws separate and organised.

    • Carefully remove the motherboard. The speaker is soldiered onto the motherboard.

  8. Super Mario Bros. 35th anniversary Game and Watch teardown, Removing the battery/speaker housing: step 8, image 1 of 1
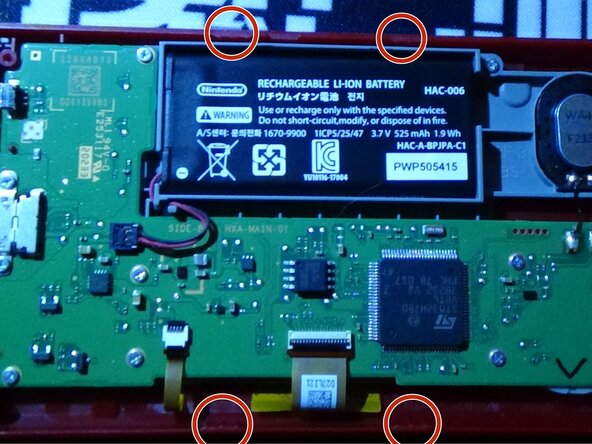
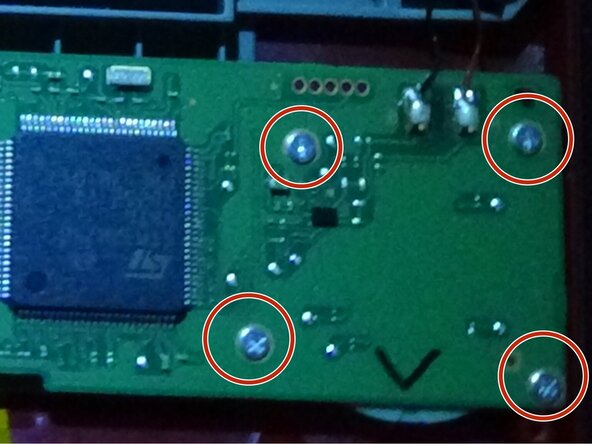
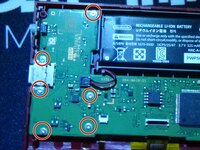
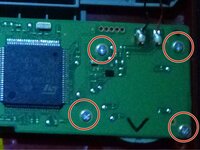
    • Remove the 1 screw in the top right (this is the last screw on the system) and lift up the housing.

    • There is only 1 more step after this!

  9. Super Mario Bros. 35th anniversary Game and Watch teardown, Removing the buttons: step 9, image 1 of 1
    • You should be able to lift out the buttons.

    • Congrats! You made it to the end! Just follow the steps in reverse to rebuild the unit.

Vincegamer

Member since: 02/27/25

13 Reputation

1 Guide authored

0 Comments

Add Comment

View Statistics:

Past 24 Hours: 6

Past 7 Days: 40

Past 30 Days: 59

All Time: 59