
Toshiba Satellite A205-S4577 USB 3.0 ports Replacement
Introduction
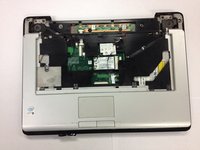
Go to step 1If you have a compatible motherboard, a USB 3.0 port will greatly increase read and write speeds when using a USB stick to access saved files. This guide will show you how to remove your old USB 2.0 cable to make room for your new USB 3.0 cable.
What you need

-
-
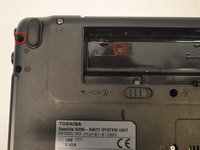
Locate the two sliding locks indicated in the photo.
-
Slide the right lock (labeled "1") to the right. It will remain in the unlocked position.
-
Slide the left lock (labeled "2") to the left and hold it in place.
-
-
-
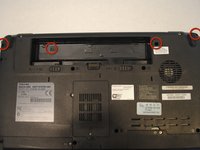
Remove the four screws indicated in the photos using a Phillips 00 Screwdriver. Left to right: 6mm button-head, 3mm flat-head, 6mm button-head, 6mm button-head.
-
-
-
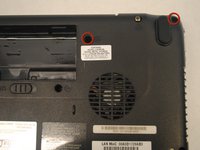
Locate the screws that are shown in the image.
-
Remove the fourteen 6mm button-head screws with a Phillips 00 Screwdriver.
-


To reassemble your device, follow these instructions in reverse order.
To reassemble your device, follow these instructions in reverse order.
Team

Cal Poly, Team 17-6, Regan Spring 2013 Member of Cal Poly, Team 17-6, Regan Spring 2013
CPSU-REGAN-S13S17G6
5 Members
33 Guides authored