Introduction
This guide explains how to replace the Xbox One's optical drive laser. Replacing the optical drive laser serves as a simpler solution for problems with the optical drive without the need to replace the console’s paired motherboard and optical drive daughterboard.
What you need
-
-
Unscrew the four Phillips #1 screws on the top of the optical drive.
-
-
-
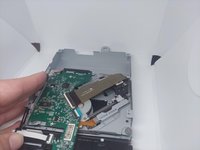
Lift the lid off of the optical drive case, this should require little to no force.
-
-
-
Slide the remaining optical drive case off of the internal components.
-
Internal components often snag on these points when removing the optical drive case.
-
-
-
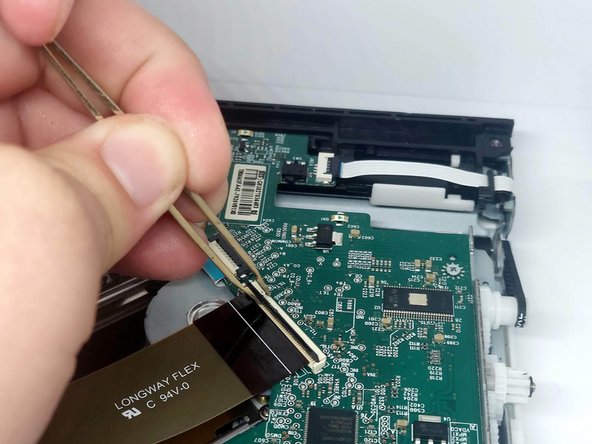
Tool used on this step:Tweezers$4.99
-
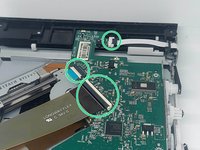
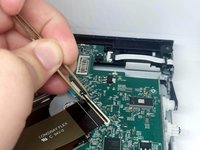
Locate the three ZIF connectors on the optical drive PCB.
-
Using tweezers, gently lift the tab on each ZIF connector to release the ribbon cables.
-
Remove the ribbon cable from each ZIF connector.
-
-
-
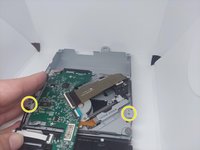
Unscrew the three Phillips #0 screws mounting the optical drive laser.
-
-
-
Lift the old optical drive laser from the unit and place in the new optical drive laser.
-


To reassemble your device, follow these instructions in reverse order.
Cancel: I did not complete this guide.
8 other people completed this guide.
2 Guide Comments
If my xbox one is reading Bluray disc(xbox one games/ Bluray movies), but for DVD it work sometimes, sometimes it wont (xbox 360 games/ DVD), should i replace the whole bluray drive or this Optical drive laser?
I would start with this repair. A faulty laser sounds like a very likely source for your issue. If it doesn't work you have a problem with the drive board.
Replacing the entire drive would require you to replace the main motherboard of the Xbox with one from the same console that the replacement drive came from because they are linked as an anti-piracy measure. At that point you're better off replacing the entire console.