Introduction
Use this guide to replace a worn-out or dead battery in your Xiaomi Mi 8.
If your battery is swollen, take appropriate precautions. For your safety, discharge your battery below 25% before disassembling your phone. This reduces the risk of a dangerous thermal event if the battery is accidentally damaged during the repair.
You’ll need replacement adhesive to reattach components when reassembling the device.
What you need
-
-
Apply a heated iOpener to the rear glass to loosen the adhesive beneath the edges. Apply the iOpener for at least two minutes.
-
-
-
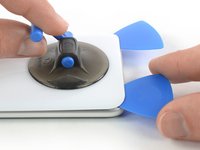
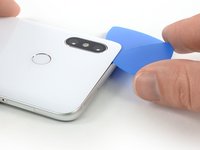
Secure a suction handle to the lower edge of the rear glass, as close to the edge as possible.
-
Lift the rear glass with the suction handle to create a gap between the glass and the frame.
-
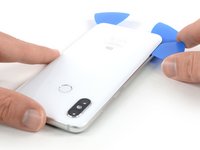
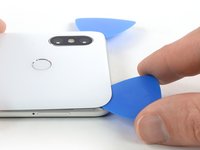
Insert an opening pick into the gap.
-
Slide the opening pick to the bottom right corner of the phone.
-
-
-
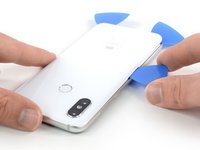
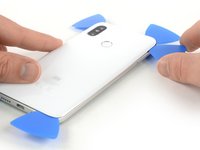
Insert a third opening pick at the bottom left corner.
-
Start to slide the opening pick from the bottom left corner along the side of the Xiaomi Mi 8 to cut the adhesive.
-
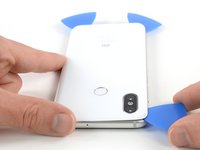
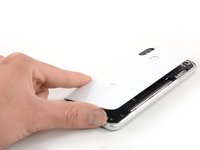
As the adhesive cools down it gets harder to cut. If necessary use your iOpener to reheat it.
-
Leave the opening pick in the top left corner to prevent the adhesive from resealing.
The back cover of MI 8 easily breaks while sliding the opening pick because it is made of fragile glass. Before sliding the pick, rim of the back cover should be heated enough to make adhesive loose.
-
-
-
-
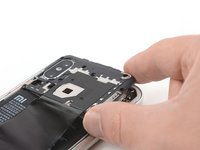
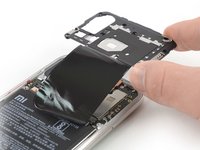
Remove the ten screws that secure the motherboard cover.
-
Eight Phillips #00 screws (3.4 mm length)
-
Two Phillips #00 screws (3.5 mm length)
Bei dem MI 8 ist (auf dem Bild gesehen) unten links noch eine Schraube (3,4 mm #00 Kreuzschlitzschraube) die zum Entfernen des Motherboards gelöst werden muß
Hallo Jürgen, danke für den Hinweis. Die Schraube wurde übersehen und ich habe den Schritt entsprechend angepasst.
-
-
-
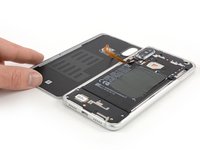
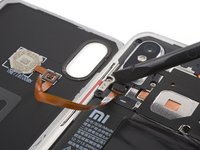
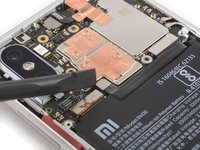
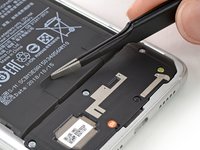
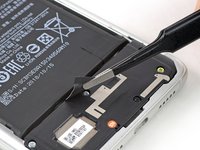
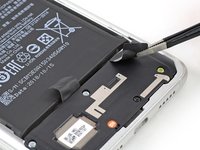
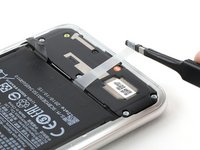
Use a spudger to pry up and disconnect the battery flex cable located at the bottom of the motherboard.
-
-
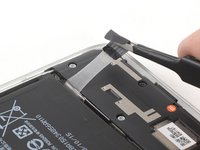
Tool used on this step:Tweezers$4.99
-
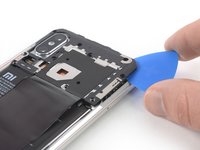
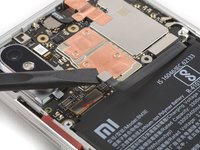
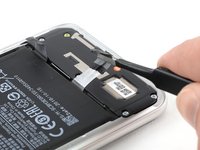
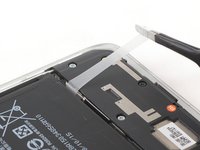
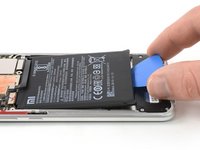
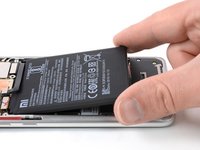
Use a pair of tweezers to peel the black ends of the adhesive tabs off the battery.
-


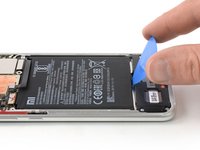


If possible, turn on your phone and test your repair before installing new adhesive and resealing the phone.
Secure the new battery with pre-cut adhesive or double-sided adhesive tape. In order to position it correctly, apply the new adhesive into the phone at the places where the old adhesive was located, not directly onto the battery. Press the new battery firmly into place.
To reassemble your device, follow these instructions in reverse order. Apply new adhesive where necessary after cleaning the relevant areas with isopropyl alcohol (>90%).
For optimal performance, calibrate your newly installed battery: Charge it to 100%, and keep charging it for at least two more hours. Then, use it until it shuts off due to low battery. Finally, charge it uninterrupted to 100%
Take your e-waste to an R2 or e-Stewards certified recycler.
Repair didn’t go as planned? Check out our Answers community for troubleshooting help.
Cancel: I did not complete this guide.
26 other people completed this guide.


12 Comments
Thanks ! Its helps me alot
Echt Klasse, allerdings sind es 8 schwarze schrauben bei der Mainboard Abdeckung. Ansonsten echt top Anleitung, vielen Dank
Die deutsche Übersetzung war veraltet, ich habe sie aktualisiert. Danke! Viel Spaß mit deinem Xiaomi.
Danke für die Anleitung erstmal. Ich habe jedoch die Keramik Version des Mi8 und bei mir scheitert es bereits beim Anheben der Rückabdeckung. Diese gibt quasi überhaupt nicht nach und ich bekommen kein Spektrum dazwischen. Irgendwelche Tipps?
Hej Gregor, vielleicht ist das Keramik nicht ganz so leitfähig wie das Glas. Dann müsstest du die Rückseite ein wenig länger erwärmen, um den Kleber aufzuweichen.
Das Problem hatte ich auch anfangs. Mit dem Messer bin ich dann letztendlich doch rein gekommen und habe einen ausreichend großen Spalt geschaffen um mit den Plektren wie gezeigt fortzufahren.
Ersatzklebestreifen bekommst du bei iFixit im Store.
Thankyou so much! Worked flawlessly :)