
Xiaomi Mi 9T Pro Screen Replacement

Introduction
Go to step 1Use this guide to replace a cracked or broken screen on your Xiaomi Mi 9T Pro.
If the frame is deformed, it's important to replace it to make sure the new screen will mount correctly and won’t suffer damage from uneven pressure.
If your battery is swollen, take appropriate precautions. Before disassembling your device, discharge the battery below 25%. The battery can catch fire and/or explode if accidentally punctured, but the chances of that happening are much lower if discharged.
Note: This guide instructs you to replace only the screen while leaving the original frame and motherboard in place. However, some replacement screens for this phone come pre-installed in a new frame (a.k.a. chassis), which requires a very different procedure. Make sure you have the correct part before starting this guide.
Before you begin this procedure, be sure to have a set of replacement adhesives for both the rear glass and the screen.
What you need
Parts


Tools


Show more…
-
-
Prepare an iOpener and apply it to the rear glass for at least two minutes to loosen the adhesive underneath.
-
-
-
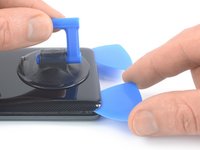
Secure a suction handle to the bottom edge of the rear glass, as close to the edge as possible.
-
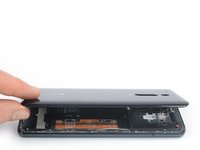
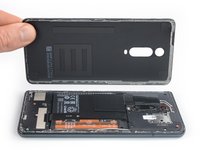
Lift the rear glass with the suction handle to create a small gap between the back cover and the frame.
-
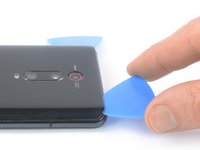
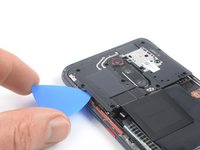
Insert an opening pick into the gap you created.
-
Slide the opening pick to the bottom right corner to slice the adhesive.
-
Leave the opening pick in place to prevent the adhesive from resealing.
-
-
-
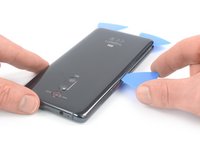
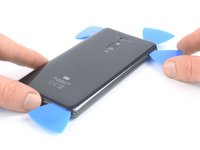
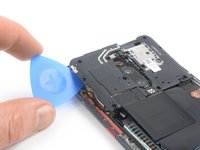
Insert a second opening pick at the bottom edge of your phone.
-
Slide the opening pick to the bottom left corner to slice the adhesive.
-
Leave the opening picks in place to prevent the adhesive from resealing.
-
-
-
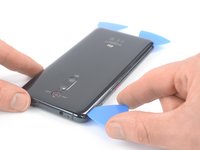
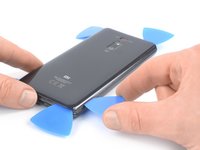
Insert a third opening pick at the bottom left corner of your phone.
-
Slide the opening pick along the left edge of your phone to slice the adhesive.
-
Leave the opening pick in the top left corner to prevent the adhesive from resealing.
-
-
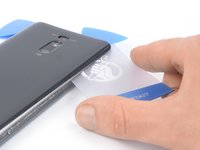
Tool used on this step:Plastic Cards$2.99
-
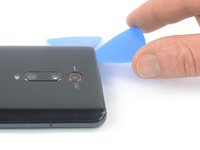
Carefully insert a plastic or playing card at the right edge of the phone where the rear camera is located.
-
Use the plastic card to slice the adhesive along the rear camera frame.
-
-
-
Use a Phillips screwdriver to remove the twelve screws securing the motherboard cover:
-
Eleven 3.9 mm-long Phillips screws
-
One 2.3 mm-long Phillips screw
-
-
-
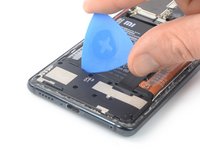
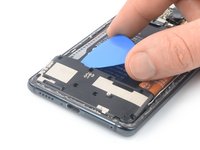
Insert the tip of an opening pick underneath the left edge of the motherboard cover.
-
Flip the opening pick sideways to pry up the motherboard cover.
-
-
Tool used on this step:Tweezers$4.99
-
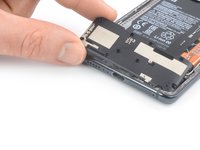
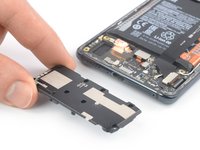
Use a pair of tweezers or your fingers to remove the motherboard cover.
-
-
-
Use a spudger to disconnect the battery cable by prying the connector straight up from its socket.
-
-
-
Use a Phillips screwdriver to remove the eight 3.9 mm-long screws securing the loudspeaker assembly.
-
-
-
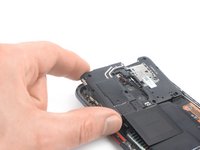
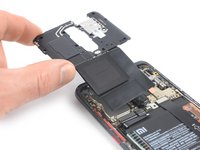
Insert an opening pick into the gap between the top edge of the loudspeaker assembly and the battery.
-
Use your opening pick to pry up the loudspeaker assembly.
-
-
Tool used on this step:Tweezers$4.99
-
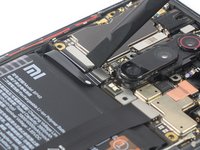
Use a pair of tweezers to carefully peel the sticker off the interconnect cable.
-
-
-
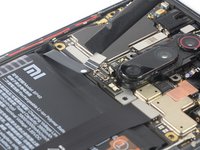
Use a spudger to disconnect the interconnect cable by prying the connector straight up from its socket.
-
-
-
Carefully slide the tip of an opening pick underneath the display flex connector to separate it from the midframe.
-
-
-
Apply a heated iOpener or a heat gun to the screen to loosen the adhesive underneath. Apply the iOpener for at least two minutes.
-
-
-
Once the screen is warm to the touch, apply a suction handle to the bottom edge of the screen.
-
Lift the screen with the suction handle to create a small gap between the screen and the frame.
-
Insert an opening pick into the gap between the midframe and the screen.
-
Slide the opening pick to the bottom right corner of the screen to slice its adhesive.
-
Leave the opening pick in place to prevent the adhesive from resealing.
-
-
-
Insert a second opening pick at the bottom edge and slide it to the bottom left corner of the screen to slice the adhesive.
-
Leave the opening pick in place to prevent the adhesive from resealing.
-
-
-
Thread the display flex cable through the gap in the midframe and remove the screen.
-


If possible, turn on your device and test your repair before installing new adhesive and resealing.
To reassemble your device, follow these instructions in reverse order.
The best way to secure the new screen is to apply a sheet of custom-cut double-sided tape to the back of the screen.
Take your e-waste to an R2 or e-Stewards certified recycler.
Repair didn’t go as planned? Try some basic troubleshooting, or ask our Answers community for help.
Cancel: I did not complete this guide.
19 other people completed this guide.


7 Comments
Wer wie ich vor der Herausforderung steht, ein Display inklusive Rahmen zu wechseln, dann wird man schnell feststellen, dass man den Akku ausbauen muss, welcher verklebt ist, was sehr gut funktioniert ist, das gesamte Telefon zu erhitzen, ich nutze dafür meinen 3d Drucker mit Platte auf 50°C.
Lasse das Handy dann einfach drauf und sobald der Akku warm ist (35-40° heißer würde ich definitiv nicht empfehlen - vielleicht noch 45) kann man den Akku ohne zerstörung, ohne großen Aufwand problemlos entfernen, dazu auf der rechten Seite die 3 Klebestreifen lösen und auf der linken Seite ebenfalls, rechts dann am mittleren Element ziehen da bei 1 und 2 der kleber befestigt ist, an 3 nur der Akku, die Kraft ist schwer zu beschreiben, aber wirklich nur ganz leicht ziehen.
Dann kann man den Akku durchaus nochmal benutzen. Wenn der Akku irgendwie beschädigt werden sollte, verbogen etc, auf keinen Fall weiternutzen, nur wenn der wirklich unbeschädigt ist.
Where can i buy an original screen for this phone i literally just broke after 2+ years of having it, it fell face down while it still works perfectly the screen shows the crack of the damage still 100% usable but im heart broken about it, any links to amazon?
I have a good experience in this field and I need to work is there anyone to help me I am from Morocco
Khalilelharrak18@gmail.com
Hallo Dominik,
ich habe deine Anleitung befolgt und stehe nun vor einem nahezu perfekten Endergebnis. Nahezu perfekt, weil irgendwie nur meine obere Hälfte des Displays reagiert. Was könnte ich bei der Reparatur falsch gemacht haben? Einen Pin von einem Stecker zerstört? Oder ist das neue Display schon fehlerhaft bei mir angeliefert worden? Hast du da schon Erfahrungen gemacht? Grüße Mats
Could you make a tutorial for replacement of only the front glass?