Introduction
The clock battery in my Zojirushi rice cooker failed after about 5 years of use. I could tell because the time no longer showed on the front of the rice cooker. This is not totally fatal, you can still cook rice without the battery, but you can’t use the cool timer mode. Plus I like to have my devices working correctly.
I went to replace the battery, and was really pissed to find that it is soldered in and not designed to be user replaceable. Who does this? What an example of planned obsolescence! Dirtbags!
I went ahead and fixed it and wrote this guide mostly because I was so unhappy with them. Also I am not buying any more Zojirushi products that don’t have replaceable batteries.
What you need
-
-
Un-plug the Rice Cooker
-
Turn it over and place it on a towel or padded surface.
-
-
-
Remove 4 screws from the bottom. 3 are normal #2 Phillips, one is a security screw that looks like a 6-sided star with a hole in the center. The bit I used was marked T-20.
-
Use a Spudger or other prying tool to work around the edges of the metal bottom plate and unclip the plastic tabs holding it in place. There were 7 tabs, 1 in each corner, one in the front and 2 in the back about 1-inch each side of the center. This was pretty easy.
-
Pull the bottom plate off and set aside.
Good guide for an important project.
Please indicate spacing of solder holes for battery tabs. There are several tabbed battery offerings with different geometry.
Also, if there is room, I’d install a battery holder instead of a soldered battery. But still need pin spacing.
And Is there vertical space for a slightly thicker element? (To accept a holder, not just a raw battery. )
@John B, see @Ed Chou recent comments on adding a battery holder.
Jimjar -
-
-
-
-
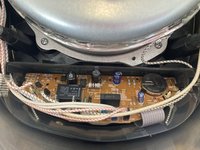
You can now see the circuit board with battery.
-
There are actually two circuit boards stacked on top of each other. You can leave the hidden circuit board (with the display and controls) in place for this repair.
-
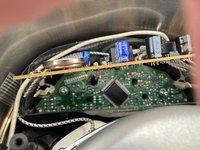
Remove 6 connectors from the top circuit board. Pull these straight out. there are no locking mechanisms. From left to right they are Red, Black, Yellow, Blue, Blue base and Black base. The colors are nicely marked on the circuit board.
-
The ribbon cable does not have a connector, so don't remove it, leave it in place.
-
Push in the plastic tabs holding the top board in place to release it, and fold it out on the ribbon cable to expose the underside of the clock battery.
-
Don't remove the bottom board! I did this and it was a big pain to get it correctly reseated so that the control buttons worked.
-
-
-
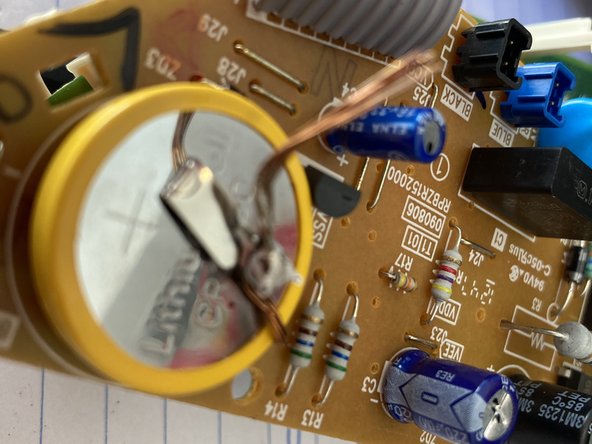
Use your soldering iron to heat one of the two battery terminals on the back-side of the top circuit board. The terminals are conveniently marked.
-
When the solder is melted use your plastic spudger to pry the battery away from the top of the circuit board.
-
Repeat for the other battery terminal and remove the battery for recycling.
-
Caution! If you want pull the battery away with pliers, wrap the pliers with electrical tape to avoid shorting out the battery. You can probably use your fingers (if not too hot) or your plastic spudger.
-
-
-
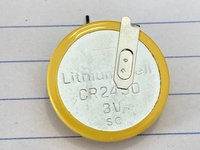
Hopefully you bought a replacement battery with Solder tabs. I found mine on eBay.
-
The solder tabs on your replacement battery may not line up with where you need them, mine didn't.
-
I soldered one tab in place directly, then soldered some stranded wire to bridge between the second tab and the circuit board. I trimmed and bent the second tab a little to make this work. It was easy to solder the wire to.
-
Read the comments...some people smarter than me have soldered in battery holders to make changing the battery easier in the future. Genius!
-
-
-
put the top circuit board back in place. The black plastic tabs on the sides are the card guides.
-
Plug in the 6 connectors you removed earlier. Double-check the colors vs the labels...I almost swapped two.
-
If you turn the unit over you should now see the time displayed on the clock.
-
Replace the bottom cover and the 4 screws.
-


To reassemble your device, follow these instructions in reverse order.
To reassemble your device, follow these instructions in reverse order.
Cancel: I did not complete this guide.
10 other people completed this guide.

21 Comments
If you have a Ring doorbell, try the included orange-handled screwdriver for opening the case and removing the circuit board. The security screw head along with Phillips head fit all the screws inside and out. Not sure about all rice cooker versions, but this worked perfectly for mine.
This battery holder fit my rice cooker perfectly.
CR2450 Coin Cell Battery Holder - PC Pin https://a.co/d/71iBrrP
Thanks for the article. I fixed mine by removing the battery and adding wire leads to a 2032 battery holder. I covered the connections on the back of the holder with epoxy to insulate the leads. I then hot glued the holder to the inside front of the case. I still have to remove bottom to replace battery, but 2032 batteries are cheaper and easier to find. I replaced the security screw with a standard one.
I did this, with the battery holder. Worked great, until I plugged it into power. The display went blank like I had shorted something! Any clue?
@davesandusky I am not sure what is wrong but I would start by making sure that you reconnected all of the wires properly, they are easy to mis-connect if you are not careful.
@Jimjar I never disconnected the wires - didn’t need to.
I 3D printed a CR2450 Battery Holder and used the existing tabs from the old (dead) battery as connectors.
My battery holder 3D Model can be found here. Read the description there for details. This is in place of Steps 4 and 5 of this tutorial.
From an Amazon review tip, https://www.digikey.com/en/products/deta... is a replacement battery with the correct lead style the right distance apart. The plastic bottom snapped off easily without a prying tool after removing the screws. Instead of disconnecting the wires I just removed them from the retainers at each side. The hardest part of this repair was freeing the board from its plastic clips.
All of this. Battery perfect replacement. Didn't disconnect the wires. Replaced with an extra set of hands. Before putting back together, double check all connections in case anything was bumped or knocked of and plug in and make sure it doesn't display any error message.
Hey, thanks for doing this. I was beyond annoyed when zojurushi told me I had to ship it to them to have the battery replaced. That's a lot of wasted time and energy by a lot of people. Anyway, I replaced the battery successfully, thank you.
@adrianvasq65716 Fantastic that you were able to replace the battery youself!
What a low down racket all these rice cooker companies are running. They just want people to buy a new rice cooker every few years. They could perfectly easily make them with a pop open battery door and a pop in battery, like every dinky battery-operated gadget has!
I feel your rage.
I followed this guide for a NS-ZCC10, some things to note:
1. The battery in the NS-ZCC10 is a CR-2354 so if you want to solder a direct replacement you'll need to buy that size.
As @edchao noted, a CR2450 Coin Cell Battery Holder does fit. The best I could find online they're both 3V just different dimensions. I had to slight tilt a transistor (I think that's what it was) to make enough room for the battery holder, but gently doing this seemed ok.
2. On the NS-ZCC10 the LCD is mounted differently and is in the way of the battery. I removed the support cage to desolder the battery to easily lift it off, if I were to do it again I'd leave the support cage in place and work around it. The LCD is attached via very long pins soldered to the board so I was in danger of damaging this connection.
3. The wire clips were latched, so be very careful removing the wires as you don't want to break the connector or pull the part off the board.
Thanks! I have a NS-KCC05 that I picked up used and now I can have oatmeal waiting in the morning. As suggested by another user, I installed a battery holder rather than a solder-in battery as I tend to keep my appliances for a long time. This model uses JIS head screws rather than Torx so I didn't have to dig out my tamper-proof set.