Intro History: iPhone 7 Display Assembly Replacement
Edit by Jeff Suovanen —
Edit approved by Jeff Suovanen
- Before
- After
- Unchanged
| Device |
|
||||||||
| Type |
|
||||||||
| Thing |
|
||||||||
| Title |
|
||||||||
| Introduction |
|
||||||||
| Time Required Min |
30 minutes
|
||||||||
| Time Required Max |
1 hour
|
||||||||
| Imageid |
Before


After

|
||||||||
| Difficulty |
Moderate
|
||||||||
| Conclusion |
|
||||||||
| Author | |||||||||
| Public |
Yes
|
Tools
- iFixit Opening Picks (Set of 6) x1 added.
- P2 Pentalobe Screwdriver iPhone - Archived x1 added.
- iOpener x1 added.
- Suction Handle x1 added.
- Spudger x1 added.
- Tri-point Y000 Screwdriver x1 added.
- Tweezers x1 added.
- Phillips #00 Screwdriver x1 added.
Parts
- iPhone 7 Screen x1 (featured) added.
- iPhone 7 Display Assembly Adhesive x1 added.
- iPhone 7 Front Panel Assembly Cable Bracket x1 added.
- iPhone 7/7 Plus Bottom Screws x1 added.
- iPhone 7 Rear Camera Connector Bracket x1 added.
- NuGlas Tempered Glass Screen Protector for iPhone 7/8 x1 added.
Steps
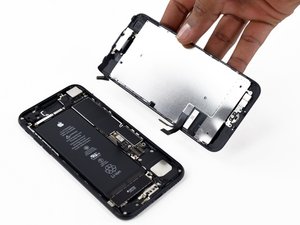
Step #: 1
Before
After

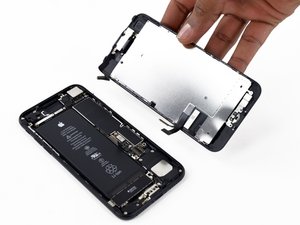
Step #: 2
Before
After

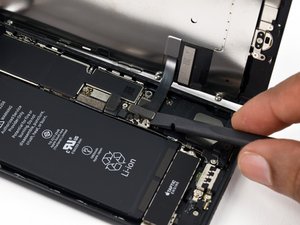
Step #: 3
Before
After


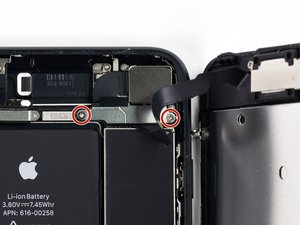
Step #: 4
Before
After