Introduction
This guide details removing the logic board in a 2019 iMac 4K in order to remove or replace the RAM.
Some images in this guide use an older iMac, which has minor visual differences. These differences do not affect the repair procedure.
This guide requires you to handle a power supply that contains large capacitors. Unplug the iMac and hold the power button down for at least 10 seconds to help discharge the capacitors. Handle the power supply board by the edges and do not touch surface components.
What you need
-
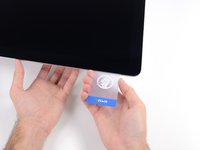
Tool used on this step:iMac Intel 21.5" Cardboard Service Wedge$4.99
-
With the hinge free to move, the iMac will be unbalanced and hard to work on. Place an iMac service wedge, in the stand to stabilize the iMac.
-
-
-
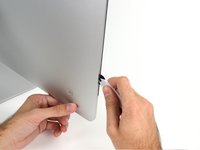
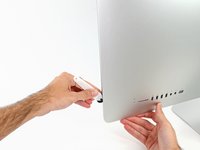
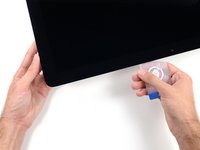
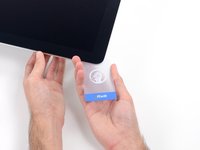
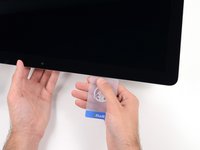
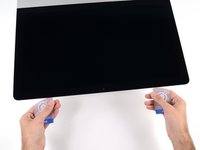
Starting on the left side of the display, near the power button, insert the iMac Opening Tool into the gap between the glass panel and the rear enclosure.
-
-
-
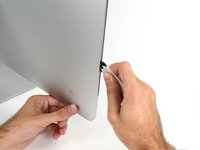
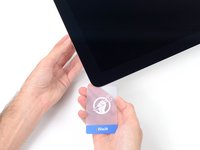
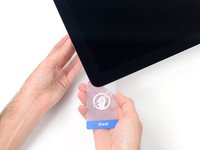
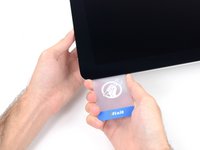
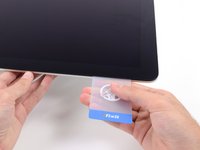
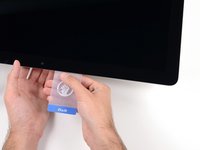
Use the tool like a pizza cutter—roll it along the gap, cutting the foam adhesive in between the frame and display.
-
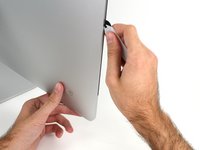
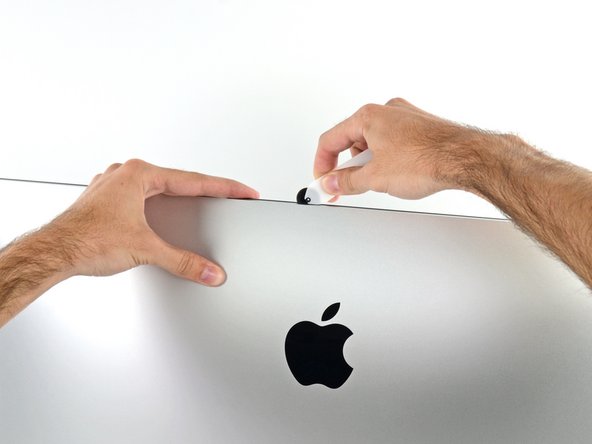
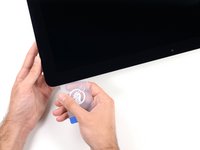
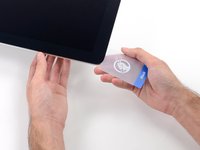
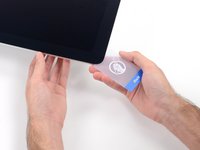
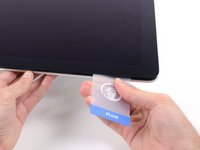
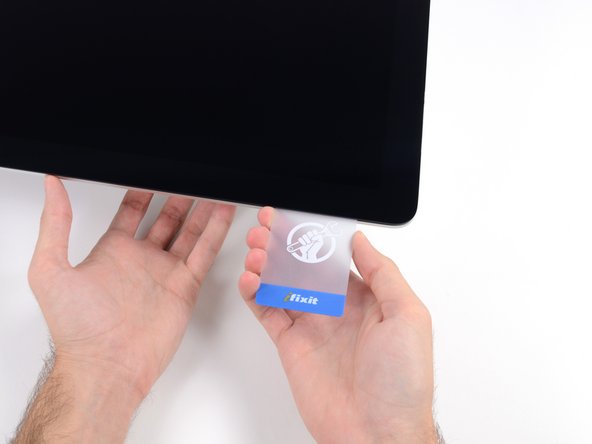
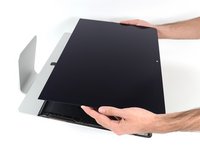
Run the tool up along the left side of the display.
-
-
-
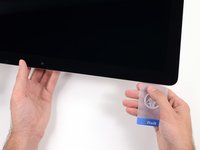
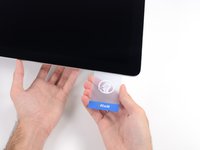
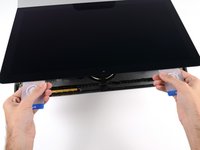
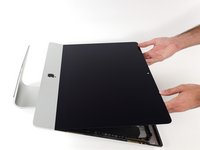
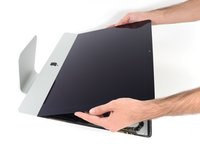
Hold the display with one hand while using your other hand to unplug the display power cable.
-
-
-
-
Remove the following five Phillips screws holding the lower support bracket in place:
-
Four 3.2 mm screws
-
One 1.7 mm screw
-
-
-
Remove the following T10 Torx screws securing the hard drive brackets to the iMac:
-
Two 21 mm screws
-
One 9 mm screw
-
One 27 mm screw
-
-
-
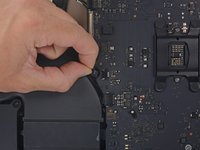
Use the tip of a spudger to push each side of the power button cable connector and gently walk it out of its socket.
-
-
-
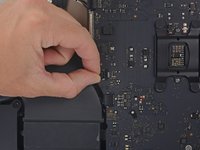
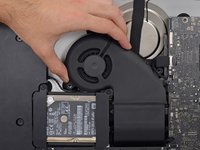
Gently pull the fan cable connector straight away from its socket on the logic board.
-
-
-
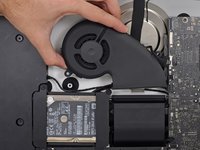
Lift the hard drive from the edge nearest the logic board and pull it slightly out of its recess.
-
-
-
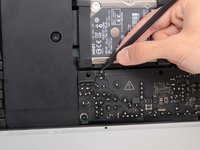
Remove the 7.3 mm T8 Torx screw securing the hard drive tray to the rear enclosure.
-
-
-
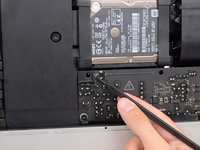
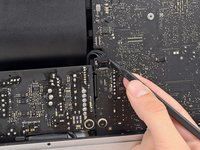
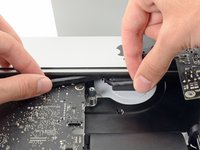
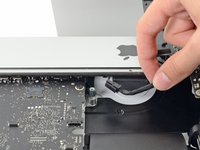
Gently pull the left speaker cable straight out of its socket on the logic board.
-
-
-
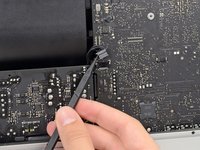
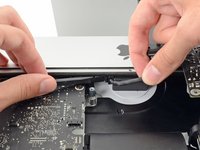
Use the tip of a spudger to flip open the retaining flap on the microphone ribbon cable ZIF socket.
-
Use tweezers to gently pull the microphone ribbon cable straight out of its socket.
-
-
-
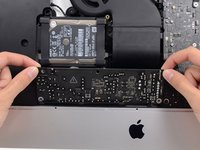
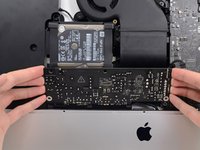
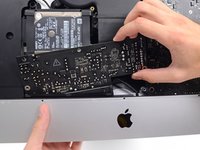
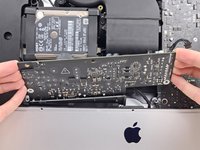
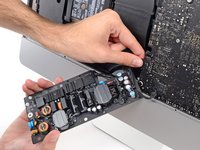
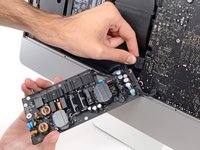
Remove the four 7.3 mm T8 Torx screws securing the logic board to the rear enclosure.
-
-
-
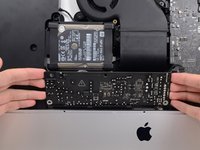
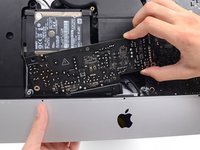
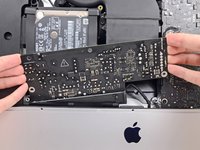
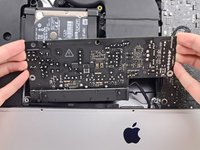
Handling the board by the edges, flip the logic board over to access the two RAM modules.
-
Use a T4 Torx driver to remove the four 2.4 mm screws securing the RAM shield.
-


Compare your new replacement part to the original part—you may need to transfer remaining components or remove adhesive backings from the new part before installing.
To reassemble your device, follow the above steps in reverse order.
Take your e-waste to an R2 or e-Stewards certified recycler.
Repair didn’t go as planned? Check out our Answers community for troubleshooting help.
Cancel: I did not complete this guide.
44 other people completed this guide.

21 Comments
I attempted this upgrade myself because iFixit labeled this as Moderate difficulty. The entire process took me seven hours from start to finish, and when I was done my computer would not turn on. I tried to do this repair myself because my local computer company wanted $400 to do this upgrade using Apple RAM, and I couldn’t afford that at the time. I had to take the iMac in to be serviced when it wouldn’t turn on, and the computer company just quoted me a price of $600 for a new logic board if it was damaged during the upgrade.
I am posting this to warn anyone else who is considering doing this upgrade to hire a certified technician. Do not go by iFixit’s difficulty rating. If you do, you may risk even greater expense if something goes wrong, like it did with my own attempt.
Perhaps iFixit should consider changing the rating on this task to Extremely Difficult, or Advanced, or LOL DON’T EVEN TRY IT to warn any other unsuspecting customers who are looking to save a little money.
It is very likely you just missed plugging in the cable from the power button to the power supply. Very easy to do and very easy for the very small cable to slip behind the power supply and you never notice.
Always a good idea to check each step as you go and read the whole guide from start to finish before you start and also in the process of reassembly.
I did this in about 3-4 hours over a Saturday afternoon. I had previously done hard rive upgrades in a 2009 iMac and a 2012 MBP. I was encouraged by a tech friend and pored over the guide for a few times to get my courage up and then discussed the step by step with him first on a zoom call. The courage is required to remove the screen. After that the guide is very solid and clear and the steps are easy to comprehend though removing the power supply is a bit tricky and the microphone cable can be elusive. The only mistake I made is when reapplying the screen, having already checked function, I got into a sweat and banged to sick it on with the VDU cables not properly connected. I would recommend have some help for the screen re application and talk it through so you avoid that kind of schoolboy error. Having removed the screen and re-applied it I am very happy. A great guide.
Jon H Smith
Sehr gute Beschreibung, jedoch stellt sich mir eine Frage nach dem Wieder zusammen setzen benötige ich doch einen Vergleichsweisen Kleber der meinen Bildschirm auf den Rahmen setzt. Damit er nicht herunter fällt. Gibt es da welche zu kaufen oder hält das wieder von alleine?
Ich habe einen IMAC 4k 21´Zoll 2019 und möchte gerne Arbeitsspeicher und CPU tauschen.
id did it in 3,5 hours, no problems at all, everything works as described.