Introduction
Follow this guide to replace the screen on your iPad Pro 11" 3rd gen.
If your battery is swollen, take appropriate precautions.
The LiDAR sensor assembly attached to the screen is paired with the Face ID hardware. You'll need to transfer it to your new screen to keep Face ID functionality.
Some photos show the battery connector blocked with two card strips. While this is an optional method, it's more reliable to fully discharge the battery. Ignore this visual discrepancy as you work through the guide.
What you need
-
-
Camera module, ambient light sensors, proximity senor, and front microphone
-
Display cables
-
Screen magnets
-
LCD edges
-
-
-
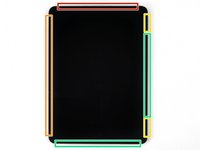
Apply a heated iOpener to the right edge of the screen for two minutes.
-
-
Tool used on this step:Clampy - Anti-Clamp$24.95
-
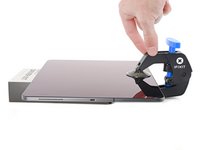
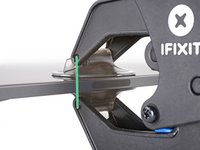
Pull the blue handle backward to unlock the Anti-Clamp's arms.
-
Place an object under your iPad so it rests level between the suction cups.
-
Position the suction cups near the middle of the right edge—one on the top, and one on the bottom.
-
Hold the bottom of the Anti-Clamp steady and firmly press down on the top cup to apply suction.
-
-
-
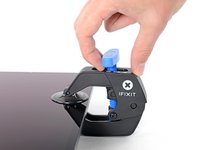
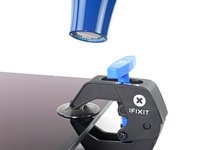
Wait one minute to give the adhesive a chance to release and present an opening gap.
-
If your screen isn't getting hot enough, you can use a hair dryer to heat along the right edge of the iPad.
-
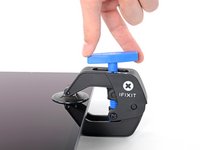
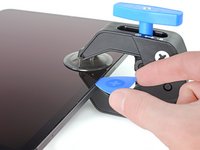
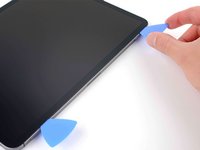
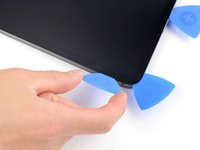
Insert an opening pick under the screen when the Anti-Clamp creates a large enough gap.
-
Skip the next step.
-
-
-
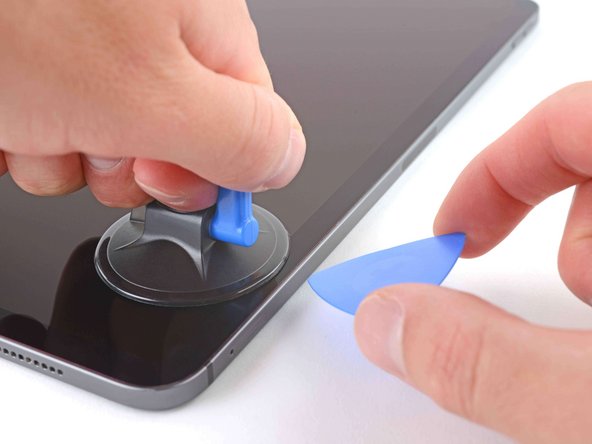
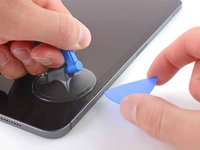
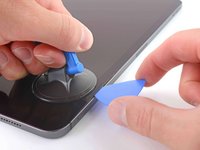
Apply a suction handle to the right edge of the screen, about 5 cm from the bottom edge.
-
Pull up on the suction handle with firm, constant pressure to create a gap just small enough to insert an opening pick.
-
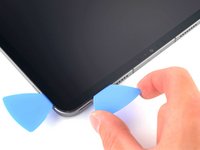
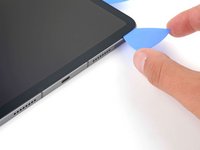
Insert the tip of an opening pick into the gap.
-
-
-
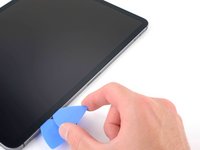
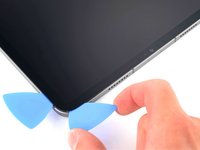
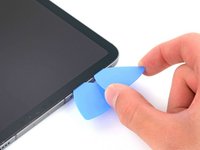
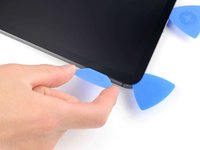
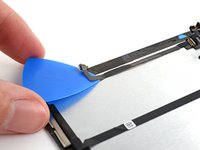
Insert a new opening pick in the gap you just created.
-
Slide the pick along the right edge to separate the adhesive.
-
Leave the pick in the top right corner to prevent the adhesive from re-sealing.
-
-
-
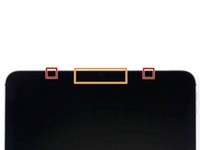
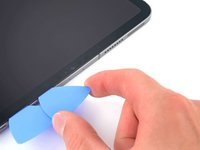
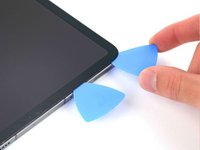
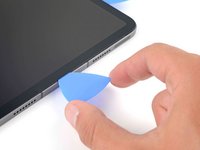
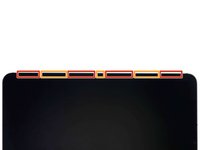
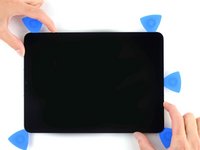
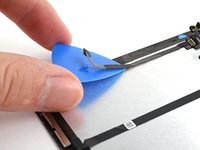
Don't insert an opening pick more than 2 mm near the top left and right edges or you'll damage the ambient light sensors.
-
Don't insert an opening pick more than 1 mm near the middle of the top edge or you'll damage the camera module, proximity sensor, and front microphone.
-
-
-
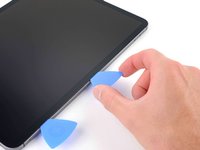
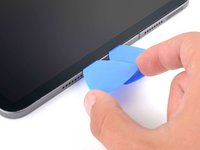
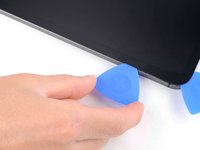
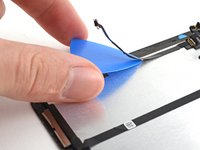
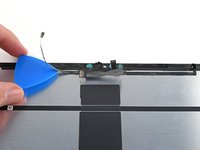
Insert a new opening pick in the gap you just created.
-
Slide the pick along the top right edge, stopping when you reach the right ambient light sensor.
-
Leave the pick in to prevent the adhesive from re-sealing.
-
-
-
Apply a heated iOpener to the bottom edge of the screen for two minutes.
-
-
-
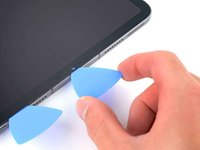
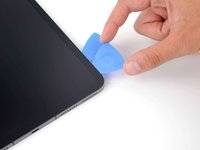
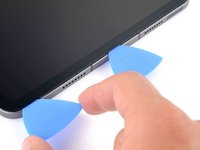
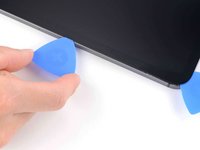
Insert a new opening pick in the bottom right corner below the existing pick.
-
Slide the pick around the bottom right corner to separate the adhesive.
-
-
-
-
Apply a heated iOpener to the left edge of the screen for two minutes.
-
-
-
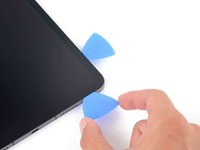
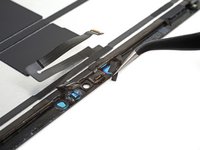
The display cables are located within small indents of the frame and require an opening pick to be inserted at a 45° angle.
-
There are flat sections of the frame which require an opening pick to be inserted horizontally.
-
-
-
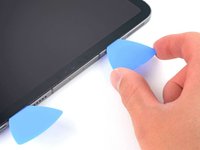
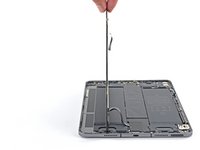
Insert an opening pick at a 45˚ angle just above the bottom left corner.
-
Carefully slide the pick along the left edge, stopping when you reach the flat section of the frame.
-
-
-
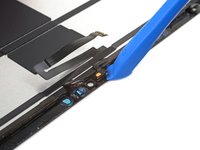
Separate the remaining adhesive, making sure to follow the instructions exactly as written.
-
Slide the pick at a 45˚ downward angle and don't insert the pick more than 5 mm.
-
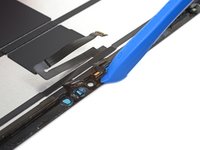
Slide the pick horizontally and don't insert the pick more than 5 mm.
-
-
-
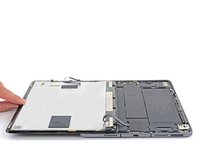
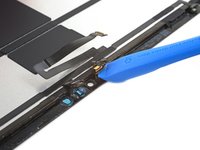
Use an opening pick to remove any remaining adhesive keeping the screen stuck to the frame.
-
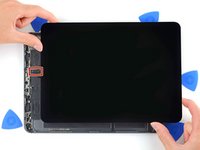
Grab the top right and bottom left corners of the screen.
-
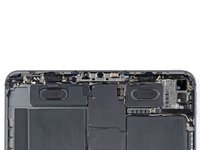
Slowly slide the screen towards the bottom right corner to separate it from the frame.
-
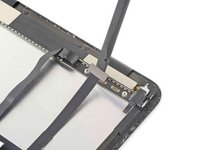
Shift the screen towards the bottom right corner of the frame until the ambient light sensor ribbon cable near the top edge is uncovered.
-
-
Tool used on this step:FixMat$36.95
-
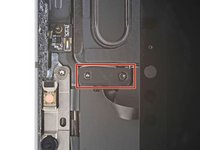
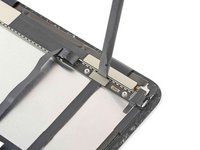
Use a Phillips screwdriver to remove the two screws securing the ambient light sensor cable bracket to the logic board:
-
One 1.3 mm screw
-
One 2.0 mm screw
-
-
Tool used on this step:Tweezers$4.99
-
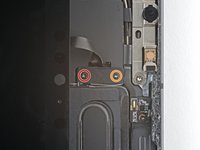
Use a pair of tweezers or your fingers to remove the bracket.
-
-
-
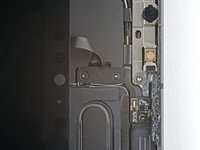
Use the flat end of a spudger to disconnect the ambient light sensor cable by lifting straight up on the press connectors.
-
-
-
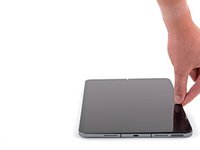
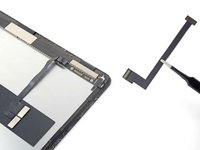
Grip the right edge of the screen and fold it open like a book.
-
Lay the screen down over the left edge of the iPad.
-
-
-
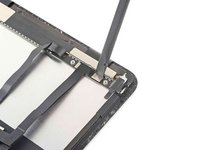
Use a Phillips screwdriver to remove the five screws securing the lower cable shield to the logic board:
-
Two 2.0 mm screws
-
Three 1.3 mm screws
-
-
Tool used on this step:Tweezers$4.99
-
Use tweezers or your fingers to grab and remove the lower cable shield.
-
-
-
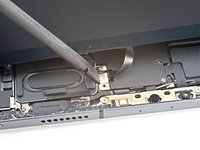
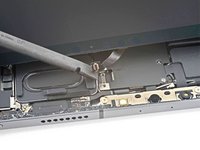
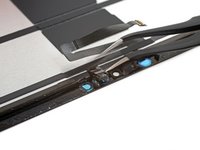
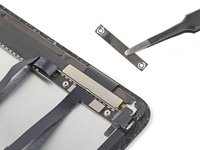
Use the pointed end of a spudger to pry up and disconnect the top two display cables.
-
-
-
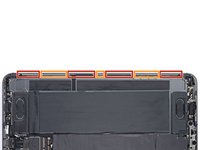
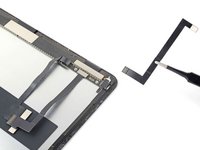
The LiDAR sensor assembly is composed of four total sensors:
-
Two ambient light sensors
-
One proximity sensor
-
One microphone
-
-
-
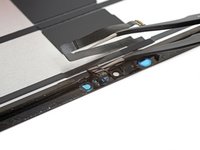
Heat an iOpener and apply it to the top of the screen for two minutes.
-
-
Tool used on this step:Tweezers$3.99
-
Insert one arm of your angled tweezers between the ambient light sensor and the screen.
-
Pry up to separate the sensor from the screen.
-
Repeat this procedure for the other ambient light sensor.
-
-
-
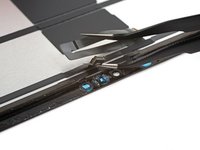
Insert one arm of your angled tweezers between the proximity sensor cable and the screen.
-
Slide the tweezers toward the screen while prying to separate the sensor from the screen.
-
-
-
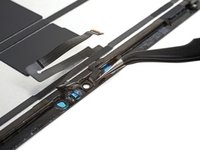
Slide an opening tool under the microphone to separate its adhesive.
-
Pry up to separate the microphone from the screen.
-
-
-
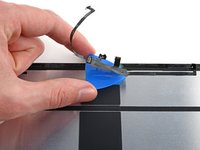
Slide an opening pick under the LiDAR sensor assembly cable to separate it from the screen.
-
-
Tool used on this step:Tesa 61395 Tape$8.95
-
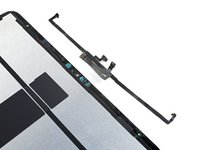
Align the LiDAR sensor assembly on your replacement screen.
-
Use Tesa tape, or similar double-sided tape, to secure the cables to the screen.
-
Use E6000 adhesive, or similar adhesive, to secure the sensors to their cutouts on the screen.
-
-
-
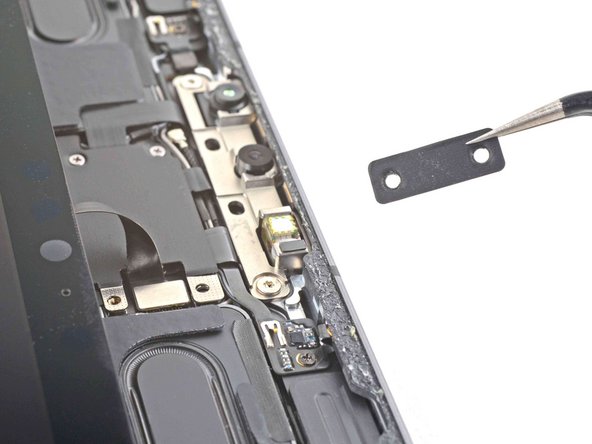
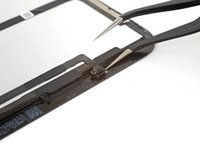
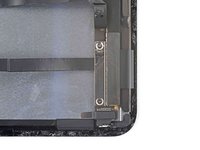
The display cable connectors are located under a bracket near the bottom right corner of the screen.
-
-
-
Slide an opening pick under the non-removable display cable to loosen it from the bracket.
-
-
-
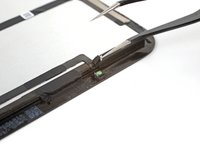
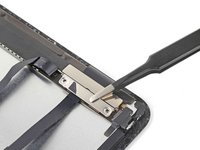
Use a Phillips screwdriver to remove the two 1.2 mm screws securing the display cable bracket.
-
-
-
Use the flat end of a spudger to pry up and disconnect the narrow display cable.
-
Remove the narrow display cable. Set it aside for reassembly.
-


Compare your new replacement part to the original part—you may need to transfer remaining components or remove adhesive backings from the new part before installing.
To reassemble your device, follow these instructions in reverse order.
Take your e-waste to an R2 or e-Stewards certified recycler.
Repair didn’t go as planned? Try some basic troubleshooting, or ask our iPad Pro 11" 3rd Gen Answers community for help.
Cancel: I did not complete this guide.
15 other people completed this guide.

Team

5 Guide Comments
Is it possible to replace the LiDAR sensor assembly w/o losing the current Face ID configuration or is the original flex cable necessary to restore the function?
The author did not address the rare earth magnets. Heap replacement screens do not come with either the ribbon cables (you covered this which is really important) and your iPad also has two small bar magnets comprised of two rare earth magnets each under the right bezels. They have specific polarization that will engage and hold down any flip cover case. If you remove them from your broken display with markings first, good, if one went flying as with my shattered screen I found the poles aligned quite nicely using my case cover to mark orientation. —CM
The screw sizes/color coordinations are wrong, the 5 screws covering the screen ribbon and battery ribbon have 3 short screws and 2 long screws, the 2 long ones go up top and 3 short ones on bottom of cover plate.. and the upper lidar/ambient light ribbon cover the long screw goes up top and short screw on bottom of that cover plate.. the instructions color codes are exact opposite and this should be changed in instructions…. Annnnnd 500 for a %#*@ screen is flippin absurd wth is goin on ifixit I love u guys but this is starting to feel like a %#*@ apple store
Just successfully completed this morning. I marked the correct orientation and transferred the cover magnets from the old display to the new. If you have a FDM 3D printer, the print bed is great for heating up the screen. I placed the iPad on a pre-heated 90C printer bed for a couple of minutes and the adhesive came off very easily.