Introduction
Follow this guide to replace the screen on an iPad mini 5 Wi-Fi. You may need to do this if the screen is cracked or has stopped working.
This guide also shows how to transfer the original home button and magnetic sensor to the replacement part.
Note that only the iPad’s original home button assembly will be capable of Touch ID functionality. If you would like to maintain Touch ID functionality, you’ll need to transfer your original home button assembly to the new screen.
Some replacement screens don't come with a magnetic sensor installed. Without a magnetic sensor, the iPad won’t be able to sleep and wake when using a Smart Cover. It may also cause the power button to not be able to sleep and wake the iPad. AssistiveTouch may also lose its sleep and wake functionality. Without a magnetic sensor, holding down the power button to prompt the power off slider will still wake the screen. The home button will also still wake the screen.
Transferring the magnetic sensor requires advanced soldering skills. The magnetic sensor cable is soldered to the screen. Make sure to follow soldering safety procedures such as wearing eye protection, working in a well-ventilated area, and washing your hands with soap and water after soldering.
For your safety, discharge the battery below 25% before disassembling your device. This reduces the risk of a dangerous thermal event if the battery is accidentally damaged during the repair. If your battery is swollen, take appropriate precautions.
Some photos in this guide are from a different model and may contain slight visual discrepancies, but they won't affect the guide procedure.
What you need
-
-
If your display glass is cracked, keep further breakage contained and prevent bodily harm during your repair by taping the glass.
-
Lay overlapping strips of clear packing tape over the iPad's display until the whole face is covered.
-
Do your best to follow the rest of the guide as described. However, once the glass is broken, it will likely continue to crack as you work, and you may need to use a metal prying tool to scoop the glass out.
-
-
-
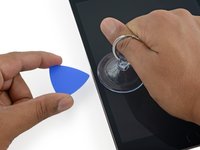
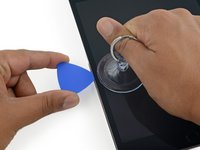
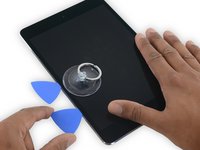
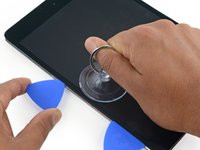
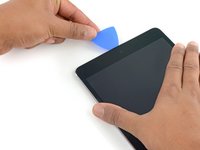
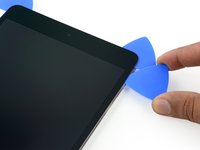
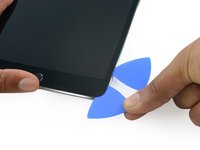
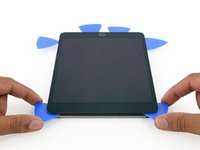
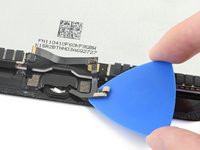
While holding the glass up with the suction cup, insert the point of an opening pick into the gap between the glass and body of the iPad.
“Don't insert the opening pick any deeper than the black bezel on the side of the display. Inserting the pick too far may damage the LCD.”
Unfortunately, you only know you have inserted it too far when you have, and you start seeing little bubble veins form between the glass screen and the LCD.
The adhesive can be very stiff/hard, and if pushing through it can result in the pick plunging into the LCD when the adhesive finally gives way.
Take your time, use alot of heat, and if you need to try and push the pick in, try and do so in a slicing motion along the edge, use the wide edge, or hold the pick so that your finger will hit the edge of the screen before the pick tip will pass the bezel.
Adhesive strips are only 1mm wide on sides. Up to 5mm wide top and bottom. I used the Isclack. Screen seemed ok bending without breaking. Worth looking for a photo of the replacement adhesive strips so you know what you have to separate. Be extra careful at the lower right corner where the cables are.
This is a failure of a guide as it doesn’t tell you to insert at a downward angle so you don’t potrude into the LCD… Now I have to spend more money to replace the screen as I pushed adhesive between the LCD and the screen even though I went no farther than a millimeter short of the screen...
can you open the right side if the left is too cracked to use a suction cup on?
This guide needs amending urgently.
You MUST NOT put the pick or whatever you are using more than 2mm under the sides of the screen, or you will cut through the adhesive tape securing the backlight assembly to the LCD glass.
This will push adhesive into the viewable area of the LCD and cause the backlight assembly to no longer be secured against the LCD fully.
I now need a new screen.
This line below from the guide is absolutely INCORRECT and will ruin your expensive display:
”Don't insert the opening pick any deeper than the black bezel on the side of the display.”
The black bezel is 5mm to 6mm wide; you MUST NOT insert anything to that depth or you will destroy your display. 2mm maximum!
thanks. will take this into account for my repair
Adab Abu -
I too damaged my display because of this absolute nonsense (The German version, which I used, still had this INCORRECT portion in it). I can't believe how long it took iFixit to update this, even though people have been reporting this for years on end. Sadly iFixit still haven't updated a variety of other things that are still at the very least high risk instructions. I just messaged them the other day, but they don't seem to care about or understand the remaining issues that this guide has. At least they updated one of the most severe things, but they just plainly told me 'I'm wrong' about the rest. I liked iFixit it so far, and I've worked on a variety of (difficult) repairs - but this experience was a very huge let down.
A few thoughts after opening a number of Mini 4’s.
1) if the display is warm enough you can squeeze the digitizer and LCD back together after a minor incursion with the opening pick and it will reseal.
2) I’ve started going in at the top just to the right of the camera (I use an iFlex to get in then switch to a pick). Then I run down either side with my fingers choked up on the pick so there only a mm or 2 sticking out. Usually after running down one side, I can get the display open enough to get the pick in behind the LCD when I do the other side
-
-
-
Reheat and reapply the iOpener to the left edge for a few minutes.
If your iPad is cold, consider leaving the iOpener on for longer than 5 minutes. The aluminum housing is a very large thermally dissipating mass and will quickly cool off the glass and make you have to start over and wait the 10 minutes to reheat. There’s a very slim window in which you’re able to insert the pick into the glass adhesive before it solidifies once again. I’ve been fighting with it for like 20 minutes following these instructions and it’s not working. You really need to leave it for longer than just 5 minutes to get the back housing hot too.
Heat is essential. I used a 3d printer’s heated set at 65 degrees. Chris Storer’s stip above saved me as you really need to let it sit for quite a while to soften the adhesive. Since I was doing a battery change, I heated both sides as the aluminum back is a huge heatsink that really sucks up the heat. Don’t try forcing it; if the suction cup isn’t pulling a gap in the screen, leave it on the heater for additional time.
Love the 3d printer idea, I hadn’t thought of that! I have used a heat gun as well but you have to be very careful to not use too much heat. Also watch for inserting the pick too far, it is really easy to delaminate glass from the display!
russ -
-
-
-
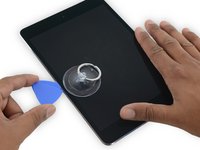
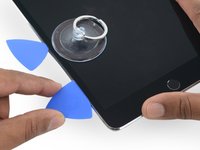
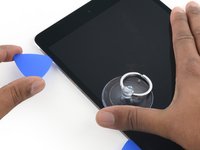
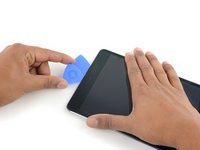
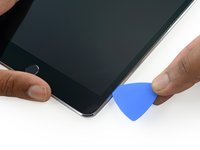
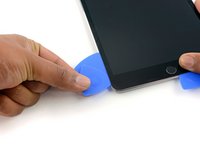
Leave the opening pick in the iPad slightly past the front-facing camera.
-
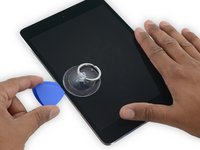
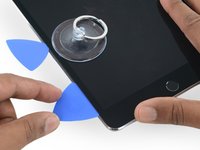
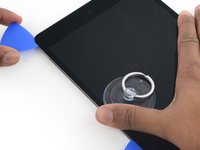
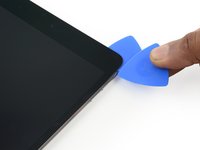
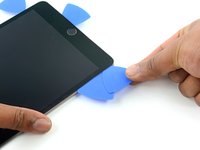
Take a second pick and insert it to the left of the camera, where the first pick just was. Slide it back to the corner to completely cut any remaining adhesive.
-
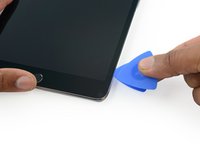
Leave the second pick in place to prevent the corner adhesive from re-sealing as it cools.
-
-
-
-
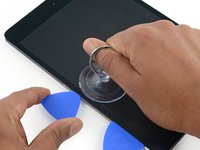
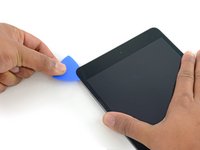
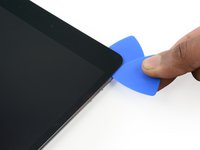
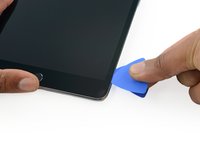
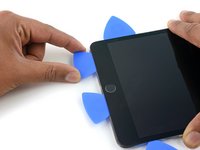
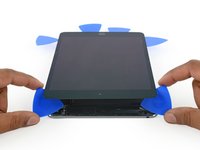
Twist the two picks at the top edge of the iPad to break up the last of the adhesive holding the display assembly in place.
-
Lift the display from the top edge to open the device.
"Twist the two picks at the top edge of the iPadTwist the two picks at the top edge of the iPad "
When I did this twisting motion, and I thought I was being gentle, one of the picks cracked nearly in half. That adhesive is very strong! I probably did not cut into it far enough before applying the twisting to open the screen.
-
-
-
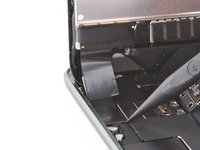
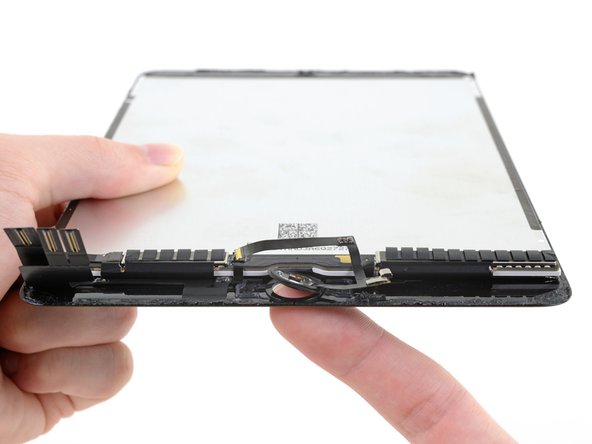
To avoid stressing any cables, hold the screen perpendicular to the frame.
-
-
Tool used on this step:Magnetic Project Mat$19.95
-
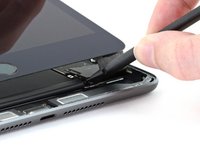
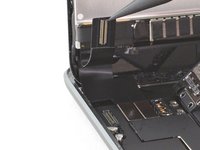
Use a Phillips screwdriver to remove the two 1.3 mm screws securing the display cable bracket.
-
-
-
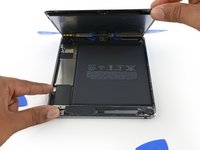
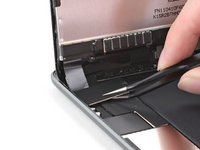
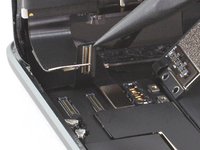
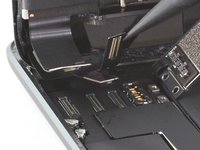
Insert the flat end of a spudger under the display cable bracket and lift up to disconnect the battery press connector from the logic board.
The guide says "Don't try to remove the display cable bracket as it's attached to the battery by the battery cable.Don't try to remove the display cable bracket as it's attached to the battery by the battery cable.".
Well then, please explain how to attach a new battery since my battery does not come with an attached display cable bracket. This point caused me a lot of confusion and finally I removed the bracket and installed it on the new battery. But the question remains about exactly what is the required steps.
The bracket has conductive material fixed to the underside but the part that goes on the battery connector has a separate piece of adhesive which may or may not serve as to insulate. Without any available guidance, I installed the battery cable and the top of it rests on the conductive material, apparently providing a ground bond between the other 3 connectors and the bracket.
More information should be provided here.
Hello! I was just wondering if you also took the bracket off of the battery cable, and it still worked for you, correct? I was scared that i tore it off or something, but it appears that it can be detached, but you can't just pull it off, you need to do so very carefully. Also, do you think that the ipad wouldn't power up properly, if it were missing that bracket? Thanks, in advance, for your assistance.
-
-
Tool used on this step:Tweezers$4.99
-
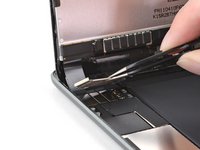
Use a pair of tweezers to pull the display cable bracket's clip out from under the frame's edge.
-
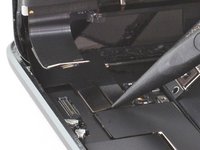
Rotate the display cable bracket toward the battery.
-
-
-
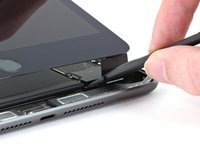
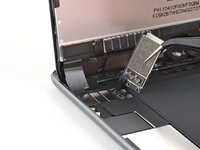
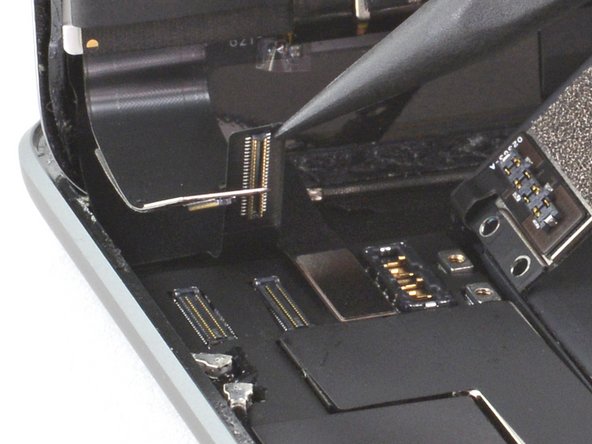
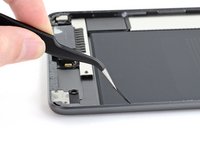
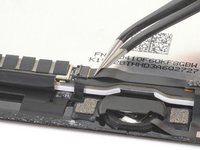
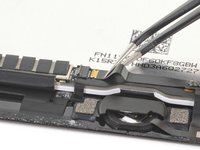
Use the pointed end of a spudger to disconnect the digitizer press connector from the logic board.
-
-
-
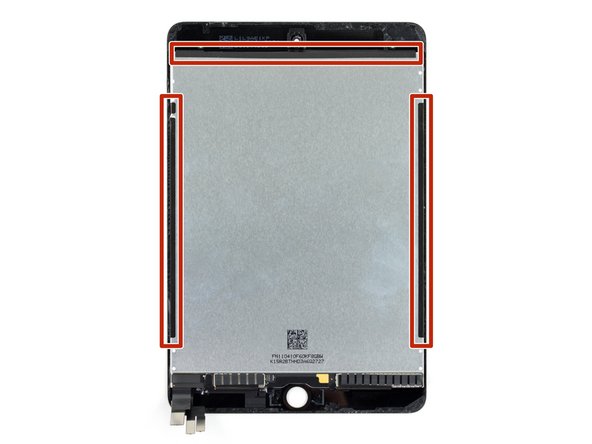
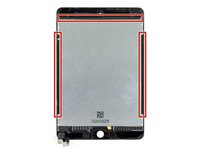
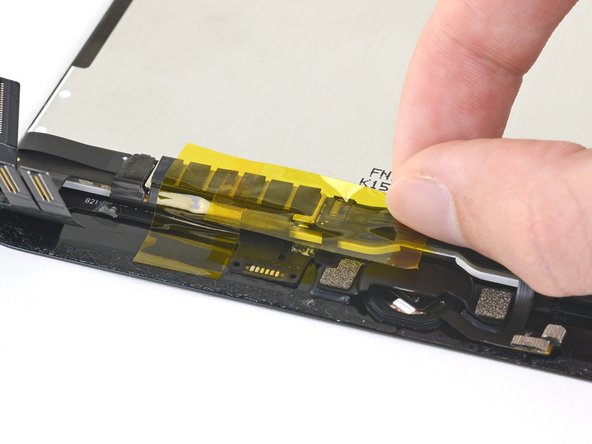
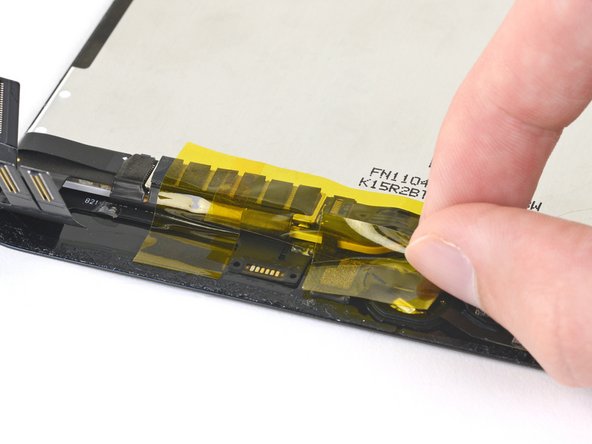
Don't remove the black tape on the left, right, and upper edges of the display. These hold the display to the front glass.
-
-
Tool used on this step:Tweezers$4.99
-
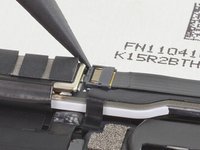
Use a pair of tweezers to remove the sticker covering the home button assembly ZIF connector.
-
-
-
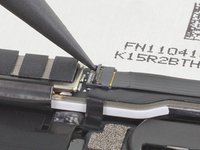
Use the pointed end of a spudger, an opening tool, or your fingernail to flip up the small, hinged locking flap on the home button assembly ZIF connector.
-
-
-
Use a pair of tweezers to pull the home button assembly cable out of the ZIF connector.
-
-
-
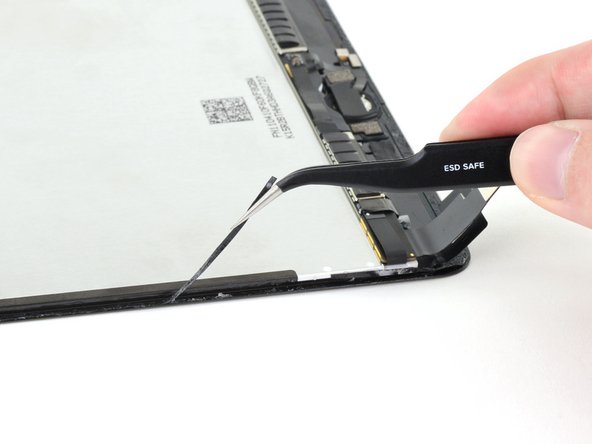
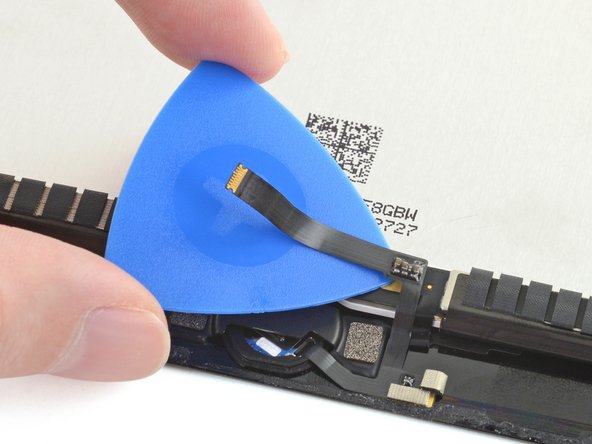
Use an opening pick to separate the home button assembly cable from the screen.
-
-
Tool used on this step:E6000 Adhesive Glue$2.99
-
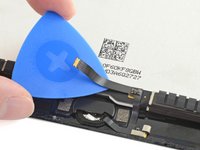
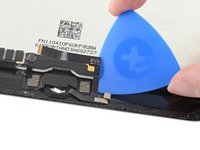
Use a plastic opening tool to pry the home button bracket off of the screen.
-
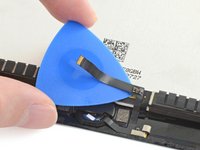
Use a pair of tweezers to lift and remove the home button bracket.
-
Use a small clamp to hold the bracket to the screen during the curing duration.
-
-
-
Heat an iOpener and apply it to the bottom of the screen for two minutes to weaken the adhesive holding the home button in place.
-
-
-
Slowly push the home button up and out through the back of the screen.
-
-
-
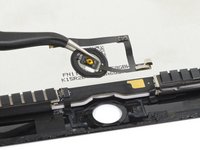
Lift and remove the home button assembly.
-
Peel the gasket off of the home button. Then, thread it past the cable to remove it.
-
Apply a replacement gasket to the home button.
-
Rotate the home button so that the home button cable sits where it was before disassembly. Make sure the home button cable can be inserted into its ZIF connector.
-
Center the home button so that it fits into its slot in the screen. Then, press down firmly on the gasket to adhere it to the screen.
-
-
Tool used on this step:Tweezers$4.99
-
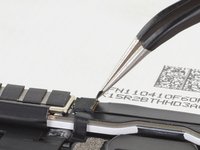
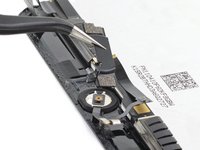
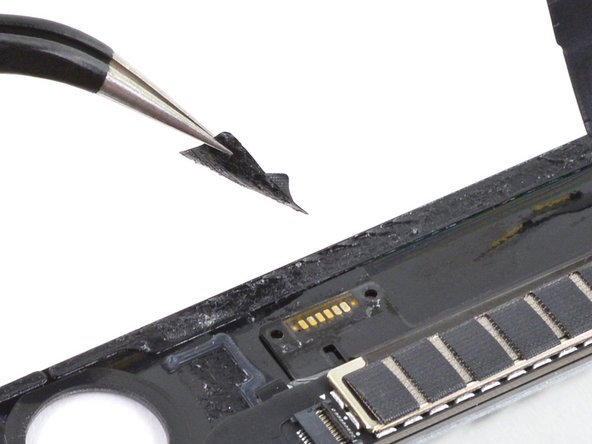
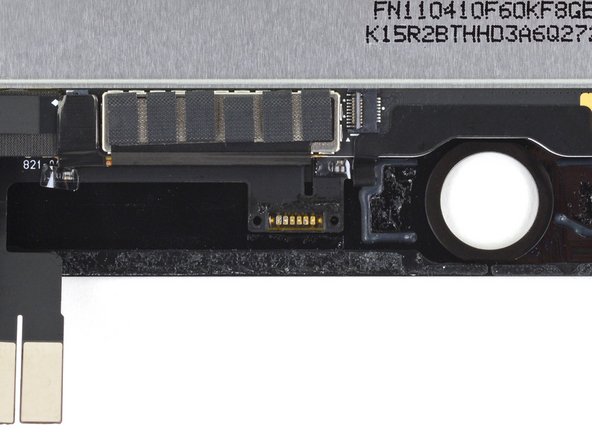
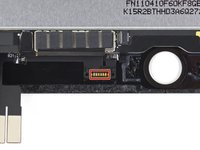
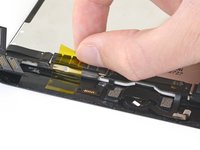
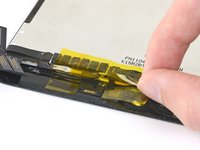
Use a pair of tweezers to remove the sticker covering the magnetic sensor solder pads.
-
-
-
In the next steps, you'll desolder the six solder pads securing the magnetic sensor to the screen.
-
-
-
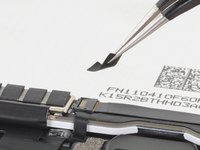
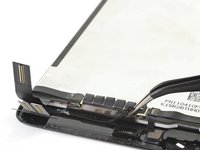
Apply polyimide tape to the area around the magnetic sensor solder pads to protect the components from heat.
-
-
-
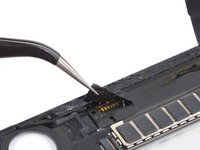
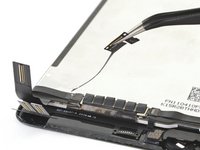
Use a soldering iron or hot air gun to apply heat evenly to the six magnetic sensor solder pads.
-
-
-
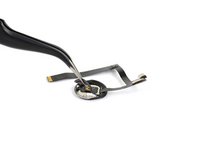
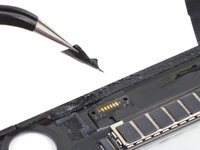
When the solder on the solder pads is melted, use a pair of tweezers to separate the magnetic sensor from the screen.
-
When the area is cool enough to touch, remove the polyimide tape.
-
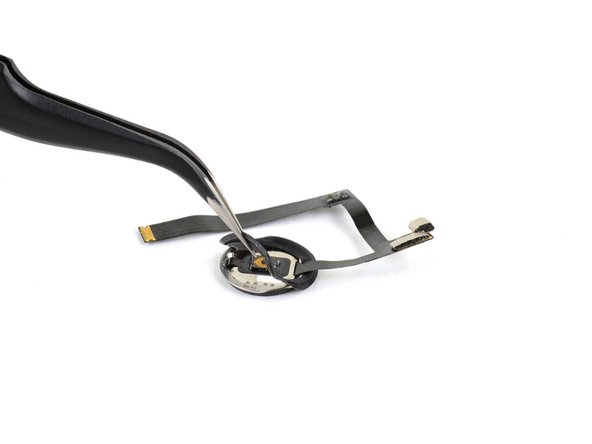
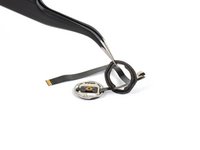
Use a pair of tweezers to remove the magnetic sensor cable.
-
-
-
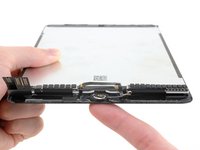
After removing the home button and magnetic sensor, only the screen remains.
-


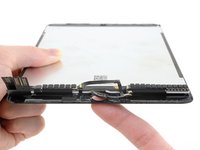


Compare your new replacement part to the original part—you may need to transfer remaining components or remove adhesive backings from the new part before installing.
To reassemble your device, follow these instructions in reverse order.
Take your e-waste to an R2 or e-Stewards certified recycler.
Repair didn’t go as planned? Try some basic troubleshooting, or ask our iPad mini 5 Answers community for help.
Cancel: I did not complete this guide.
12 other people completed this guide.

4 Comments
is it possible to buy the screen with the magnetic sensor already on it?
Yes, if it is in stock.
hello sir
I want to replace my ipad with another apple products
its possible or no ?
Thanks so much for this. I had a variable response touch screen issue following a Tech repair (2 blown capacitors) and I suspected that the screen connectors had not been firmly reseated during reassembly.
Using this excellent tutorial I was easily able to remove the screen and carefully reseat the connectors.
I’ve been using it for a while now with no further issues.
Thanks again, great service!