
iPhone 11 Pro Screen Replacement

Introduction
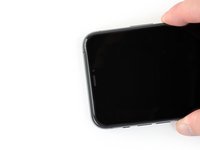
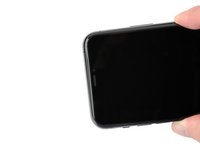
Go to step 1If your iPhone 11 Pro screen is cracked, not responding to touch, or not showing a picture when your phone is powered on, use this guide to restore your iPhone to working order with a new screen, a.k.a. display assembly.
The combined earpiece speaker + sensor assembly affixed to the back of the display is paired to your individual iPhone from the factory, so you must transfer it from your old display to your new one during any display replacement. It contains the flood illuminator, which is part of the biometric Face ID security feature. If it is damaged or replaced, Face ID will cease to function, so take extra care not to damage any of these components during this procedure. If damaged, only Apple or an Apple-authorized technician can restore Face ID function.
Note: True Tone functionality is disabled after a screen replacement, even when using an original Apple screen. Additionally, your iPhone may temporarily show a warning about the “genuineness” of the display.
What you need
Fix Kit
This kit contains all the parts and tools needed to complete this guide.

Parts


Tools


Show more…
-
-
Power off your iPhone before beginning disassembly.
-
Remove the two 6.7 mm-long pentalobe screws at the bottom edge of the iPhone.
-
-
-
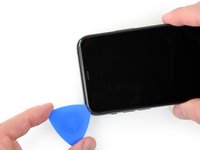
Measure 3 mm from the tip and mark the opening pick with a permanent marker.
Got to step 2 and realized the fix kit doesn't include an opening pick! Looks like a guitar pick, and I have those lying around. Is that expected? Looks like the pick is used in many steps below. There's a little blue crowbar that isn't mentioned in the instructions. Perhaps that replaces the opening pick?
Hi! I can't see which guide you were using when writing this comment. Can you reply here with which guide and fix kit you used?
I see you posted this in Meta. I hope it's resolved soon! In the meantime, a guitar pick may work well enough for your repair.
what fix kit?
My fix kit didn't include an opening pick either
My AliExpress refurbished screen came with a pick that has a coin-like circle that pops out, so no modification was necessary
It's not an Ifixit KIT if it doesn't include everything. You'll need to order the opening pic separately. Or head to Walmart like myself and look for guitar pics. Hopefully, this will work just as well.
No pick in mine as well. It’s really not clear that you have to order this separately when ordering an IPhone SE 202/2022 screen repair kit. Is this the case?
Frustrated, I ordered a compact package where everything was encapsulated. Useless suction tools could not separate the screen. If it is unable to decouple the screen, then why sucking suction tools you have provided.
For my kit the triangle pick was stuck inside the box with the screen not with the other tools maybe it's also there for you
Y’all are getting far, FAR too detailed with some of this stuff…. Measuring and marking the pick that you won’t actually use to open the device?!? lol that’s kinda funny. Just heat it up, grab a spudger, and the back just pops right off! The iFixit tech need to stick to the KISS method more often, you know KEEP IT SIMPLE STUPID!!! Like l, for reals, I’ve been doing this stuff for YEARS and using iFixit guides regularly and this is just ridiculous at this point!
Will the phone still work if the sensor assembly on the back of the screen is damaged?
-
-
-
Lay overlapping strips of clear packing tape over the iPhone's screen until the whole face is covered.
-
If you can't get the suction cup to stick in the next few steps, fold a strong piece of tape (such as duct tape) into a handle and lift the screen with that instead.
-
-
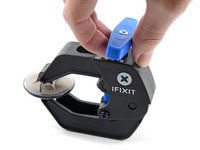
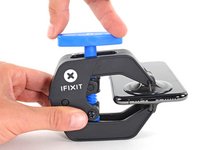
Tool used on this step:Clampy - Anti-Clamp$24.95
-
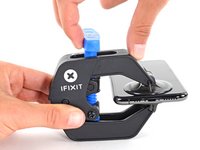
Pull the blue handle backwards to unlock the Anti-Clamp's arms.
-
Slide the arms over either the left or right edge of your iPhone.
-
Position the suction cups near the bottom edge of the iPhone—one on the front, and one on the back.
-
Squeeze the cups together to apply suction to the desired area.
-
-
-
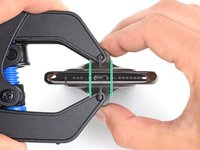
Heat an iOpener and thread it through the arms of the Anti-Clamp.
-
Fold the iOpener so it lays on the bottom edge of the iPhone.
-
Wait one minute to give the adhesive a chance to release and present an opening gap.
-
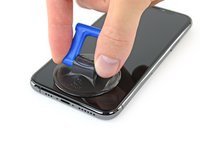
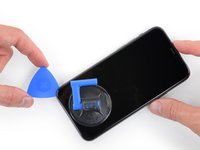
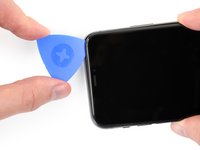
Insert an opening pick into the gap under the screen and the plastic bezel, not the screen itself.
-
Skip the next three steps.
If the display is separating from the plastic, and the plastic is not rising in the middle, then you have forgotten step 1! The screws that hold the plastic to the bottom are still there! Stop fighting it, and go back to step 1! I made this mistake on my livestreamed repair on my youtube channel, somehow I managed to get it out with the screws attached, hopefully my display works! I gave up on the anti-clamp, used a hand suction on the bottom right corner with heat gun, used pry tool on the bottom right corner, and used another spudger along the middle which I guess bent the holes the screws go in so that it released the front. I also skipped over the slide action that is necessary. Also the adhesive on my phone was so intense it was a continual battle. Hopefully my display works!
-
-
-
Use a hairdryer or heat gun or prepare an iOpener and apply it to the lower edge of the iPhone for about a minute in order to soften up the adhesive underneath.
I used a regulated heating gun, 180 degree celsius, 60 percent airstream, moving constantly around the edges for two minutes - works great for me.
-
-
-
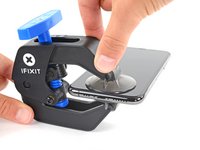
Pull up on the suction cup with firm, constant pressure to create a slight gap between the front panel and rear case.
-
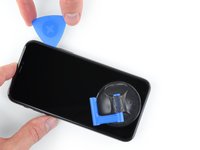
Insert an opening pick into the gap under the screen and the plastic bezel, not the screen itself.
-
-
-
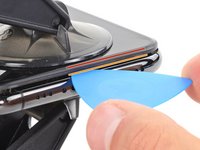
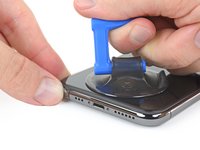
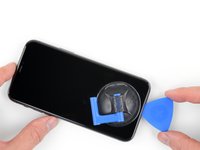
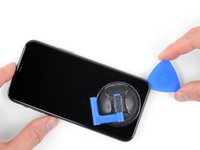
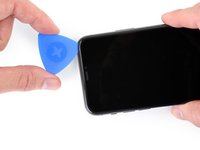
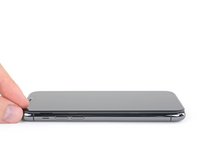
Slide the opening pick around the lower left corner and up the left edge of the iPhone, slicing through the adhesive holding the display in place.
-
-
-
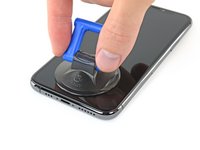
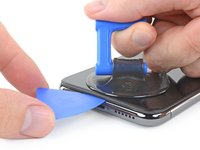
Pull on the small nub on the suction cup to remove it from the front panel.
-
-
-
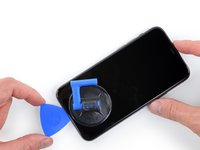
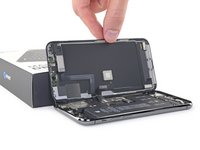
Open the iPhone by swinging the display up from the left side, like the back cover of a book.
-
Lean the display against something to keep it propped up while you're working on the phone.
-
-
Tool used on this step:Magnetic Project Mat$19.95
-
Remove two 1.3 mm long Y000 screws securing the battery cover bracket.
German translation says "3 screws” but there are only 2.
-
-
-
Use a spudger or a clean fingernail to pry the battery connector up from its socket on the logic board.
-
Bend the connector slightly away from the logic board to prevent it from accidentally making contact with the socket and providing power to the phone during your repair.
-
-
-
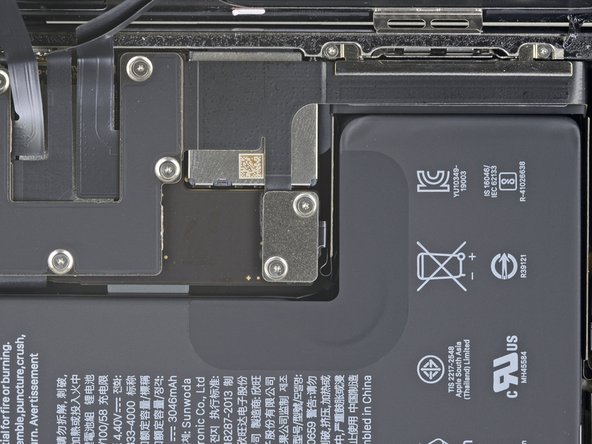
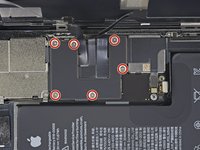
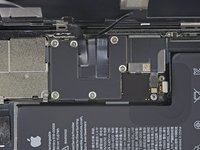
Use a Y000 driver to remove six 1.3 mm screws securing the logic board cover bracket.
-
-
-
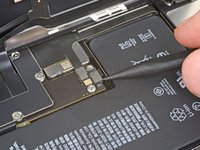
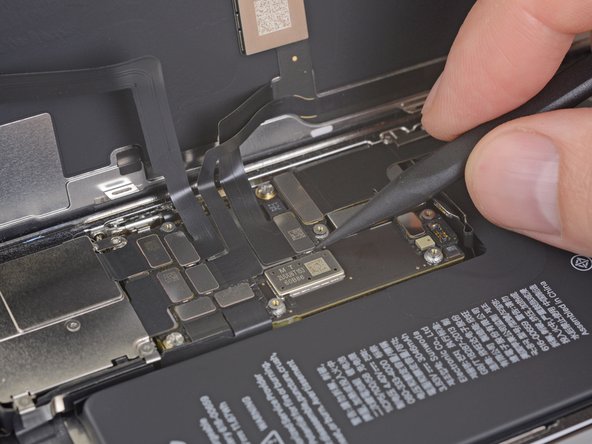
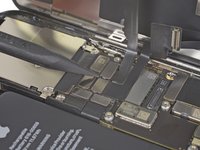
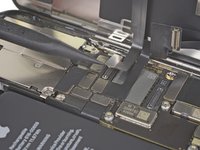
Use a spudger or a fingernail to disconnect the OLED panel cable connector.
My screen never activates upon reassembly, despite the phone vibrating to various inputs etc. I guess I damaged the cable? By pins, do you mean the pins of the cable damage, or the pins on the logic board damage? Need to know what to do.
-
-
-
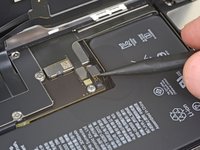
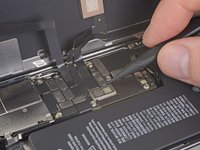
Use a spudger or a fingernail to disconnect the front sensor assembly cable connector.
-
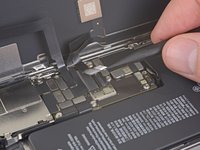
Use a spudger or a fingernail to disconnect the digitizer cable connector.
-
-
-
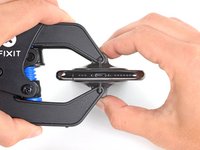
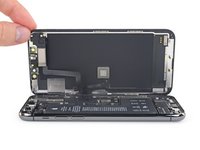
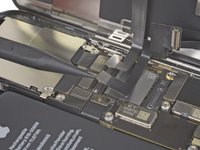
Remove the display assembly.
-
-
-
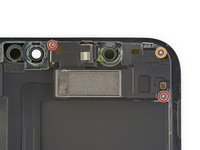
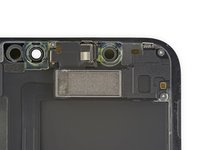
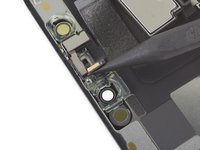
Use a Y000 driver to remove the three screws securing the speaker/sensor assembly to the back of the display:
-
Two 1.3 mm screws
-
One 1.9 mm screw
Note that the top left screw has a smaller head than the other 3! You’ll learn like I did if they get mixed up & its really hard to get the other 1.3 mm screw to fit.
Thank you Andrew. That saved me!
-
-
-
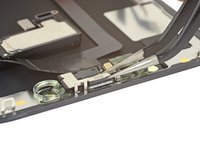
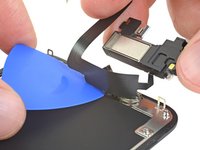
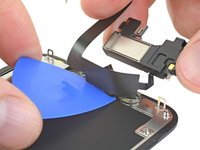
Use the point of a spudger to gently pry up the top edge of the speaker.
-
Flip the speaker assembly over—down and away from the top edge of the display.
-
-
-
Use a hairdryer or heat gun or prepare an iOpener and apply it to the top front of the display for 1-2 minutes, in order to soften the adhesive securing the sensors.
-
-
-
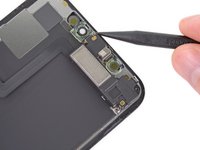
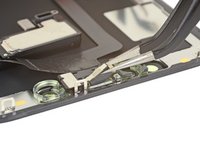
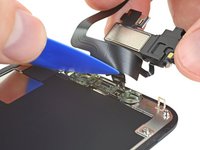
Use the point of a spudger to lift and separate the microphone from its notch in the front panel.
-
-
Tool used on this step:Tweezers$4.99
-
Use tweezers to wiggle the ambient light sensor and lift it from its notch in the display.
-
-
-
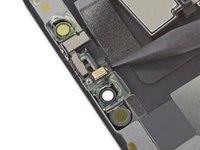
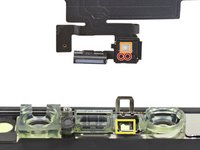
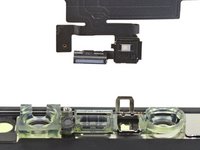
If you successfully removed the entire ambient light sensor, as shown in the first photo, continue to the next step below.
-
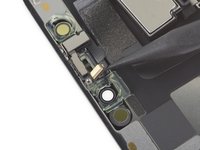
If the white diffuser strip detached and remains embedded in the display, as shown in the second photo, you will need to carefully lever it out along the top edge using a thin blade or pry tool. Re-applying heat first may make this task a bit easier.
-
-
-
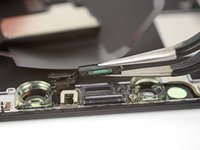
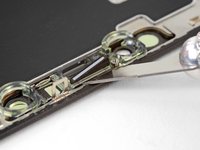
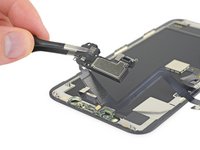
Remove the earpiece speaker and front sensor assembly.
-
Proximity sensor
-
Flood illuminator
-
The module must be positioned so that these components are not obstructed by any adhesive.
-


Compare your new replacement part to the original part—you may need to transfer remaining components or remove adhesive backings from the new part before installing.
To reassemble your device, follow the above steps in reverse order.
Take your e-waste to an R2 or e-Stewards certified recycler.
Repair didn’t go as planned? Check out our iPhone 11 Pro Answers community for troubleshooting help.
Cancel: I did not complete this guide.
99 other people completed this guide.


9 Comments
Scusate ma perche dovrei spendere 1-2 ore di tempo piu il costo del display a “soli” euro 500,00 (ma ti fanno il resto di € 0,05!, ndr) quando la APPLE “UFFICIALE” te lo ripara con 300euro pezzi , attrezzi e tempo di lavoro : TUTTO INCLUSO !!!!!
Comunque guida ben fatta!!!
UMM, Maybe you can tell customers that they will forever have a notification pop up saying “Unknown Part, not an original part installed” so that they can make an informed decision if they want to install or not.
Fixed it. Thank you.
Display Daten für True Tone müssen mit einem Programmer aufs neue Display übertragen werden. Das sollte allgemein bekannt sein. Und dann entferne ich die Ohrhörer/Lautsprecher/Sensor Einheit komplett mit der Kunststoffhalterung vorsichtig vom Display und baue die so auf dem neuen Display wieder ein. Mir ist noch nie was kaputt gegangen. Die Fummelei mit dem Raushebeln tue ich mir nicht an. Viel zu riskant.
On the back of the iFixit iPhone 11 Pro replacement screen, there's a little sticker with a QR code attached to... whatever that connector piece is in the middle. I forgot to remove that before buttoning everything up, but everything seems to work fine. Does anyone know if that could be issue? Only thing I could see is if it's supposed to contact metal-to-metal for heat dissipation.
completed this repair and a month later the screen is black, but working. The glass is damaged so it’s possible that has something to do with it but I’ve also heard it’s an ios16 issue with charging. same thing happened when I replaced an iPhone 13 screen. Any ideas on what’s going on?
Thanks for this - it was helpful. My screen was shattered so even do the tape trick the suction cup only pulled up the cracked glass and no the bezel edge. If you have the same issue as me, its still doable, but an extra step as the screen comes off in one piece and its much harder to work the pick around the edge as you are seperating the glass from the bezel, and then have to remove the bezel seperately after. I had to pry it up carefully with a spudger to get a gap between the bezel and lower case to slide my pick in and seperate the bezel from the adhesive. Hopefully this helps someone who was in the same situation as me.
I am having difficulty accessing the disassembly steps to remove all of the components from the rear case. This web site stops at step 1. I am not sure how to access the rest of the steps. Can you help. Domingo Rochin
Mingo59 - Reply