
iPhone 16 Pro Max Taptic Engine Removal

Prerequisite Only
This guide is only intended to be used as a prerequisite for other guides. It's incomplete by itself.

What you need

  1. iPhone 16 Pro Max Taptic Engine Removal, Remove the Taptic Engine cover: step 1, image 1 of 2 iPhone 16 Pro Max Taptic Engine Removal, Remove the Taptic Engine cover: step 1, image 2 of 2
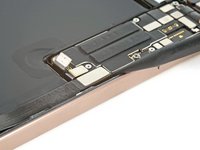
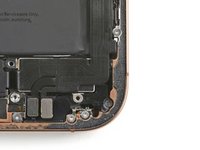
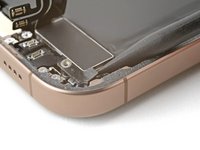
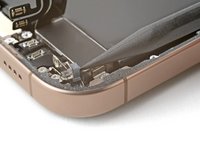
    • Use a Phillips screwdriver to remove the three screws securing the Taptic Engine cover:

    • One 2.9 mm‑long screw

    • One 1.3 mm‑long screw

    • One 2.4 mm‑long screw

  2. iPhone 16 Pro Max Taptic Engine Removal: step 2, image 1 of 3 iPhone 16 Pro Max Taptic Engine Removal: step 2, image 2 of 3 iPhone 16 Pro Max Taptic Engine Removal: step 2, image 3 of 3
    • Use tweezers or your fingers to lift the top edge of the Taptic Engine cover.

    • Once the bottom edge unlatches from the frame, remove the Taptic Engine cover.

  3. iPhone 16 Pro Max Taptic Engine Removal, Loosen the lower assembly cable: step 3, image 1 of 2 iPhone 16 Pro Max Taptic Engine Removal, Loosen the lower assembly cable: step 3, image 2 of 2
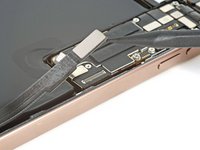
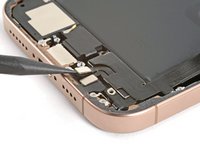
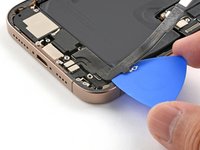
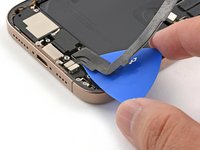
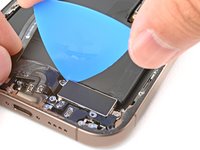
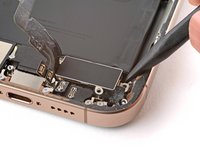
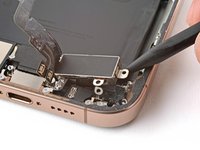
    • Use the point of a spudger to pry up and disconnect the lower assembly cable from the logic board.

  4. iPhone 16 Pro Max Taptic Engine Removal: step 4, image 1 of 3 iPhone 16 Pro Max Taptic Engine Removal: step 4, image 2 of 3 iPhone 16 Pro Max Taptic Engine Removal: step 4, image 3 of 3
    • Use the point of a spudger to pry up and disconnect the two connectors near the bottom right edge of the frame.

  5. iPhone 16 Pro Max Taptic Engine Removal: step 5, image 1 of 2 iPhone 16 Pro Max Taptic Engine Removal: step 5, image 2 of 2
    • Remove the two screws securing the lower assembly cable:

    • One 1.0 mm‑long tri-point Y000 screw

    • One 1.3 mm‑long Phillips screw

  6. iPhone 16 Pro Max Taptic Engine Removal: step 6, image 1 of 1
    • Use a hair dryer to heat up the lower assembly cable section on top of the Taptic Engine until it's hot to the touch.

  7. iPhone 16 Pro Max Taptic Engine Removal: step 7, image 1 of 3 iPhone 16 Pro Max Taptic Engine Removal: step 7, image 2 of 3 iPhone 16 Pro Max Taptic Engine Removal: step 7, image 3 of 3
    • Slide an opening pick under the lower assembly cable to separate it from the Taptic Engine.

    • Carefully bend the cable out of the way so you can access the Taptic Engine.

  8. iPhone 16 Pro Max Taptic Engine Removal, Remove the Taptic Engine: step 8, image 1 of 1
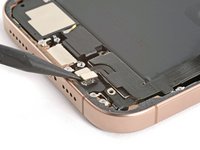
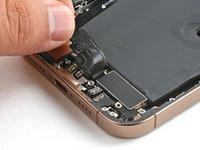
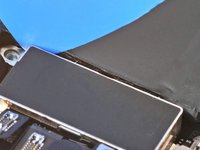
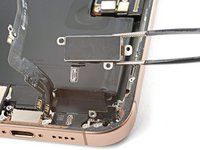
    • Use a Phillips screwdriver to remove the 2.1 mm‑long screw securing the Taptic Engine.

  9. iPhone 16 Pro Max Taptic Engine Removal: step 9, image 1 of 2 iPhone 16 Pro Max Taptic Engine Removal: step 9, image 2 of 2
    • Use the point of a spudger to pivot the corner bracket up.

  10. iPhone 16 Pro Max Taptic Engine Removal: step 10, image 1 of 3 iPhone 16 Pro Max Taptic Engine Removal: step 10, image 2 of 3 iPhone 16 Pro Max Taptic Engine Removal: step 10, image 3 of 3
    • Slide the tip of an opening pick along the top edge of the Taptic Engine to separate the plastic buffer strip adhered to it.

  11. iPhone 16 Pro Max Taptic Engine Removal: step 11, image 1 of 3 iPhone 16 Pro Max Taptic Engine Removal: step 11, image 2 of 3 iPhone 16 Pro Max Taptic Engine Removal: step 11, image 3 of 3
    • Use the point of a spudger to pry up the Taptic Engine.

    • Be careful not to pry against the battery.

    • Remove the Taptic Engine.

Finish Line

Arthur Shi

Member since: 01/03/18

283,026 Reputation

587 Guides authored

Team

iFixit Member of iFixit

Staff

118 Members

19,533 Guides authored

0 Comments

Add Comment

View Statistics:

Past 24 Hours: 2

Past 7 Days: 2

Past 30 Days: 31

All Time: 36