Introduction
For an easier repair, use our fix kit and follow this shorter guide to replace your iPhone’s entire screen.
For more advanced fixers, this guide will help you replace only the iPhone SE 2020 LCD and digitizer assembly (a.k.a. the bare “front panel”). This requires you to transfer several components from your original screen to the new one before installing it—including the front-facing camera, earpiece speaker, LCD shield plate, and home button assembly.
For all screen/display repairs, it's important to carefully transfer the original home/Touch ID sensor onto the new display in order for it to function. The solid-state home button is paired to its original logic board by Apple, so replacing it will render it unusable.
What you need
-
-
Remove the two 3.5 mm pentalobe screws on the bottom edge of the iPhone.
-
-
-
Measure 3 mm from the tip and mark the opening pick with a permanent marker.
-
-
-
If your display glass is cracked, keep further breakage contained and prevent bodily harm during your repair by taping over the glass.
-
Lay overlapping strips of clear packing tape over the iPhone's display until the whole face is covered.
-
If the broken glass makes it difficult to get a suction cup to stick in the next few steps, try folding a strong piece of tape (such as duct tape) into a handle and lifting the display with that instead.
-
-
Tool used on this step:Clampy - Anti-Clamp$24.95
-
Pull the blue handle backwards to unlock the Anti-Clamp's arms.
-
Slide the arms over either the left or right edge of your iPhone.
-
Position the suction cups near the bottom edge of the iPhone just above the home button—one on the front, and one on the back.
-
Squeeze the cups together to apply suction to the desired area.
-
-
-
Heat an iOpener and thread it through the arms of the Anti-Clamp.
-
Fold the iOpener so it lays on the bottom edge of the iPhone.
-
Wait one minute to give the adhesive a chance to release and present an opening gap.
-
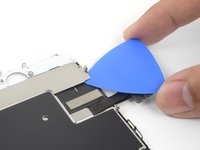
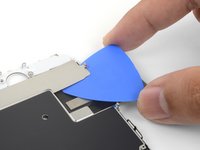
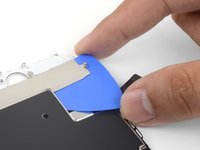
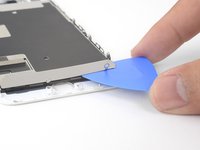
Insert an opening pick into the gap.
-
Skip the next three steps.
-
-
-
Heating the lower edge of the iPhone will help soften the adhesive securing the display, making it easier to open.
-
Use a hairdryer or prepare an iOpener and apply it to the lower edge of the phone for about 90 seconds in order to soften up the adhesive underneath.
-
-
-
Apply a suction cup to the lower half of the front panel, just above the home button.
-
-
-
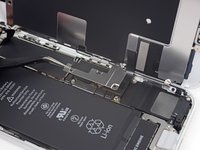
Tool used on this step:Magnetic Project Mat$19.95
-
Remove four Phillips screws securing the lower display cable bracket to the logic board, of the following lengths:
-
Two 1.3 mm screws
-
Two 2.8 mm screws
-
Remove the bracket.
-
-
-
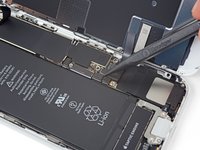
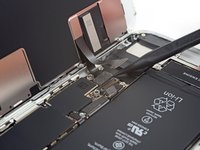
Use the point of a spudger to pry the lower display connector out of its socket.
-
-
-
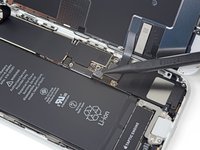
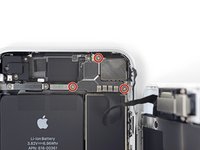
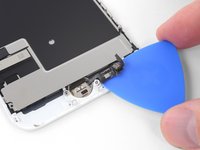
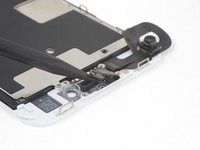
Remove the four Y000 screws securing the bracket over the home/Touch ID sensor:
-
One 1.2 mm screw
-
Three 1.3 mm screws
-
Remove the bracket.
-
-
-
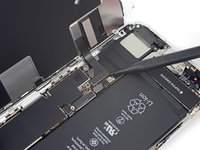
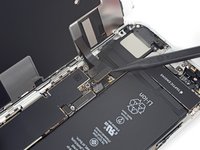
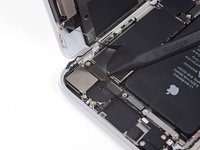
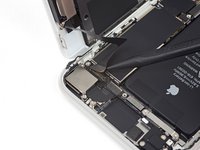
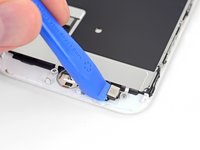
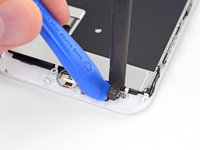
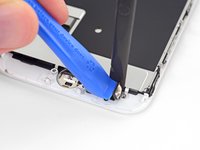
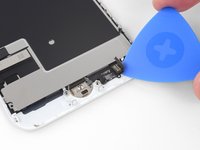
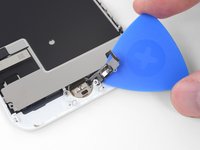
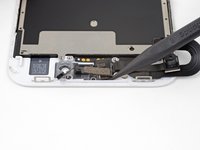
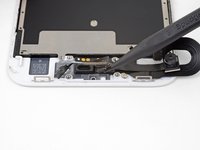
Use an opening tool to pry under the left edge of the home button cable connector to disconnect it from its socket.
-
-
-
Flip the display assembly over. Use a hairdryer or prepare an iOpener and apply it to the lower edge of the display for about 90 seconds in order to soften up the adhesive underneath.
-
-
-
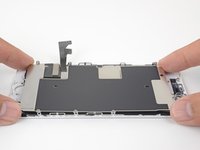
Remove the three Phillips screws securing the top earpiece bracket to the front panel:
-
Two 2.6 mm screws
-
One 1.8 mm screw
-
-
-
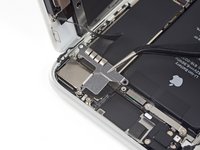
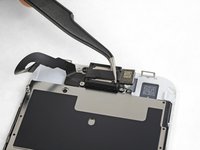
Lift the front facing camera up out of its socket and swing it out of the way.
-
-
-
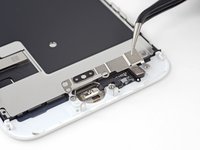
Remove the two Phillips screws securing the earpiece speaker to the front panel:
-
One 1.8 mm screw
-
One 2.3 mm screw
-
-
-
Heat an iOpener and apply it to the upper edge of the display to soften the adhesive holding the front camera and sensor assembly in place.
-
-
-
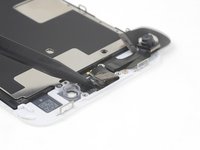
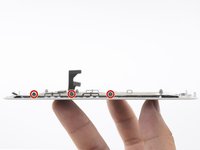
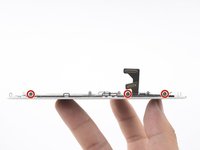
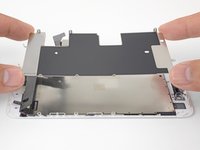
Remove the six 1.2 mm Y000 screws from both sides of the display.
-
-
-
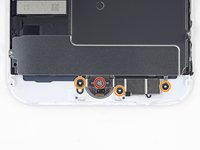
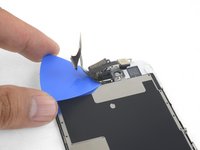
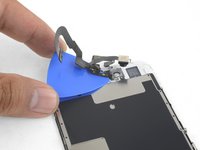
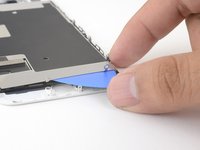
Heat an iOpener and lay it over the edge of the shield closest to the home button to soften the adhesive holding it in place.
-


Compare your new replacement part to the original part. You may need to transfer remaining components or remove adhesive backings from the new part before installing.
To reassemble your device, follow these instructions in reverse order.
Take your e-waste to an R2 or e-Stewards certified recycler.
Repair didn’t go as planned? Check out our iPhone SE 2020 Answers community for troubleshooting help.
Cancel: I did not complete this guide.
34 other people completed this guide.

4 Comments
Is anyone else experiencing low brightness after replacing the LCD? TrueTone to blame? Any known fix yet…
true tone is disabled after a screen swap. At least thats what I see online
Will the screen replacement disable anything? I know it's common to have true tone disabled, but will replacing it disable touch id on this device?
Currently this device will still allow Touch ID to work after a screen repair, but if you try to replace the home button you will lose Touch ID functionality. It will work ONLY as a home button if you replace Touch ID.
BRUCEL86 -