
Sony Handycam FDR-AX33 Panel Replacement

Notice: You are editing a prerequisite guide. Any changes you make will affect all 5 guides that include this step.

English
Italian

Translating step 8

Step 8
Sony Handycam FDR-AX33 Panel Replacement: step 0, image 1 of 3 Sony Handycam FDR-AX33 Panel Replacement: step 0, image 2 of 3 Sony Handycam FDR-AX33 Panel Replacement: step 0, image 3 of 3
  • Remove the 4 mm Phillips #00 screw above and to the right of the battery slot.

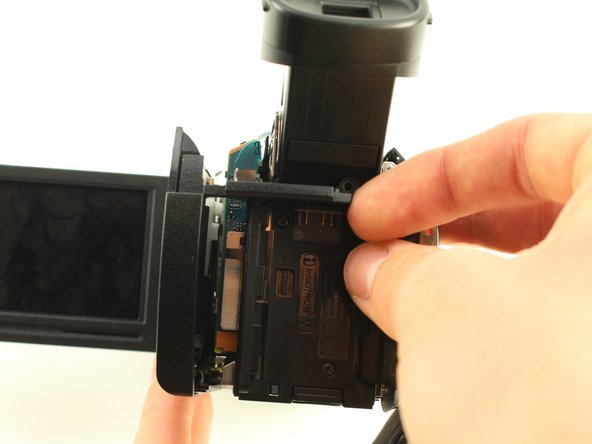
  • Pry the left panel out at an angle by pushing the plastic slat between the battery slot and the eyepiece.

  • Wiggle the left panel and pull it out gently.

  • The left panel can be hard to remove so make sure to apply a good amount of force, but be cautious to not harm yourself or the device.

Insert translation here

Insert translation here

Insert translation here

Insert translation here

Your contributions are licensed under the open source Creative Commons license.