Translating step 9
Step 9


-
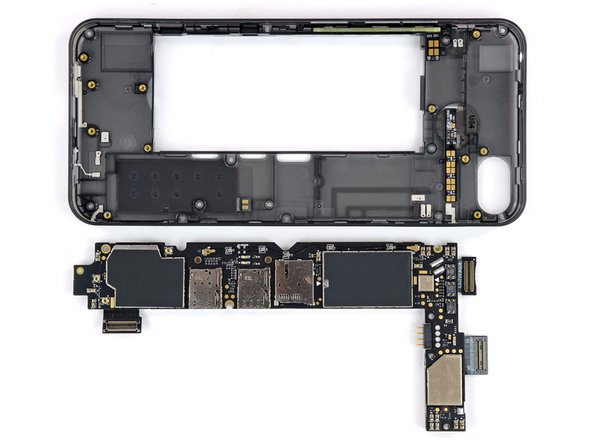
Removing the motherboard, we discover a bunch of spring contacts, which connect to the fingerprint sensor, the volume and power buttons, and a few antennas.
-
Pulling off the shields reveals:
-
Samsung KMRH60014A-B614 eMMC with 64 GB
-
Qorvo QM57508 RF front-end module
-
Qualcomm WTR3925 RF transceiver
-
Qualcomm WCN3680B WiFi module
| [* black] Removing the motherboard, we discover a bunch of spring contacts, which connect to the fingerprint sensor, the volume and power buttons, and a few antennas. | |
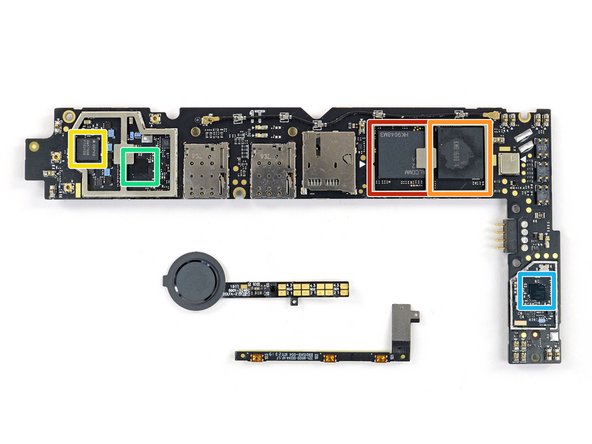
| [* black] Pulling off the shields reveals: | |
| [* red] [https://www.qualcomm.com/products/snapdragon-632-mobile-platform|Qualcomm Snapdragon 632 SoC|new_window=true] | |
| - | [* orange] |
| + | [* orange] Samsung KMRH60014A-B614 eMMC with 64 GB |
| [* yellow] Qorvo QM57508 RF front-end module | |
| [* green] Qualcomm WTR3925 RF transceiver | |
| [* light_blue] Qualcomm WCN3680B WiFi module |
Your contributions are licensed under the open source Creative Commons license.