Notice: You are editing a prerequisite guide. Any changes you make will affect all 10 guides that include this step.
Translating step 6
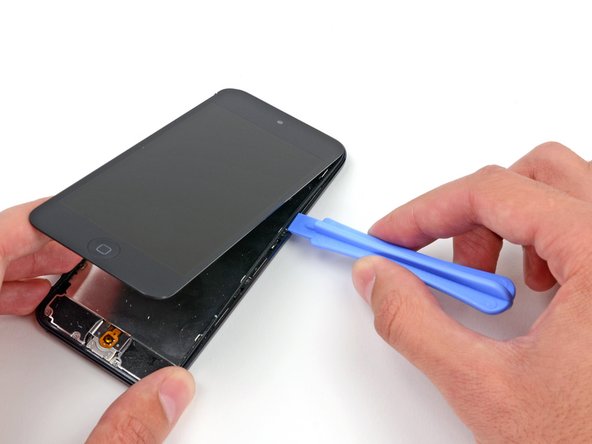
Step 6


-
Insert the plastic opening tool between the frame and the rear case behind the first clip.
-
Rock the tool sideways, to spread the gap behind the clip and separate it from the rear case.
-
This may not free the clip initially, but repeating the procedure for each clip will begin to loosen the piece.
Your contributions are licensed under the open source Creative Commons license.