Translating step 3
Step 3

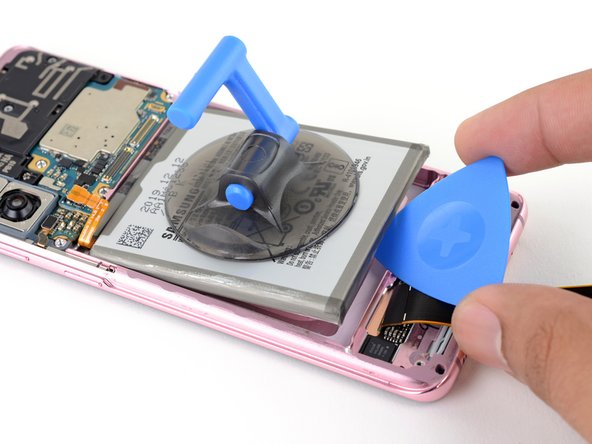


Pry up the battery
-
Insert an opening pick underneath the bottom edge of the battery and twist to loosen the battery adhesive.
| [title] Pry up the battery | |
| - | [* icon_caution] |
| + | [* icon_caution] Do not proceed with this step until the battery is lifted enough to easily insert an opening pick underneath the battery. If the battery is still firmly glued into place, you risk piercing the battery with your pick and causing a dangerous thermal event. |
| [* icon_caution] Once the battery lifts, don't apply isopropyl alcohol, or it may seep into the fingerprint sensor and damage your screen. | |
| [* black] Insert an opening pick underneath the bottom edge of the battery and twist to loosen the battery adhesive. |
Your contributions are licensed under the open source Creative Commons license.