
Jura Impressa opening procedure

Notice: You are now editing a prerequisite to the guide you were just viewing. Any changes you make will affect all 9 guides that include this step.

German
English

Translating step 2

Step 2
Jura Impressa öffnen: step 0, image 1 of 3 Jura Impressa öffnen: step 0, image 2 of 3 Jura Impressa öffnen: step 0, image 3 of 3
  • Auf der Rückseite befindet sich eine Hürde: vier Ovalkopfschrauben, sie sehen aus wie Nieten. Mit speziellem Werkzeug lassen sie sich herausschrauben. Bei iFixit ist das Oval Drive Bit Bestandteil bei Werkzeugsammlungen, du erhältst es auch bei Jurahändlern oder findest es im Internet. Der Hersteller will uns so den Zugang erschweren!

  • Drehe die Ovalkopfschrauben mit geeignetem Werkzeug heraus. Wer keines hat muss vorsichtig eine Zange verwenden. Es ist eine gute Idee, sie später durch "normale" Schrauben zu ersetzen.

  • Du kannst dir ein solches Werkzeug auch leicht selbst bauen.

  • Unter den beiden Deckeln sind zwei Schrauben, meistens TX 15. Drehe sie heraus. Hebe die Oberseite hoch und entferne sie . Sie klemmt manchmal etwas.

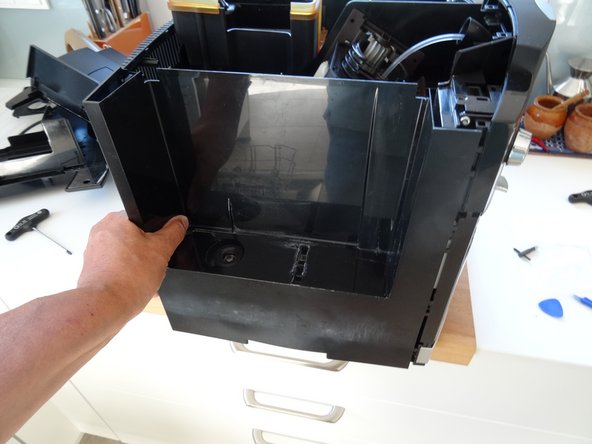
  • Schiebe die beiden Seitenteile etwa 1 cm nach hinten, das klemmt häufig. Falls nötig, setze ein Plastikwerkzeug in den Spalt zwischen Vorderseite und den Seitenteilen ein und vergrößere vorsichtig den Spalt. Dann lassen sie sich leicht abnehmen.

On the rear side is an obstacle: four "oval head screws" looking like rivets. You can remove them using a special oval drive bit. They are sold at iFixit with the tool kits as well as some Jura suppliers or somewhere in the internet. Jura wants to keep us out of our own machines!

Using an oval head bit you can screw them out. If you haven´t got one you can carefully use pliers. It is a good idea to later change the screws for normal ones.

You can even create your own specialty tool

Beneath both top side covers are two Torx T15 screws. Remove those. Now lift off the whole top cover. Sometimes it jams and you have to use a bit of force.

The side covers must be pushed backwards by about 1 cm. Sometimes this is a little bit difficult to move. If necessary, wedge a plastic opening tool into the gap between the side covers and the front panel. The rear cover can be easily removed.

Your contributions are licensed under the open source Creative Commons license.