Notice: You are editing a prerequisite guide. Any changes you make will affect the guide that includes this step.
Translating step 1
Step 1

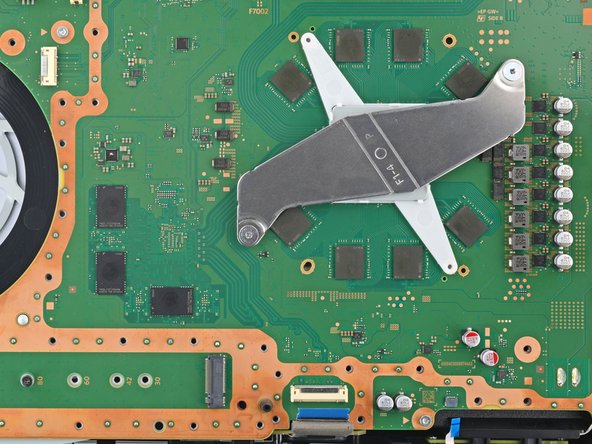


Remove the main board screws
-
Use a Phillips screwdriver to remove the 11 mm‑long SSD screw.
-
Use a Phillips screwdriver to remove the two 11.8 mm‑long APU tension bracket screws.
-
Use a TR8 Torx security screwdriver to remove the two remaining 7.3 mm‑long main board screws.
| [title] Remove the main board screws | |
| [* red] Use a Phillips screwdriver to remove the 11 mm‑long SSD screw. | |
| [* icon_note] Be careful not to lose the small spacer under the screw. | |
| - | [* yellow] Use a Phillips screwdriver to remove the two 11.8 mm‑long APU bracket screws. |
| + | [* yellow] Use a Phillips screwdriver to remove the two 11.8 mm‑long APU tension bracket screws. |
| + | [* icon_note] ***Don't remove or install one screw at a time***, or you may damage the APU. During disassembly and reassembly, alternate between the two screws a 1/2 turn at a time to maintain even pressure on the bracket. |
| [* light_blue] Use a TR8 Torx security screwdriver to remove the two remaining 7.3 mm‑long main board screws. |
Your contributions are licensed under the open source Creative Commons license.