Translating step 12
Step 12


-
The hinges exposed. To remove the cover, use either a small flathead screwdriver, or mroe ideally, a hard plastic spudger. Gentle pressure, and it should come right off.
-
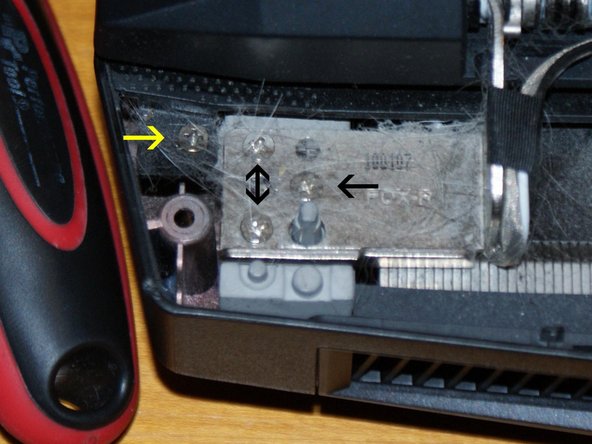
Second image, close-up of the right hinge assembly. The black arrows point to the screw that secure the hinge to the bottom enclosure. The yellow arrow indicates a screw that hold the top cover on. Remove all four.
-
Third image. Same deal here for the left-hand hinge assembly. Three hinge screws and one top cover screw. The six hinge screws are longer than the rest used in the laptop, so they should be easy to keep separate. Remove these four as well.
Your contributions are licensed under the open source Creative Commons license.