Notice: You are editing a prerequisite guide. Any changes you make will affect all 22 guides that include this step.
Translating step 8
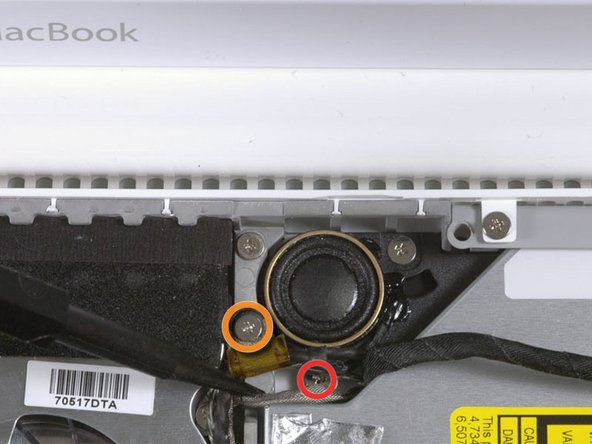
Step 8
-
Remove the 2 mm Phillips #00 screw securing the rear corner of the optical drive.
-
The silver-jacketed Bluetooth cable may be covering the screw. If so, carefully push it aside. You may need to remove the screw holding the ground shield lugs for the two nearby cables before you can move the Bluetooth cable aside sufficiently. This screw is 7mm in earlier models, and may be 4.2mm in Santa Rosa/Penryn and 2009 models.
Your contributions are licensed under the open source Creative Commons license.