
Smontaggio Fairphone 2

English
Italian

Translating step 7

Step 7
Fairphone 2 Teardown: step 0, image 1 of 2 Fairphone 2 Teardown: step 0, image 2 of 2
  • And with that, we're done with the first level of user repairs. The Fairphone is designed to be easily separated into modular components, but what if you want to fix an individual module?

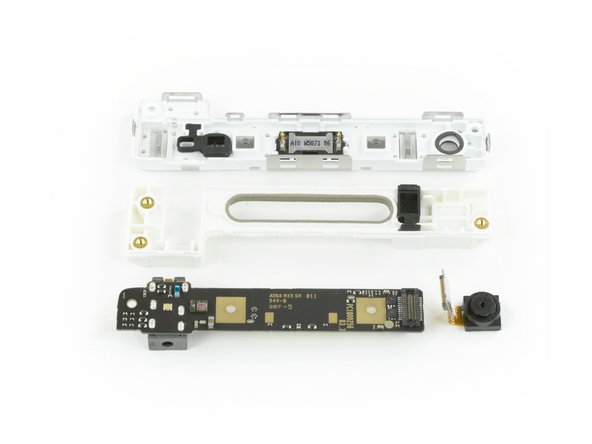
  • The modules are held together with Torx T5 screws—presumably to deter the casual user from delving too deep—but are still easy to open up.

  • We start with the top module: the front-facing camera pops right off thanks to a simple flex cable connector.

  • Spring contacts power the earpiece speaker, making for easy replacement of that as well.

  • The headphone jack, the final component, is soldered to the board. Fortunately, nothing major remains, so a replacement board should be pretty cheap.

E con questo, abbiamo finito col primo livello di riparazione dell'utente. Il Fairphone è progettato per essere facilmente separato in componenti modulari, ma che cosa succede se si deve riparare un singolo modulo?

I moduli sono tenuti insieme da viti Torx T5, presumibilmente per scoraggiare l'utente casuale dall'andare troppo a fondo, ma sono comunque facili da aprire.

Iniziamo con il modulo superiore: la fotocamera anteriore si estrae facilmente grazie a un semplice connettore con cavo flessibile.

L'altoparlante da orecchio è alimentato da contatti a molla, quindi anche questo elemento è di facile sostituzione.

Il jack cuffie, l'ultimo componente rimasto, è saldato alla scheda. Fortunatamente non rimane nient'altro di importante, quindi una scheda sostitutiva dovrebbe costare davvero poco.

Your contributions are licensed under the open source Creative Commons license.