Introduction
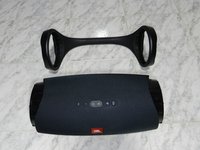
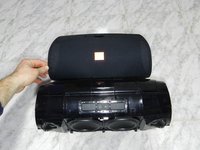
In this guide, I will show you step by step how to teardown the JBL Boombox speaker (1st generation) to get to its main board.
What you need
-
-
Tip: It can be easier if you rest the speaker against the floor and make it turn.
-
Turn the side wavy rings counterwise.
-
-
-
Once you remove the ring, we can access the screws that are underneath that hold the handle to the main body.
-
-
-
Cautiously, pull the plastic rings out towards away from the speaker body, until it releases from the side.
-
Once they are loose, they can be pulled upwards and released from the body.
-
-
-
-
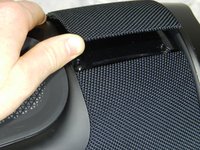
On the bottom, introduce a slim opening pick (screwdriver, knife, etc.) in the line of union that exist between the two halves of the cloth cover.
-
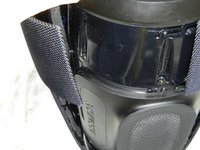
Lift the cloth cover from the rear half to reveal the screws (2 on each side).
-
Remove these screws.
-
-
-
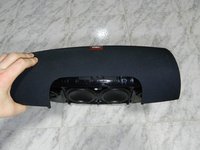
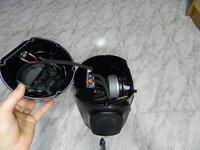
Once you get the screw that holds the cloth cover, we open it as we open a book.
-
Tip: It looks like it is going to break but it is not like that, it works as a spring and it can be opened without problem.
-
-
-
Loosen the screws that hold the sides with the tweeter speakers.
-
-
-
Carefully lift the side pieces that contain the tweeter speakers.
-
Unplug the connectors from the board.
-
Tip: The connectors may be sealed with glue. Pull carefully. I recommend to break the glue first before removing the connector.
-
Note: I recommend to separate the tweeters when you remove them, as they have cables with different lengths.
-
-
-
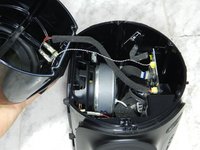
Once you remove the tweeters, we can remove the sub-woofers. To do this we loosen the 8 screws that holds each sub-woofer.
-
Note: I recommend to separate them, as they have cables with different lengths.
-
-
-
After the previous steps, we have access to the main board.
-
I do not have more pictures, but once the board is out, you can also access the battery screws and the buttons, top board, and the rear plugs.
-
Note: The Bluetooth antenna is adhered to the case with double-sided tape. I recommend to separate it first before extracting the board.
-
PS: Sorry for not having pictures of the process.
-


To reassemble your device, follow this guide in reverse order.
To reassemble your device, follow this guide in reverse order.
Cancel: I did not complete this guide.
2 other people completed this guide.
Special thanks to these translators:
100%


These translators are helping us fix the world! Want to contribute?
Start translating ›