
You're seeing solutions for Asus Laptop. Select your model to find parts for your device.
The Basics
It’s easy to forget some troubleshooting basics amidst frustration. Before undertaking any of the more time-consuming solutions below, these are a few fundamentals to get you started.
- Turn up your brightness settings. Some Asus laptops have designated keys (or key combinations) to adjust the brightness. Look for a key with a sun icon on it (☼) and try pressing it. Typically, it is either the F4 or F5 Function Key. If pressing it alone doesn't work, use it in combination with Fn or Ctrl.
- Perform a hard reset. Slowly hold down the power button for 15 seconds. After a few seconds, press the power button to boot up your laptop.
- Connect or reconnect your charger. Try different combinations if you can access multiple charging ports, outlets, and cables. This helps rule out a faulty outlet, cable, or port, preventing a dead battery from receiving a charge.
- Disconnect any peripherals. Docks or multi-port hubs are notoriously problematic, especially if many items are connected.
Causes
Sometimes, the software controlling what's supposed to be on screen doesn't work correctly. Any buggy or corrupt application could cause unexpected behavior.
- If you think your laptop is turned on, press and hold the power button for 15 seconds to turn it off.
- Press and hold F2, and press the power again to turn your laptop back on. This will bring up Advanced Boot Options.
- If nothing shows up onscreen for a minute, press F4 to attempt to boot your computer into safe mode.
- If you get an image in safe mode, third-party applications or graphics drivers are most likely culprits of your black screen issues.
- Delete any applications you recently installed or updated. Restart your computer afterward to see if that fixed the problem.
Even if the applications are working correctly to show you a proper picture, if Windows's software to talk to the graphics processor isn't working, that won't do much good.
- Return to safe mode using the above steps and try to update your graphics drivers.
- This process varies a bit between hardware configurations and software versions, so try using the linked guide as a starting point. This guide only pulls from Microsoft-approved driver repositories and will only work if your Safe Mode instance has internet connectivity (it may not).
- The graphics card manufacturer will also have the drivers on their website. Check AMD, Intel, and NVIDIA for current versions.
- Due to the potential lack of internet in Safe Mode, it is advisable to download the drivers on another device and move them via flash drive to the Asus Laptop.
- If updating isn't resolved, try uninstalling. If you have access to another computer, download DDU and transfer it to your laptop in Safe Mode (which may not have access to the internet). Use it to uninstall the display driver.
- Uninstalling the device and driver in Device Manager might be enough to remove any problematic code, but DDU will do a more thorough job.
- One last solution is to restart the explorer.exe process in the Task Manager. Press Ctrl + Shift + Esc to open Task Manager, then click the Details tab at the top of the window that pops up. Select explorer.exe from the list and click the End task button in the bottom right corner.
If you can't get an image on the screen in safe mode (even after trying the above fixes in the First Steps section), you're likely experiencing a hardware problem.
Capacitors are tiny electrical power storage devices. Draining power from them alleviates prolonged issues. A hard reset is necessary to drain the capacitors fully.
- To do this, remove the laptop's battery and all peripherals, including the charger. If your laptop battery is not easily removable, search our Asus Laptop repair guides for your exact model.
- Once everything is removed, hold the power button down for 60 seconds. This causes the computer to attempt to power on and drain the capacitors, resulting in the built-up static charge.
- Sometimes, you must unplug the BIOS (CMOS) and drain all the laptop's power. Please note that this will reset your computer's BIOS Settings.
If your Asus laptop is not powering on or showing signs of life, the issue may be related to a degraded battery. If your device shows signs of life, like status lights or beep codes, move on to the next solution instead.
- Double-check Battery Level: We've already asked you to check your outlet and charging cable, but double-check them both now to be sure. Leave your computer plugged into your functional charging setup for 15-30 minutes to ensure your laptop doesn't power up from a dead battery.
- Reset the Battery: You can attempt to revive your laptop by resetting the battery. To reset your battery, follow these instructions...
- Discharge the battery completely: Make sure that the battery is completely discharged. Your laptop should not turn on at all.
- Wait: Wait for some time. Ideally, anywhere from 4 to 6 hours.
- Fully recharge the battery: Plug your laptop into a power source and let the battery charge to 100%. Make sure the charging process is not interrupted.
- Replace the Battery: If resetting the battery hasn't worked, and you aren't seeing any signs of life from your device, it's probably not turning on due to a faulty battery. Use the appropriate guide for your specific Laptop to restore life to your device, and be sure to use the correct battery.
Find compatible replacement parts for your Asus Laptop. All parts and fix kits are backed by the iFixit Quality Guarantee.
Your laptop could function, but the display is broken or disconnected. If your device can output an excellent image to an external display, it indicates that the hardware is at fault.
Before you go diving into the depths of your laptop's internals, try a quick video driver reset shortcut:
- Press the Windows Key + Ctrl (Control) + Shift + B. This works in Windows 7 and newer.
If that didn't work, you can determine if your display is faulty by following these steps:
- Inspect the built-in display for physical damage. This includes any cracks (yes, even minor ones) or any liquid damage. Checking from different angles and shining a flashlight onto the screen can help spot hairline cracks as they catch in the light.
- If you can visually see any damage to your screen, the best solution is to replace it. Use the device tree to find Guides for your specific device. If you can't find a guide for your model, try following one for a similar-looking device instead. Many are similar enough.

Find compatible replacement parts for your Asus Laptop. All parts and fix kits are backed by the iFixit Quality Guarantee.
In most laptops, the display cable runs through the hinge, which can cause the cables to pinch in the hinge mechanism in certain circumstances. Repeated wear against the housing edges or a sudden pinch due to a sudden jolt could sever the cable.
- Remove the display assembly and check for signs of exposed copper or tears in the cable, especially when it is close to the hing.
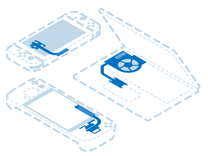
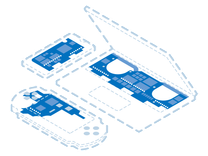
- The webcam cable and Wi-Fi antennas also travel through the hinge. The display cable is often labeled on the board by its connector. Look for ones labeled eDP, JEDP, LVDS, or even simply Display. Use this guide for help recognizing cable connector types. The images below also feature examples of display cables in Asus laptops.
- If the cable is damaged, replace it if you can. Depending on the model, replacing the entire display assembly may be required.

- 15 - 20 minutesEasy
Suppose your laptop can't boot appropriately to Windows or load display drivers due to insufficient storage. In that case, there may not be precise enough information (or any information) for Windows to display an image correctly.
- If your screen is black except for a white cursor on the top left, your device cannot find an operating system to boot to. Although this could mean only your boot sector is affected, and a rebuild will help, in a worst-case scenario, this could be caused by storage failure.
- If the test fails, replace the drive with a compatible one. Depending on the model, you may need to research to get this right. With m.2 drives, note whether it is a PCIe or SATA-based drive; it is usually listed on the sticker.
What if your Asus laptop still displays a black screen, even after following all the troubleshooting steps above? It's safe to say clues point toward a motherboard problem.
- Ensure that your device's CPU is adequately cooled. If you recently reinstalled your heatsink, double-check that it is correctly attached to your CPU and that the CPU has the appropriate amount of thermal paste applied. Proper cooling is essential to prevent overheating and ensure optimal performance. Also, ensure your device's cooling fan is plugged in, working, and spinning freely in its housing.
- Remove any accumulated dust or debris from your device's internal components. Maintaining proper airflow within your device is crucial. Dust or debris can hinder the cooling process, potentially causing issues with the operating system. Regularly cleaning your device's internals helps prevent excessive heat generation and ensures optimal performance.
- Reset your device's BIOS Settings. To reset your motherboard's BIOS settings, you can try uninstalling and then reinstalling the CMOS battery. By doing so, any stored settings or configurations that may have become corrupted will be cleared, and the system will start with default settings. This helps eliminate potential conflicts or misconfigurations that could be causing the issue you're experiencing.
- Perform a thorough visual inspection of the circuit boards for any signs of burns or damaged components. Suppose you observe any visible damage, such as burns or parts that appear to be physically damaged. In that case, the board likely needs to be replaced, especially if it's the board carrying the display cable connector. In our store, you can find motherboards for select ASUS models.
Find compatible replacement parts for your Asus Laptop. All parts and fix kits are backed by the iFixit Quality Guarantee.

Find compatible replacement parts for your Asus Laptop. All parts and fix kits are backed by the iFixit Quality Guarantee.
Find compatible replacement parts for your Asus Laptop. All parts and fix kits are backed by the iFixit Quality Guarantee.
You're seeing solutions for Asus Laptop. Select your model to find parts for your device.

1 common problem
View all